
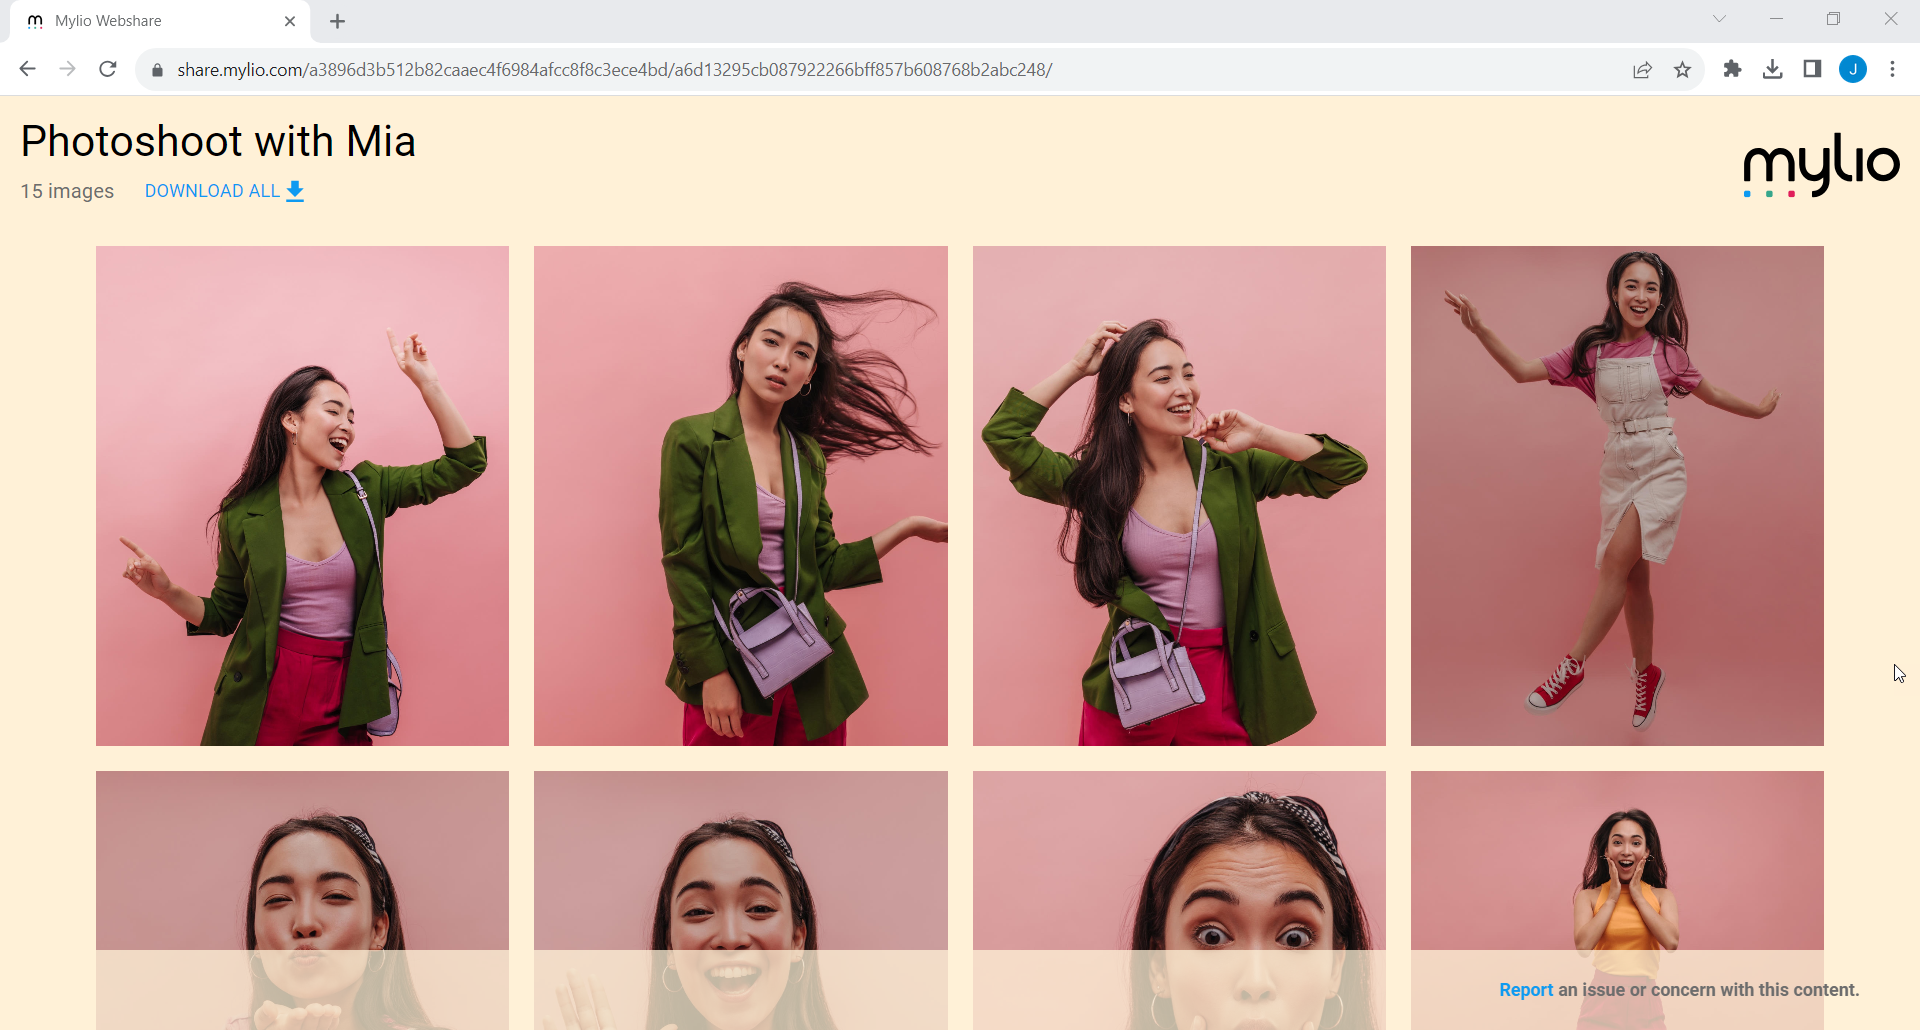
With Shareable Links, Mylio Photos+ subscribers can share a selection of photos as an online gallery, similar to creating a Shared Album. Images are hosted on non-indexed web pages that make it easy to share semi-privately.
Mylio Photos creates a unique link to your gallery that you can share via email, text message, or however you wish. Each shared gallery stands independently and does not have navigation between it and any other gallery you may have shared, nor will it appear in any search engine.
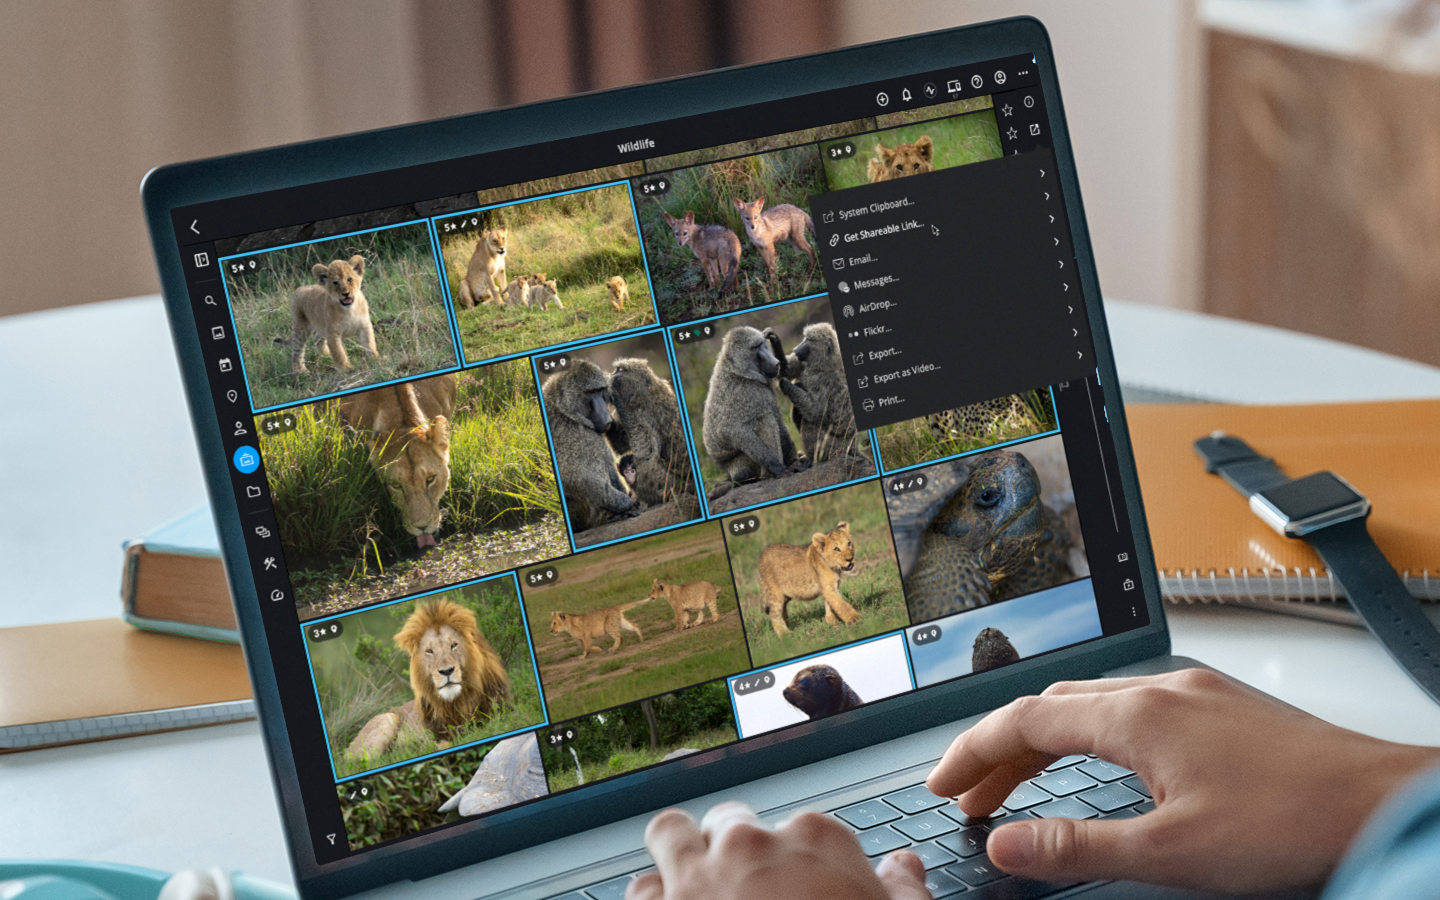
To get started, select a group of photos, click the Share icon ![]() and select Get Shareable Link. You can view and manage your shared galleries from the Albums view under QuickShares.
and select Get Shareable Link. You can view and manage your shared galleries from the Albums view under QuickShares.
- Creating a Shareable Link
-
- Select a group of photos, click the Share icon
![]() in the right sidebar and select Get Shareable Link.
in the right sidebar and select Get Shareable Link.
![]()
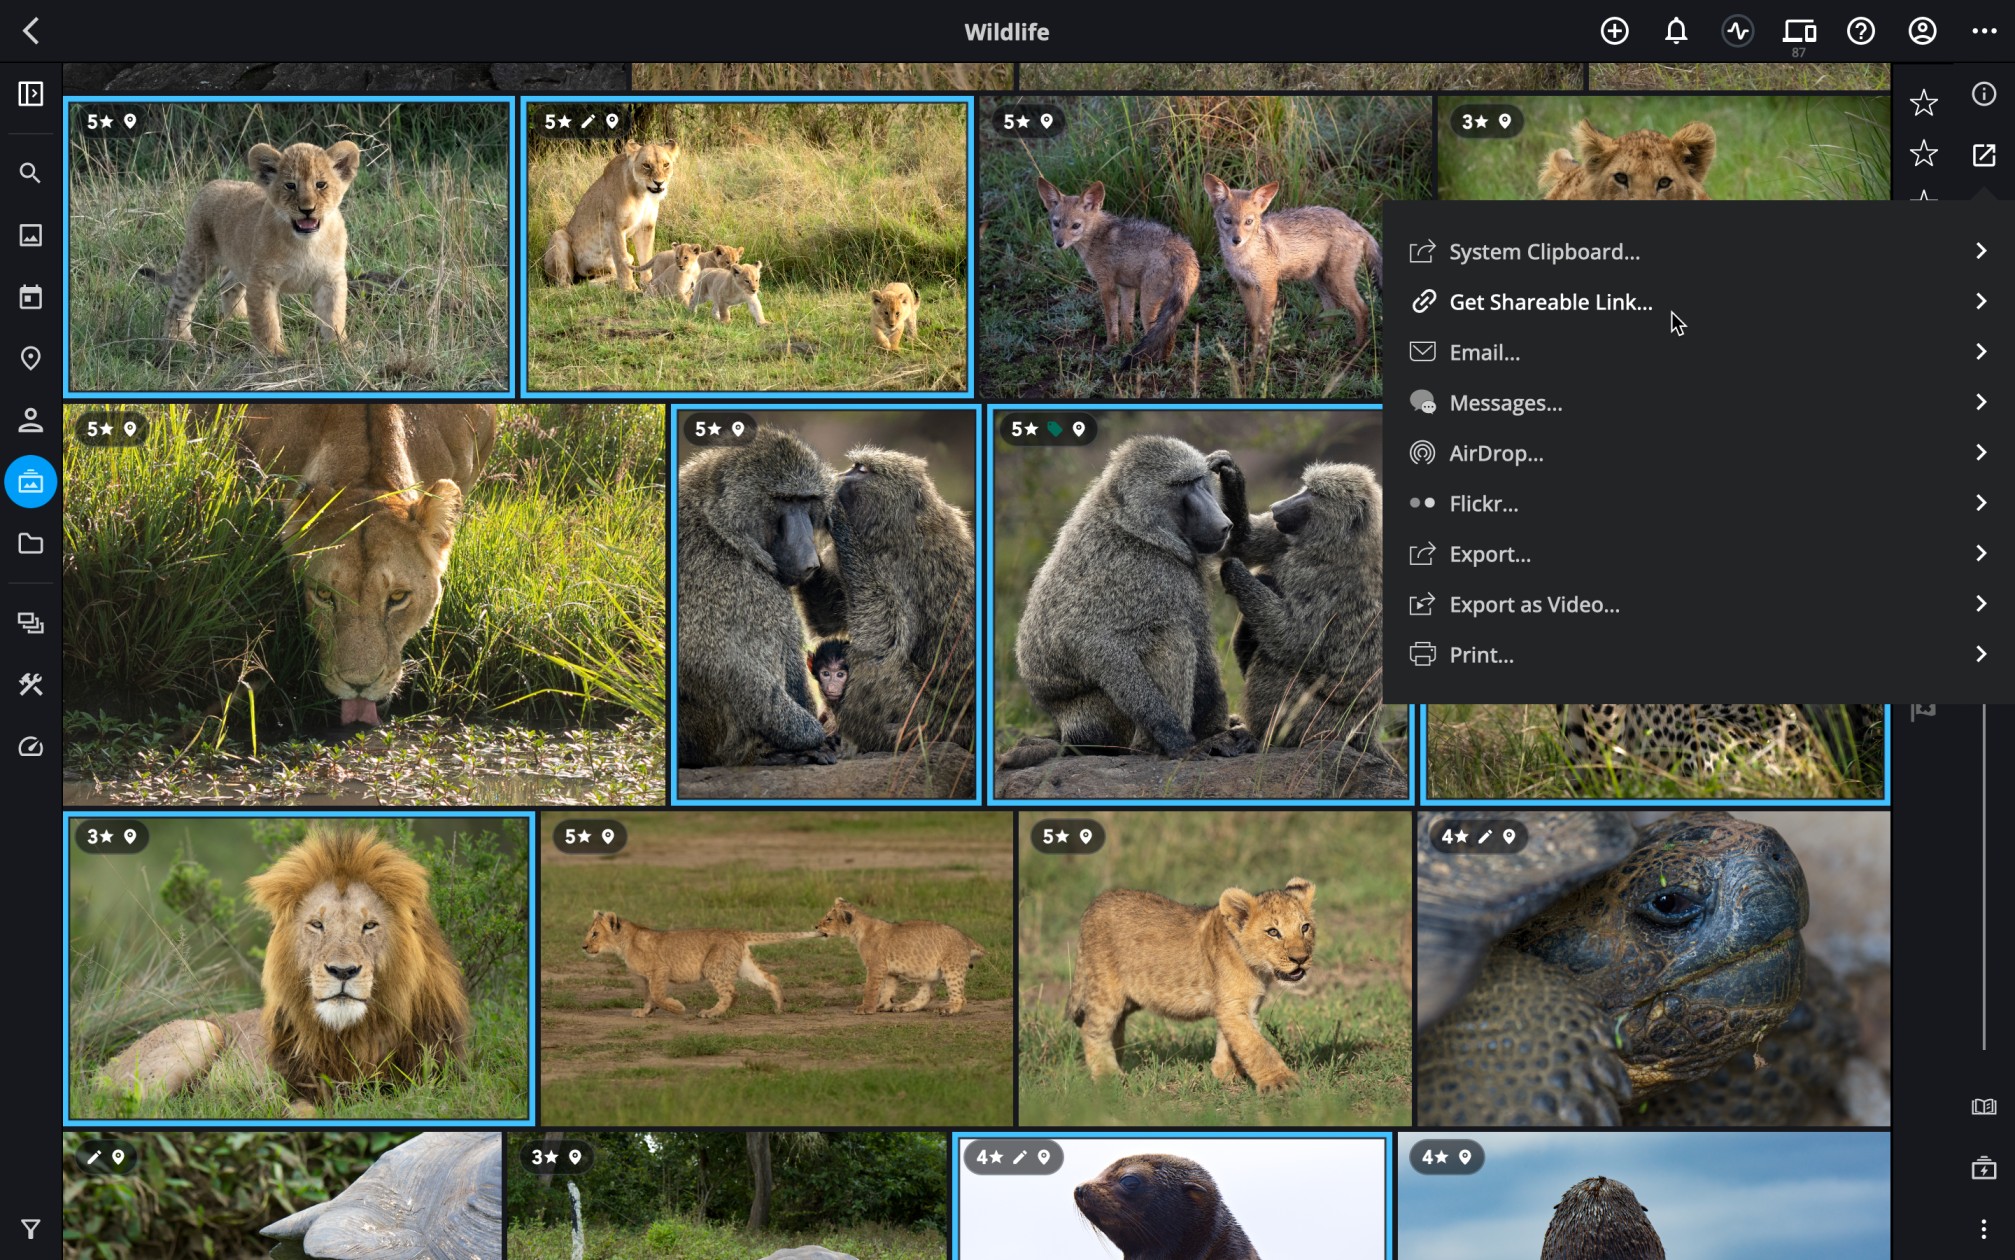
- Enter a name for your gallery, then click the Continue button.
![]()
- Click the links to read the Terms of Service and Right to Publish Content notices. If you agree to the terms, check the box next to each item, then click Continue.
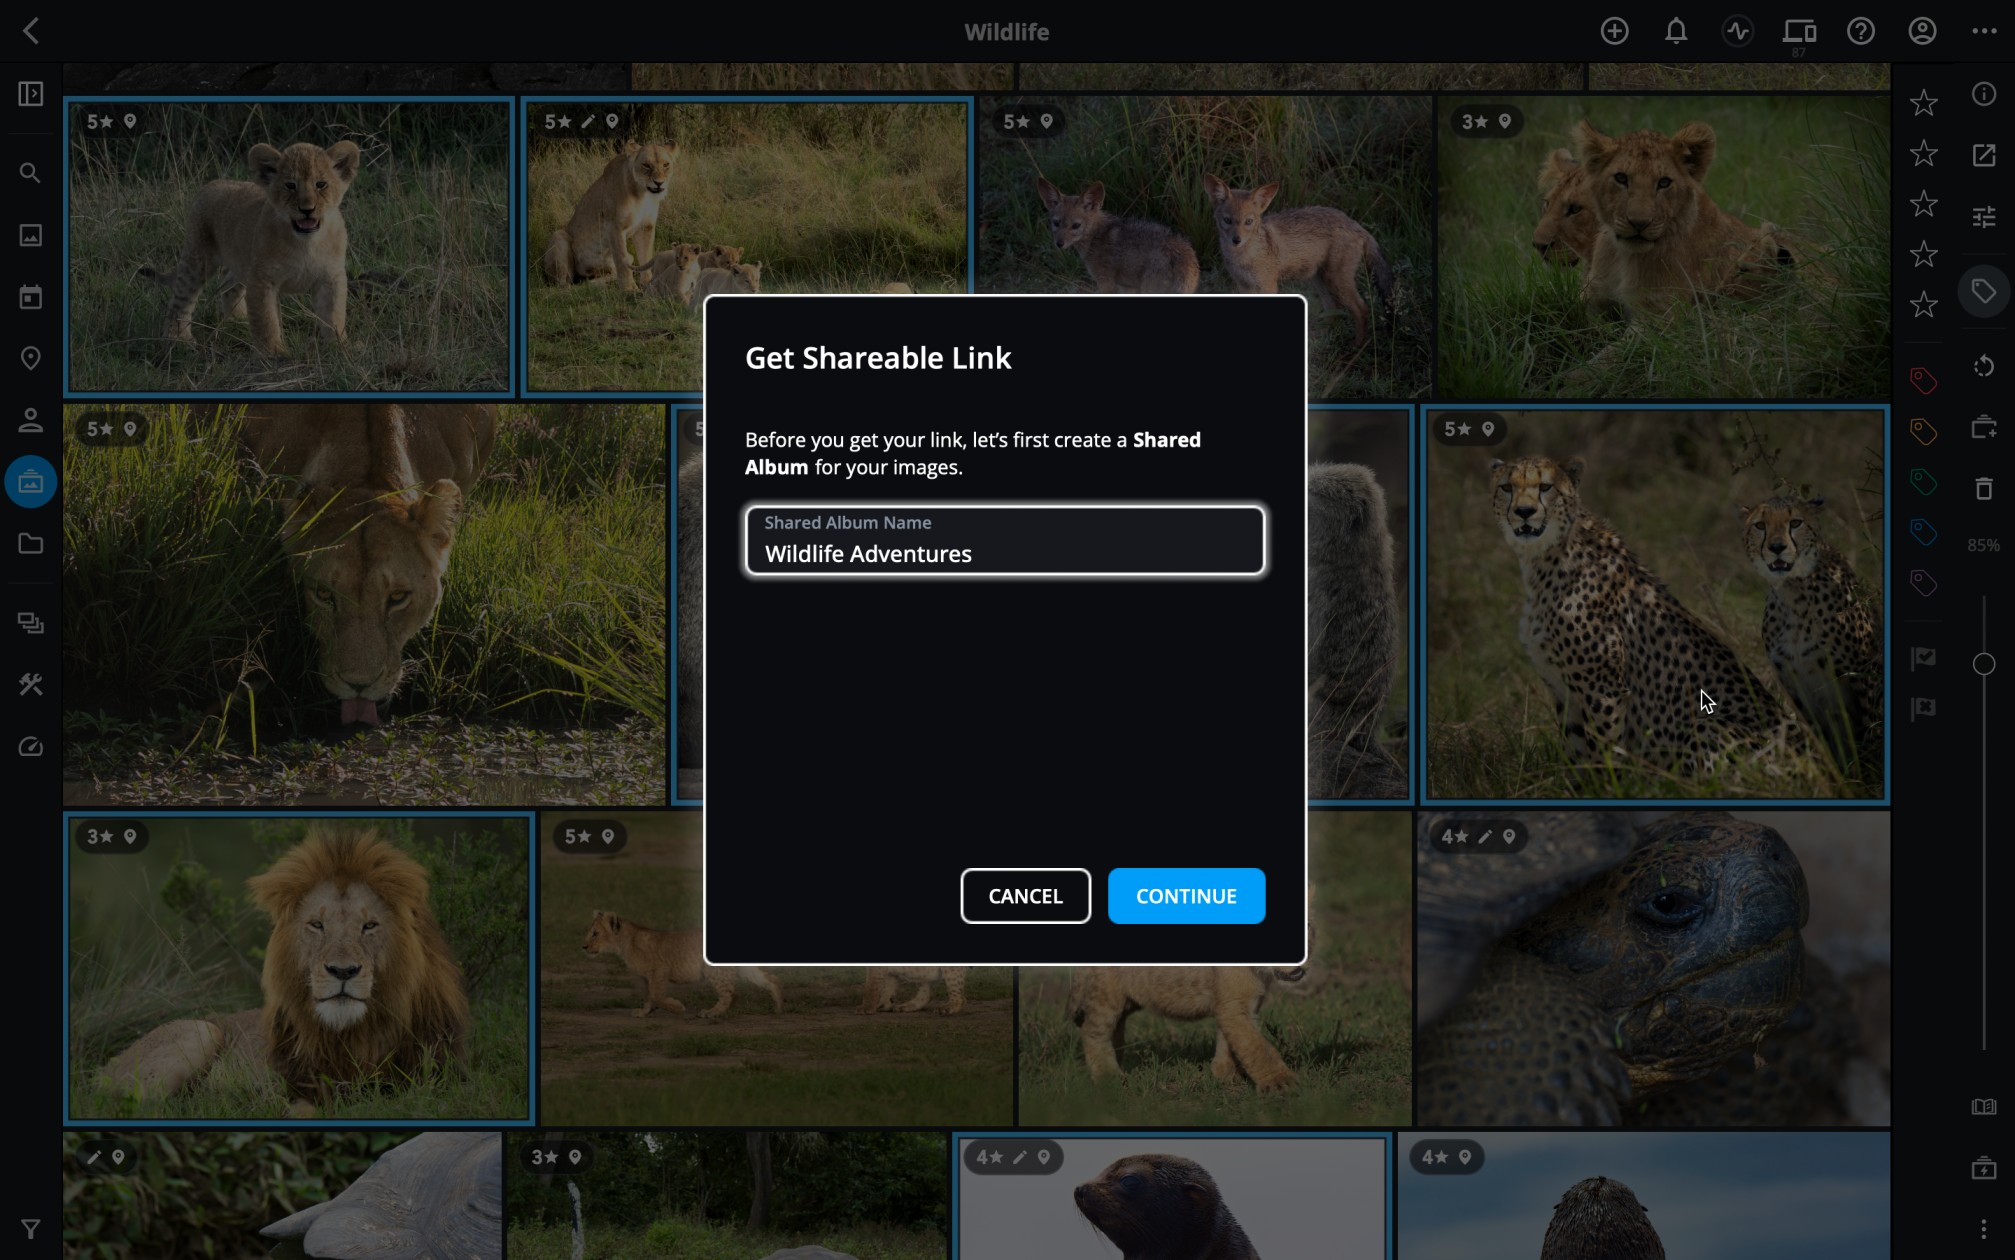
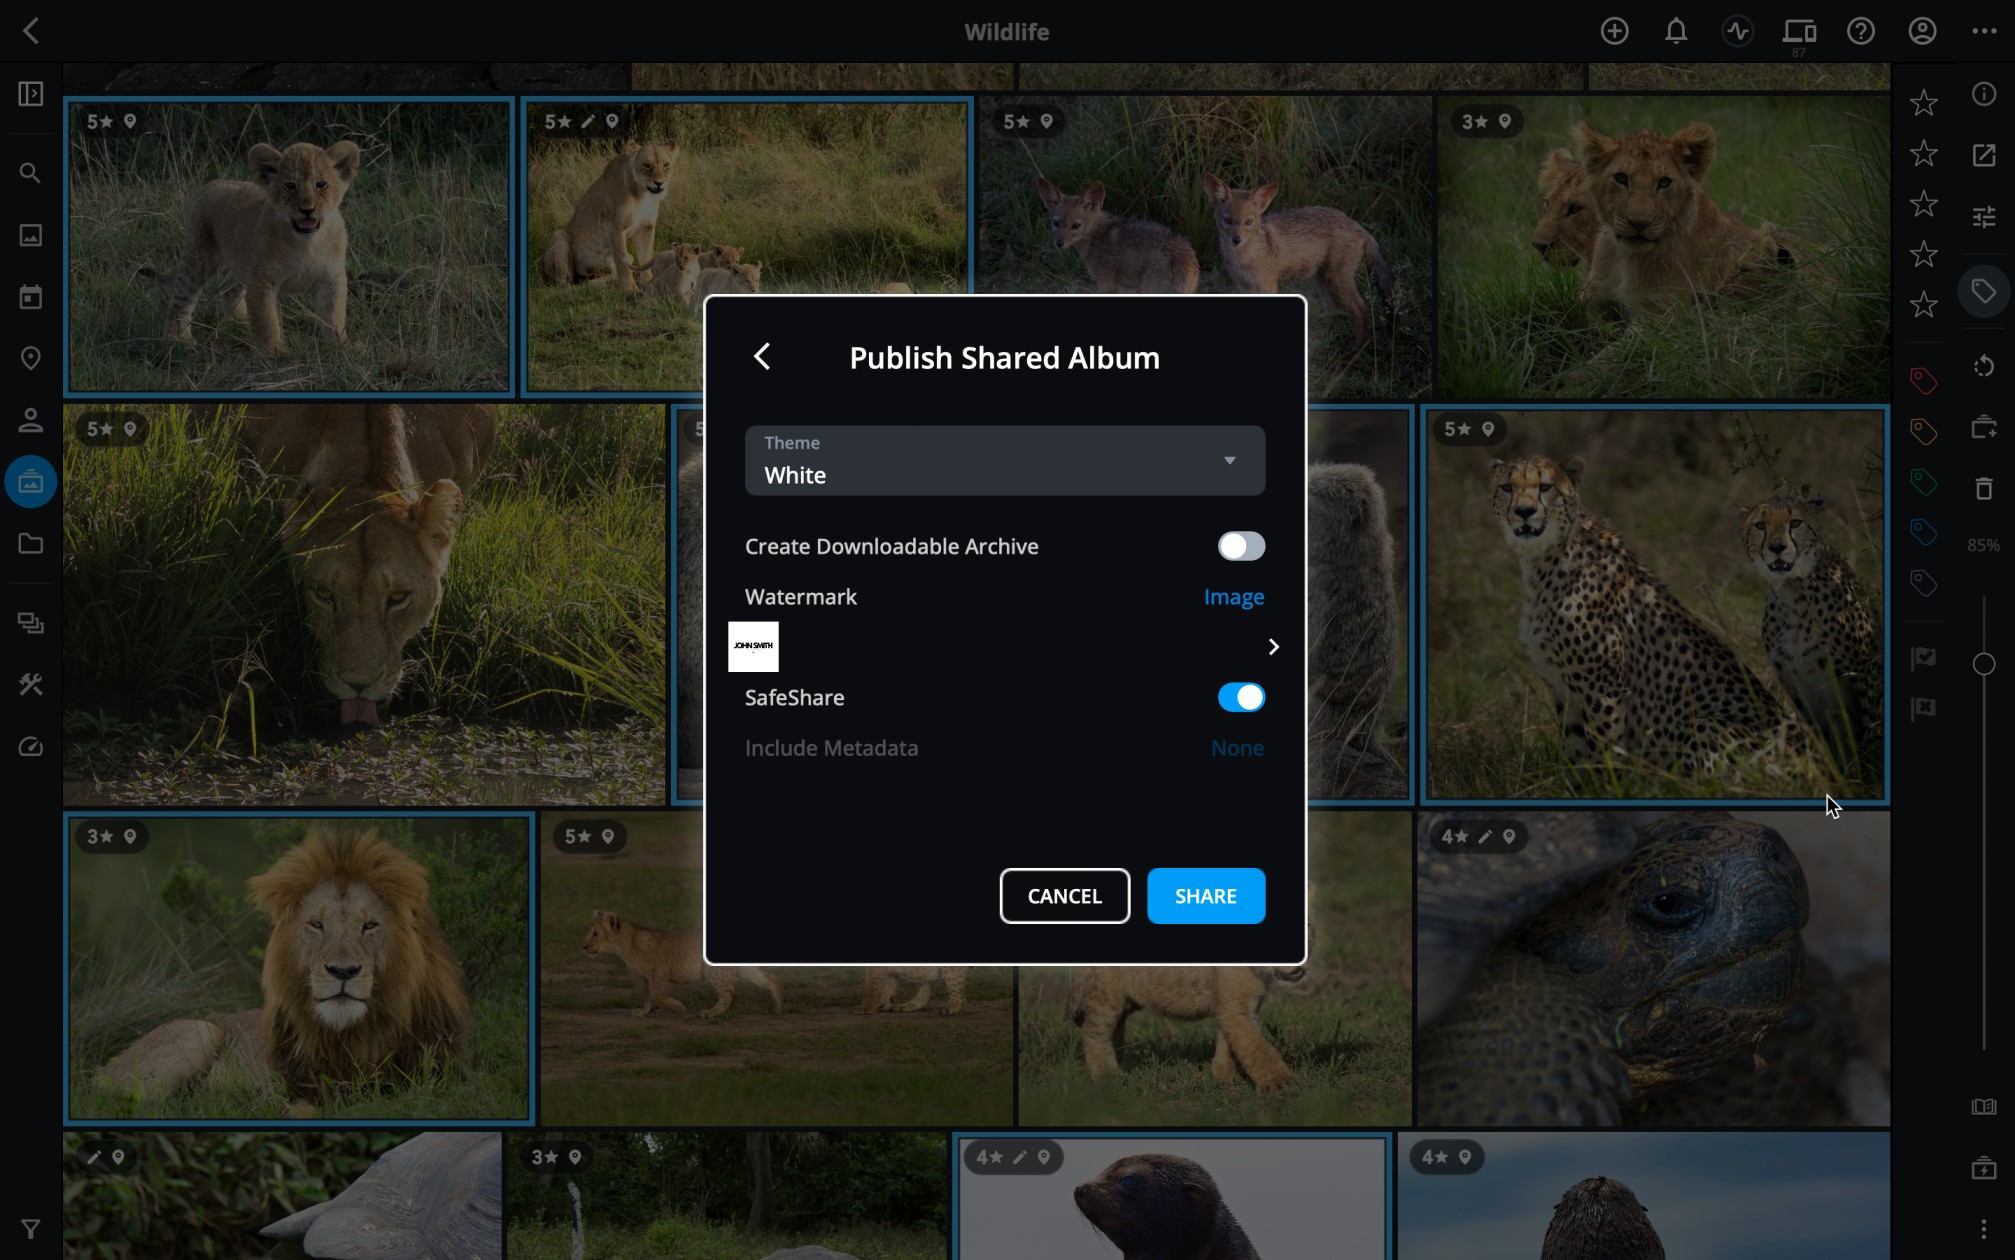
- Select the options you’d like to use in the Publish Shared Album dialog. Scroll down for a description of each option.
![]()
- When you’re ready, click the Share button. Uploading your photos to your online Shared Album may take a few moments. Please do not quit Mylio Photos until the upload is complete.
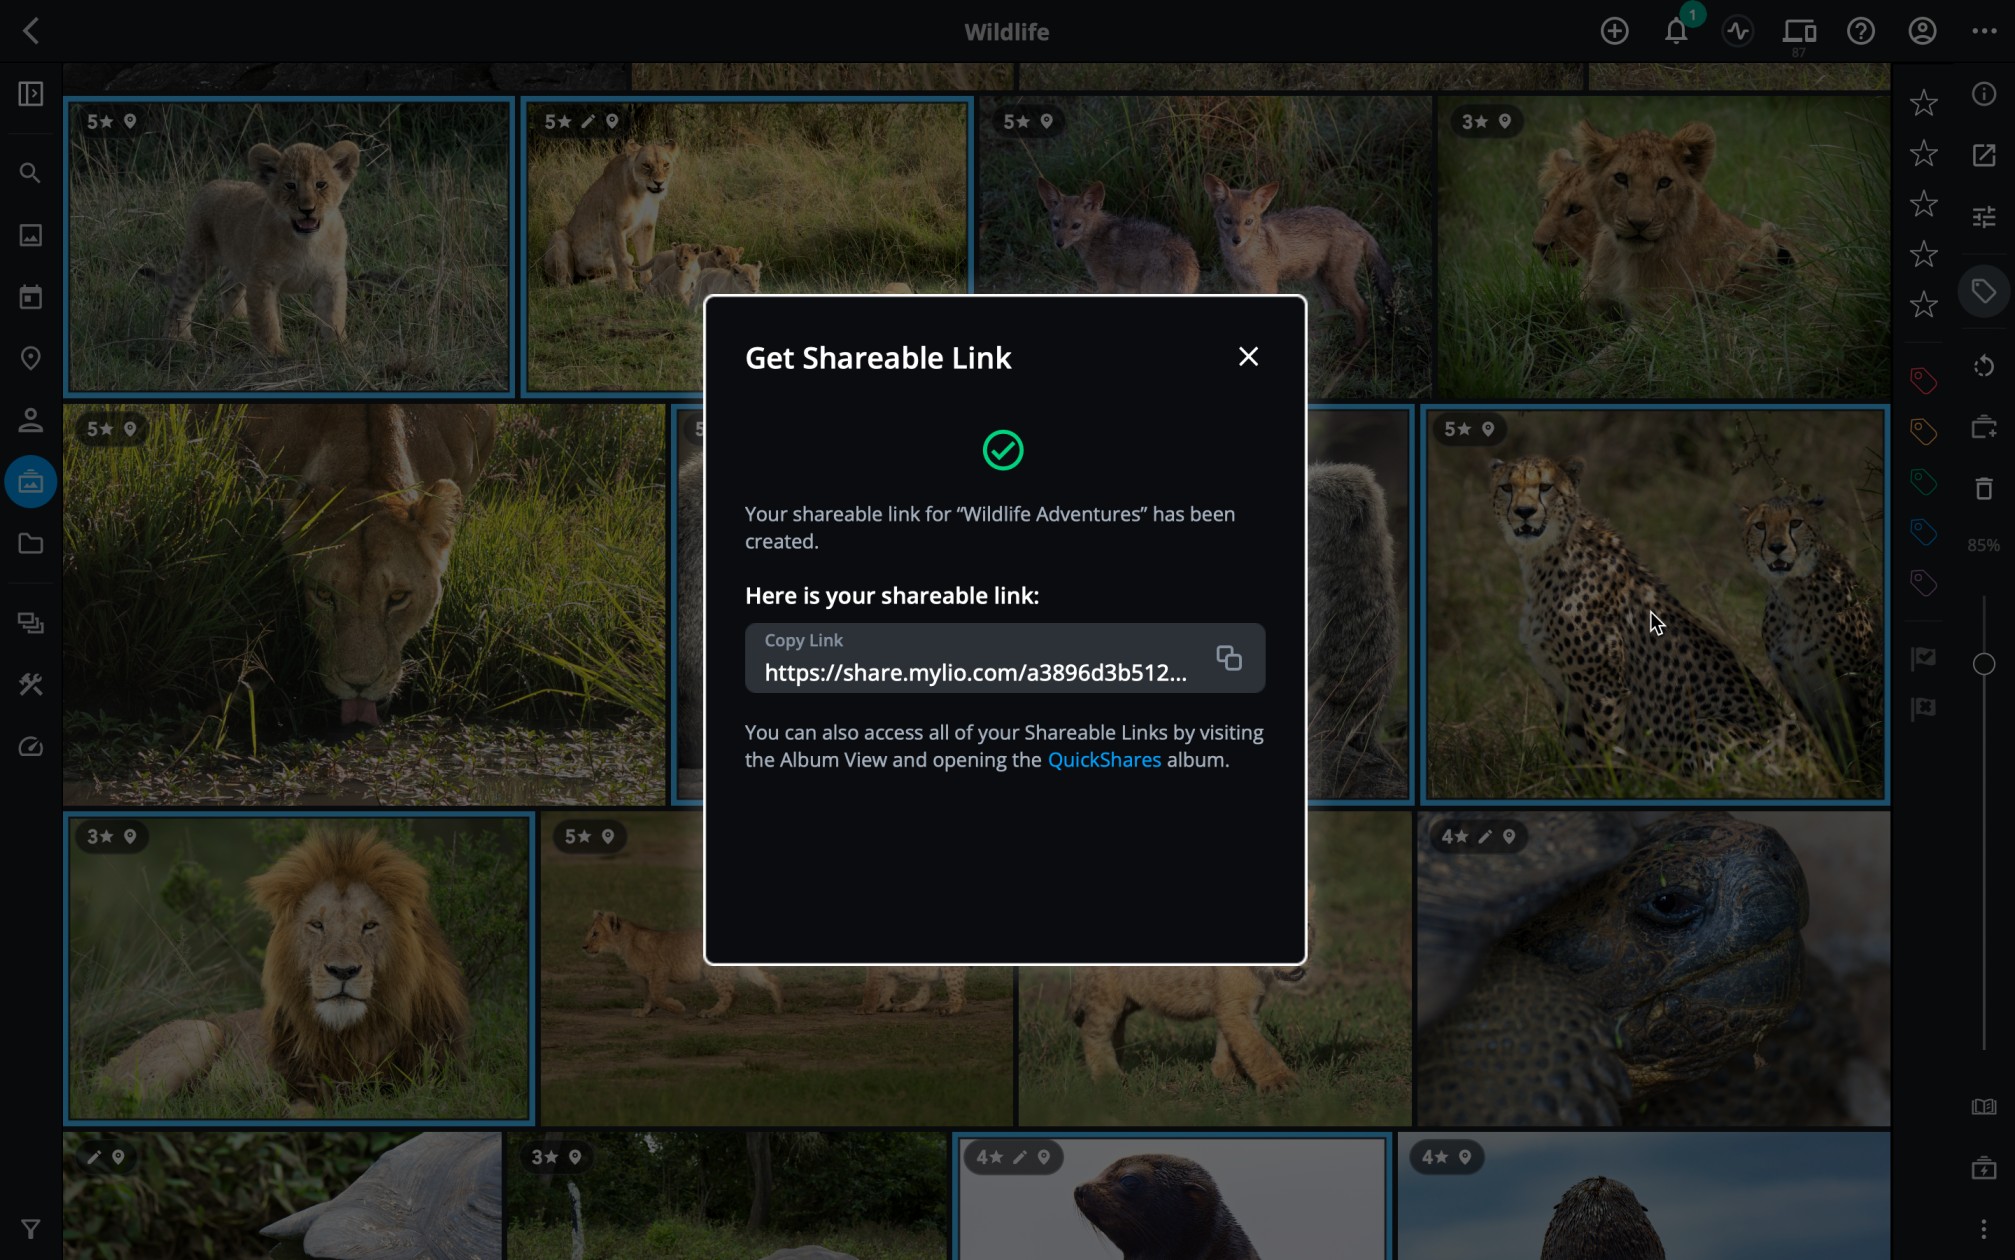
- When the upload is complete, you’ll see a confirmation dialog with your shareable link. Click the link to copy it, then paste it into emails, text messages, or wherever you want to share your link.
![]()
- Select a group of photos, click the Share icon
- Inviting Others to View Your Shareable Link
-
Once your link has been created, it is time to share the link with friends and family.
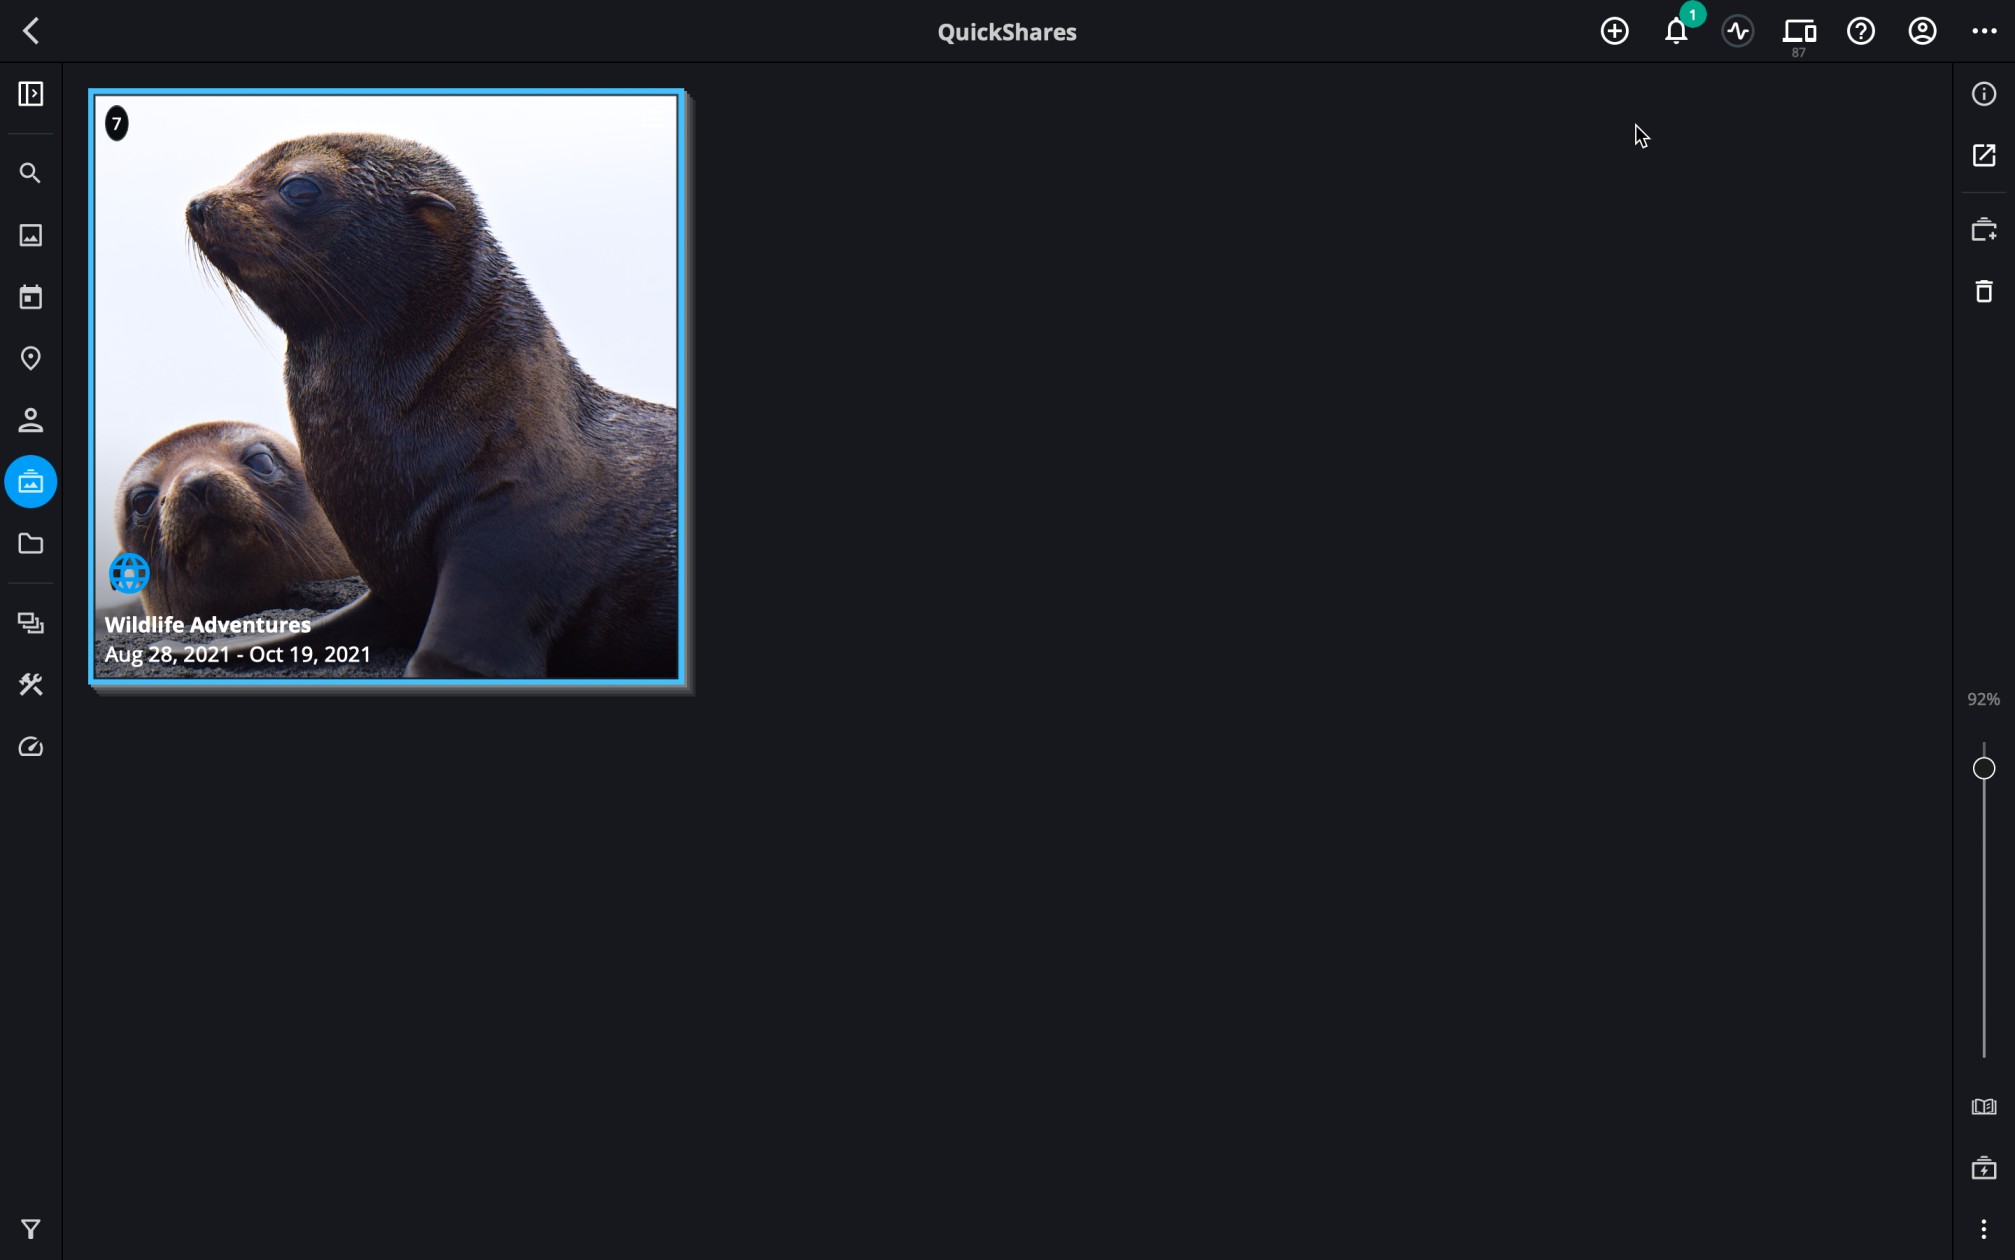
- Click the Albums icon
![]() in the left sidebar, double click on the QuickShares album, and select the gallery you want to manage.
in the left sidebar, double click on the QuickShares album, and select the gallery you want to manage.
![]()
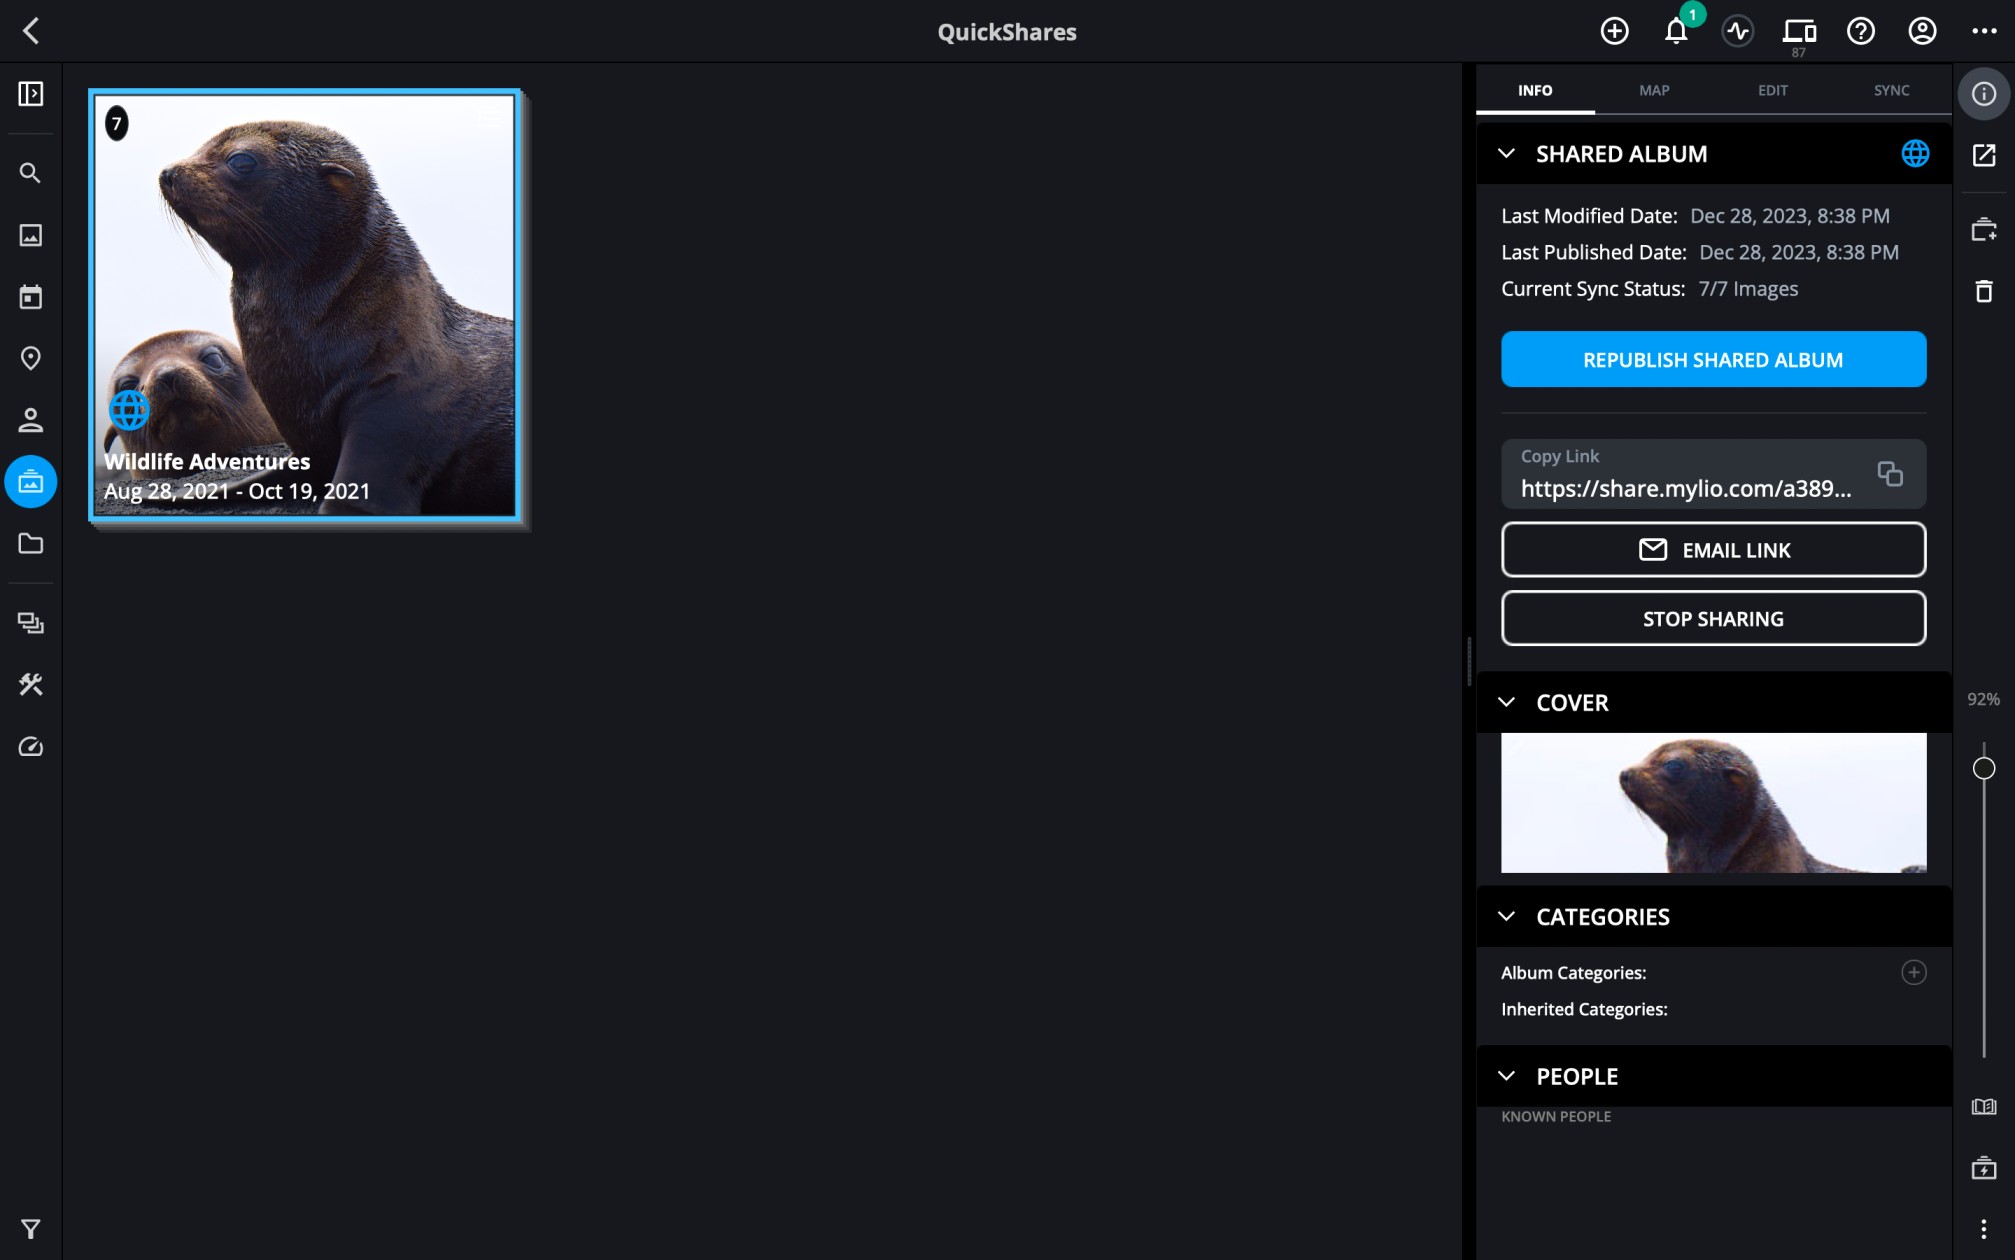
- Click the info icon
![]() at the top of the right sidebar to reveal the right panel and access the Info Panel.
at the top of the right sidebar to reveal the right panel and access the Info Panel.
- On a phone, tap the ellipsis icon
![]() to access the More menu and choose Info
to access the More menu and choose Info
- On a phone, tap the ellipsis icon
- Scroll down to the Shared Album section.
![]()
- To invite others to view your Share Album:
- Click the Email Link button to open your default email client with the link automatically added to the body of the email.
- Click on the link to copy it, paste it into a text message social post, or use any other online messaging method to share the link with your recipients.
- Click the Albums icon
- Remove or Unpublish a Shareable Link
-
Shareable Links can be removed from the web and unpublished at any time.
- Click the Albums icon
![]() in the left sidebar, double click on the QuickShares album, and select the gallery you want to manage.
in the left sidebar, double click on the QuickShares album, and select the gallery you want to manage. - Click the info icon
![]() at the top of the right sidebar to reveal the right panel and access the Info Panel.
at the top of the right sidebar to reveal the right panel and access the Info Panel.
- On a phone, tap the ellipsis icon
![]() to access the More menu and choose Info
to access the More menu and choose Info
- On a phone, tap the ellipsis icon
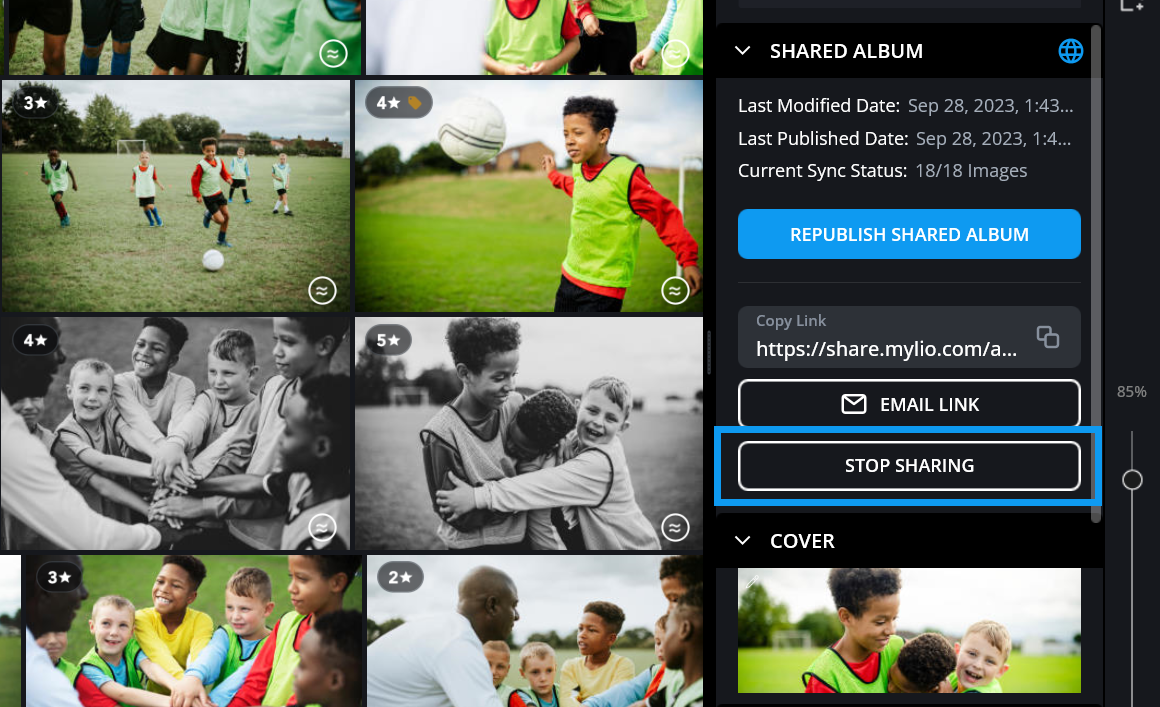
- Scroll down to the Shared Album section.
- Click the Stop Sharing button to unpublish your Shared Album from the internet. This will not remove the Album from your Mylio Photos Library.
![]()
- Click the Albums icon
- Shareable Link Options
-
The Publish Shared Album dialog contains several options to customize the look and functionality of your web gallery.
![]()
Theme
Choose from Dark, Gray, White, or Cream.
Create Downloadable Archive
To make the contents of your gallery available to viewers as a downloadable archive, toggle the switch next to Create Downloadable Archive to the ON position.
Apply Watermark
Adding a watermark helps a layer of protection and personal branding to your photos when sharing online. Mylio Photos offers the option to add a customizable text watermark or apply a graphic watermark to your exported and shared photos. Next to Watermark, click None and choose Text or Image. Click here to learn more about customizing your text or image watermark.
SafeShare
To remove all metadata from your uploaded photos, including camera EXIF, caption, keywords, ratings, copyright, IPTC, face tags, and GPS tags, toggle the switch next to SafeShare to the ON position.
Include Metadata
To manually select what metadata is included, ensure that SafeShare is in the OFF position, then click None next to Include metadata. Toggle the switch next to each metadata field you’d like to include.
![]()

Post your comment on this topic.