
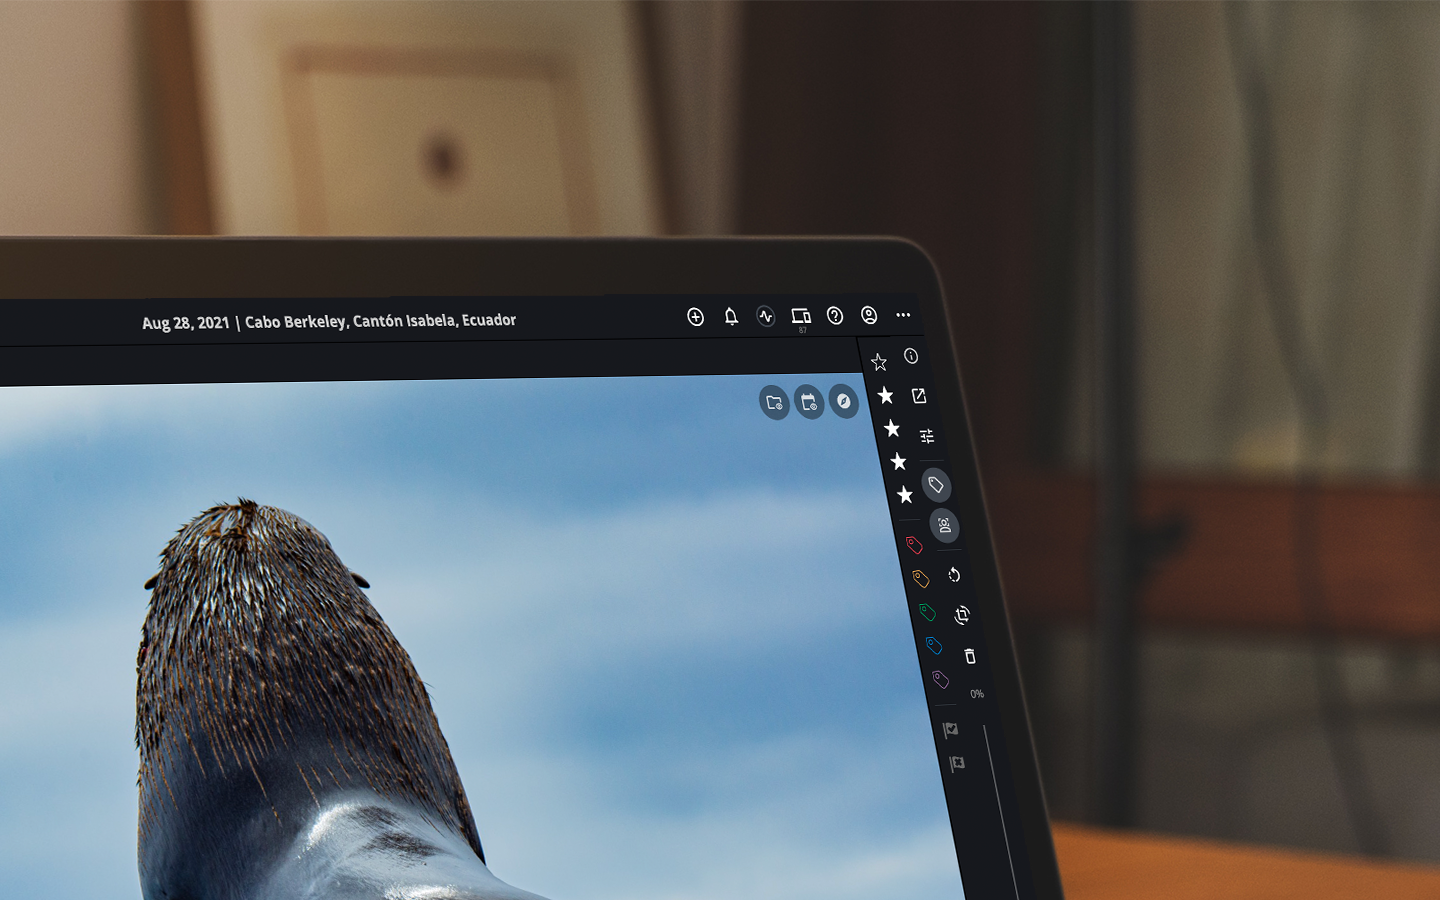
Mylio Photos’ QuickActions enable you to find and connect memories as you browse. When viewing an image in single photo view, you may notice small icons in the upper right corner of the picture. Click on each of these icons to explore related media.
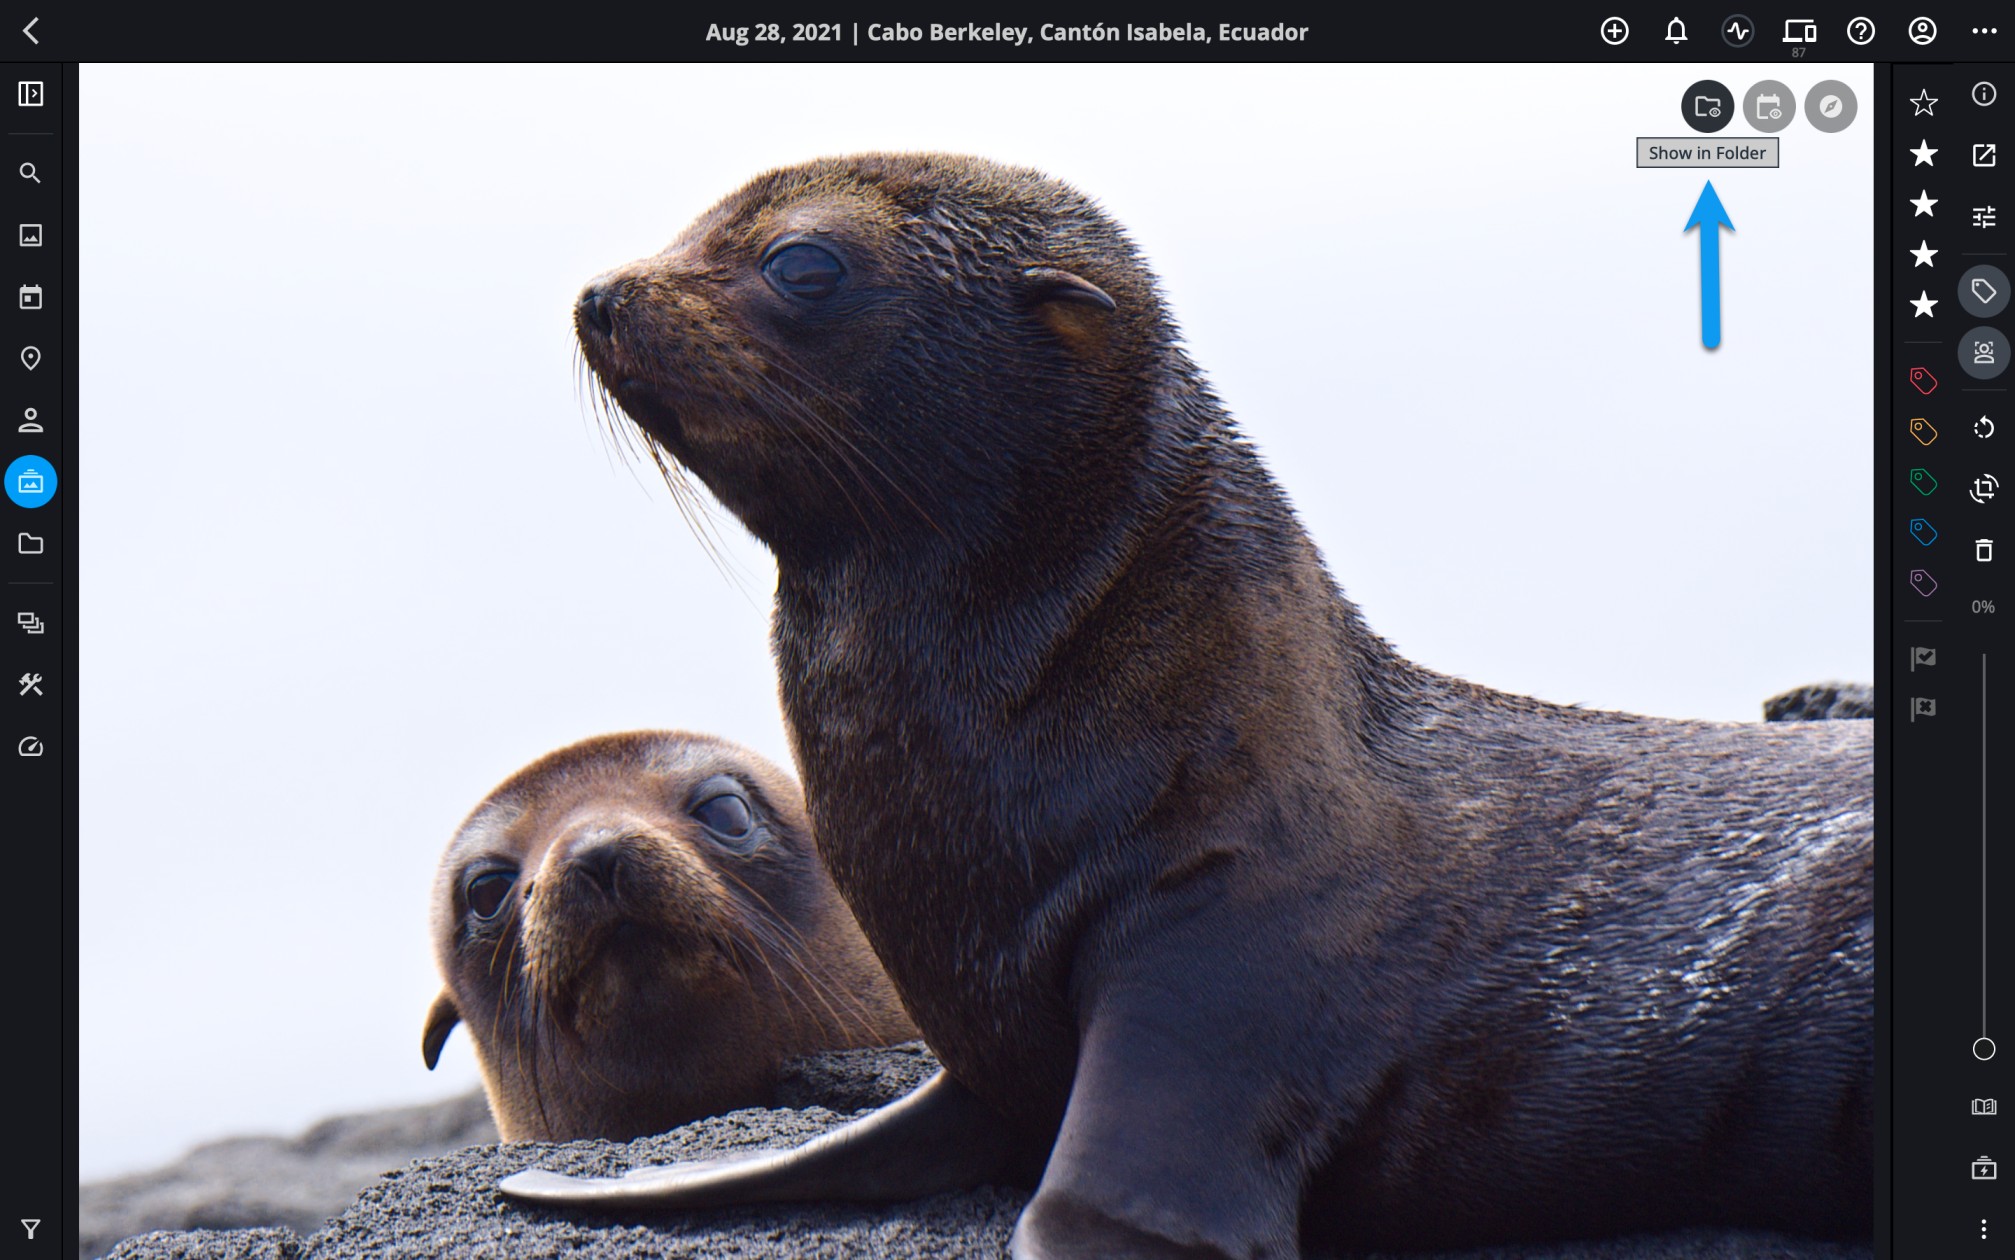
- Show in Folder
![]() – Switch to the Folders view and show media from the same folder as the selected image.
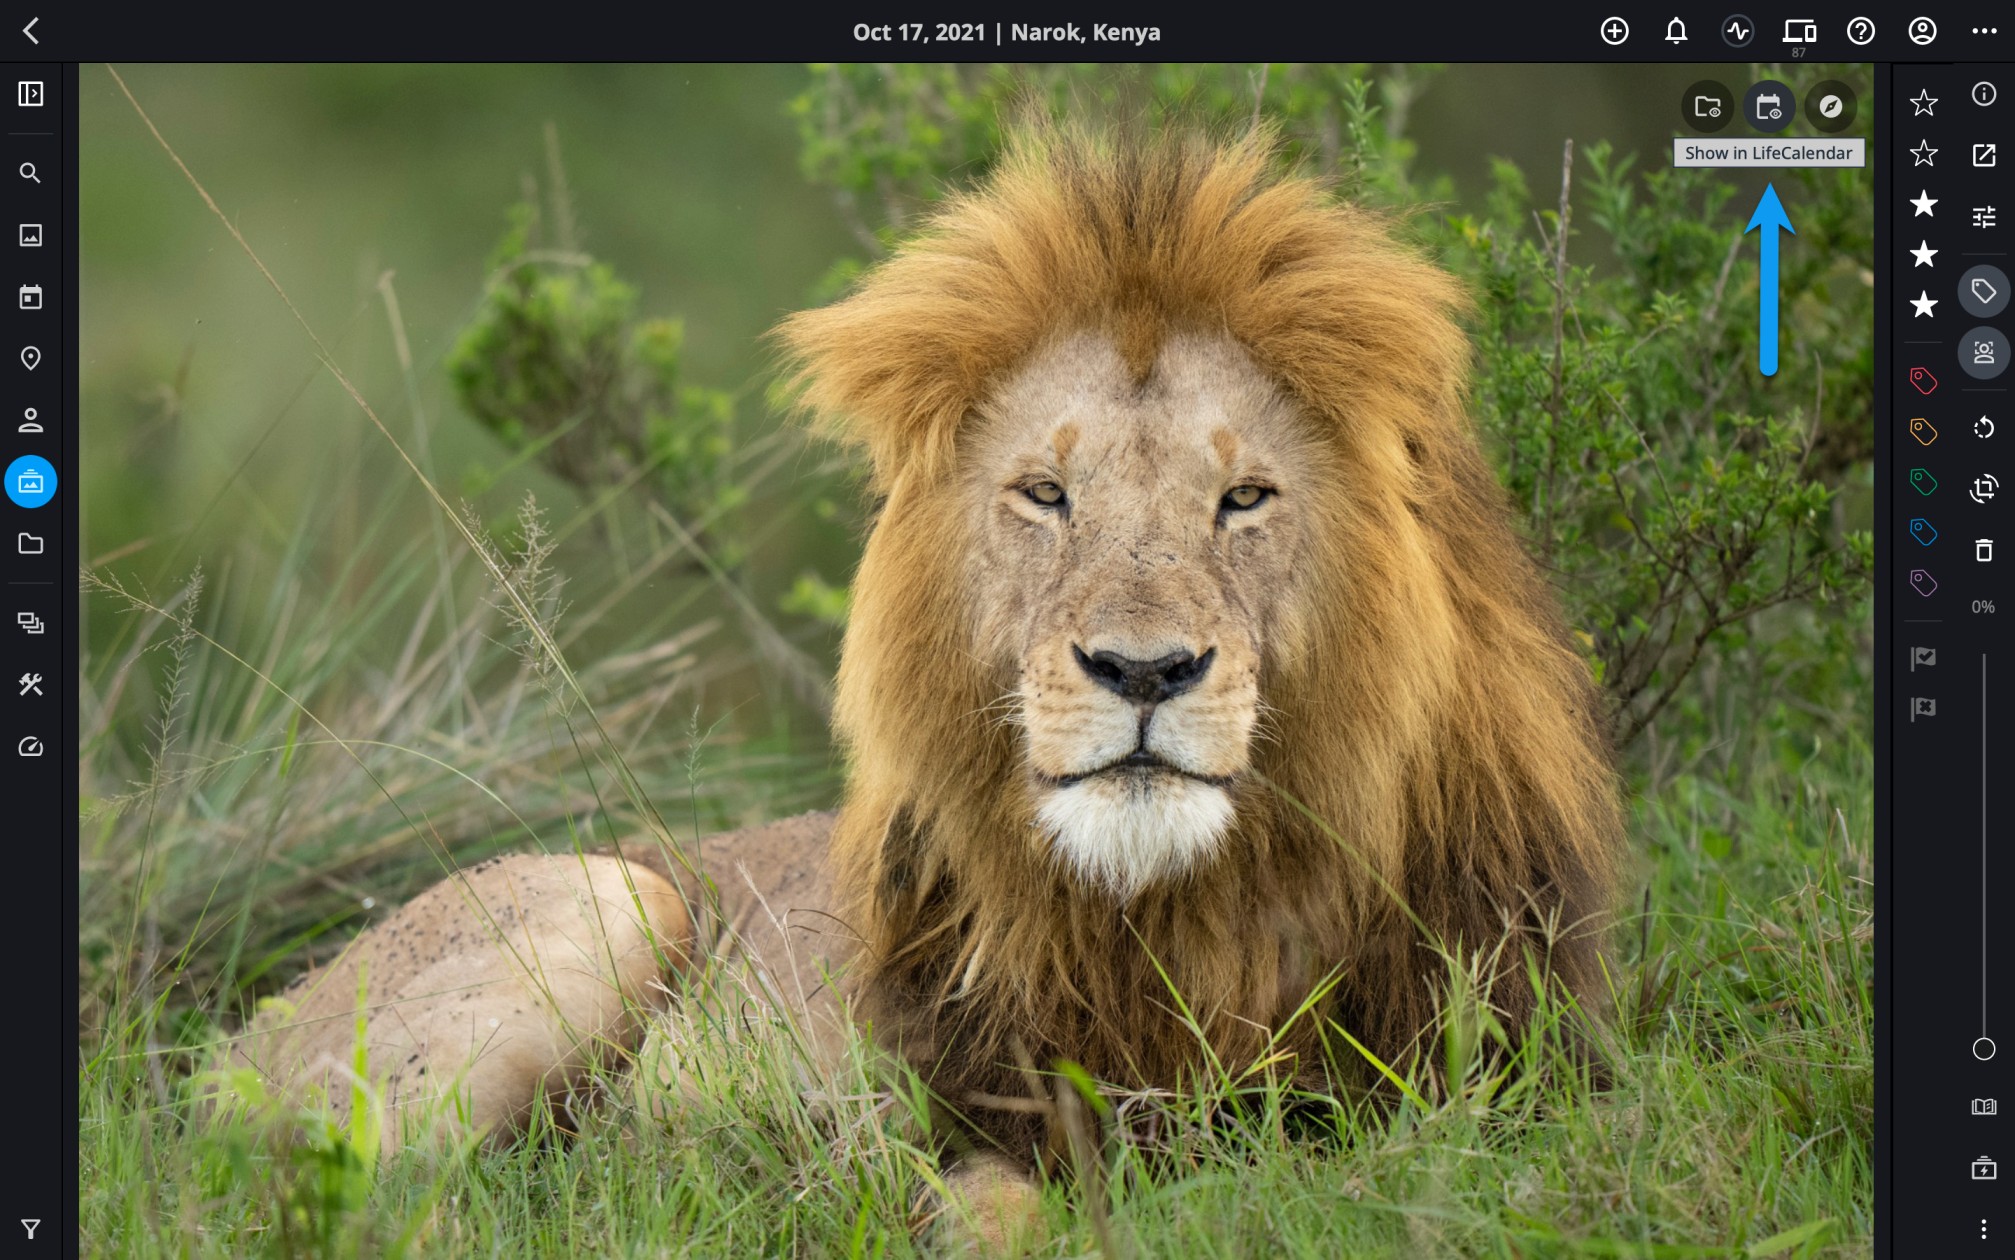
– Switch to the Folders view and show media from the same folder as the selected image. - Show in LifeCalendar
![]() – Switch to the Calendar view and show media from the same day as the selected image.
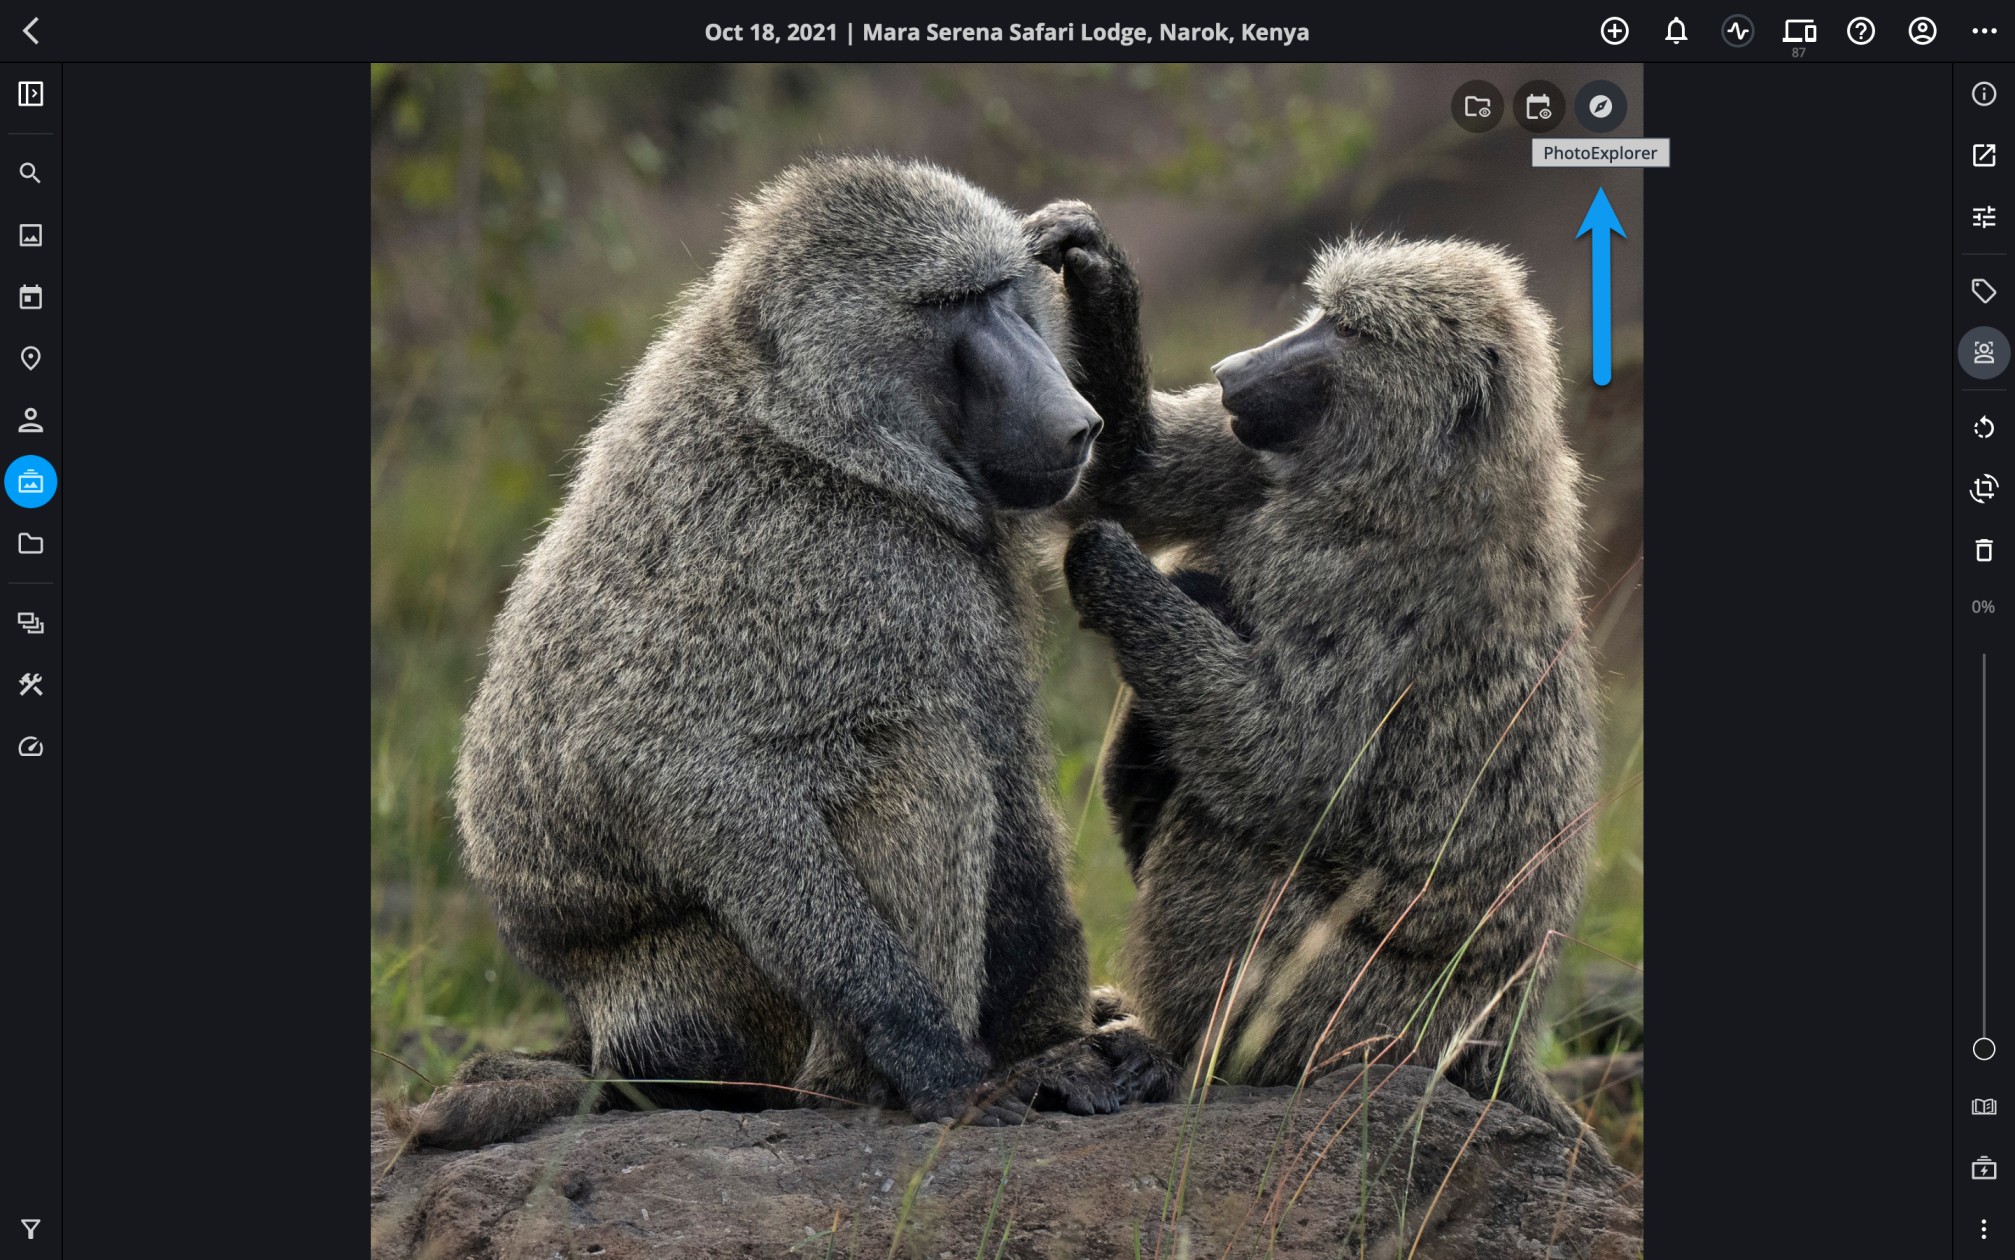
– Switch to the Calendar view and show media from the same day as the selected image. - PhotoExplorer
![]() – Perform a variety of searches or actions based on the content of your image.
– Perform a variety of searches or actions based on the content of your image.
Show or Hide QuickActions Icons
QuickActions icons are ON by default but can be hidden if desired.
- Click the ellipsis icon
![]() in the top app bar to access the More menu.
in the top app bar to access the More menu. - Select QuickActions, then toggle the switches next to each QuickAction to select which icon(s) you want to see.
- Show in Folder
-
Show in Folder makes locating where an image is stored easy so you can browse related media.
- Select an image and open it in single photo view.
- Click the Show in Folder icon
![]() in the upper right corner of the photo to switch to the Folders view and browse media stored in the same folder.
in the upper right corner of the photo to switch to the Folders view and browse media stored in the same folder.
![]()
- Show in LifeCalendar
-
Show in LifeCalendar makes finding media from the same day simple, regardless of where the photo is stored or the device it was captured with.
- Select an image and open it in single photo view.
- Click the Show in LifeCalendar icon
![]() in the upper right corner of the photo to switch to the Calendar view and browse media captured the same day.
in the upper right corner of the photo to switch to the Calendar view and browse media captured the same day.
![]()
- PhotoExplorer
-
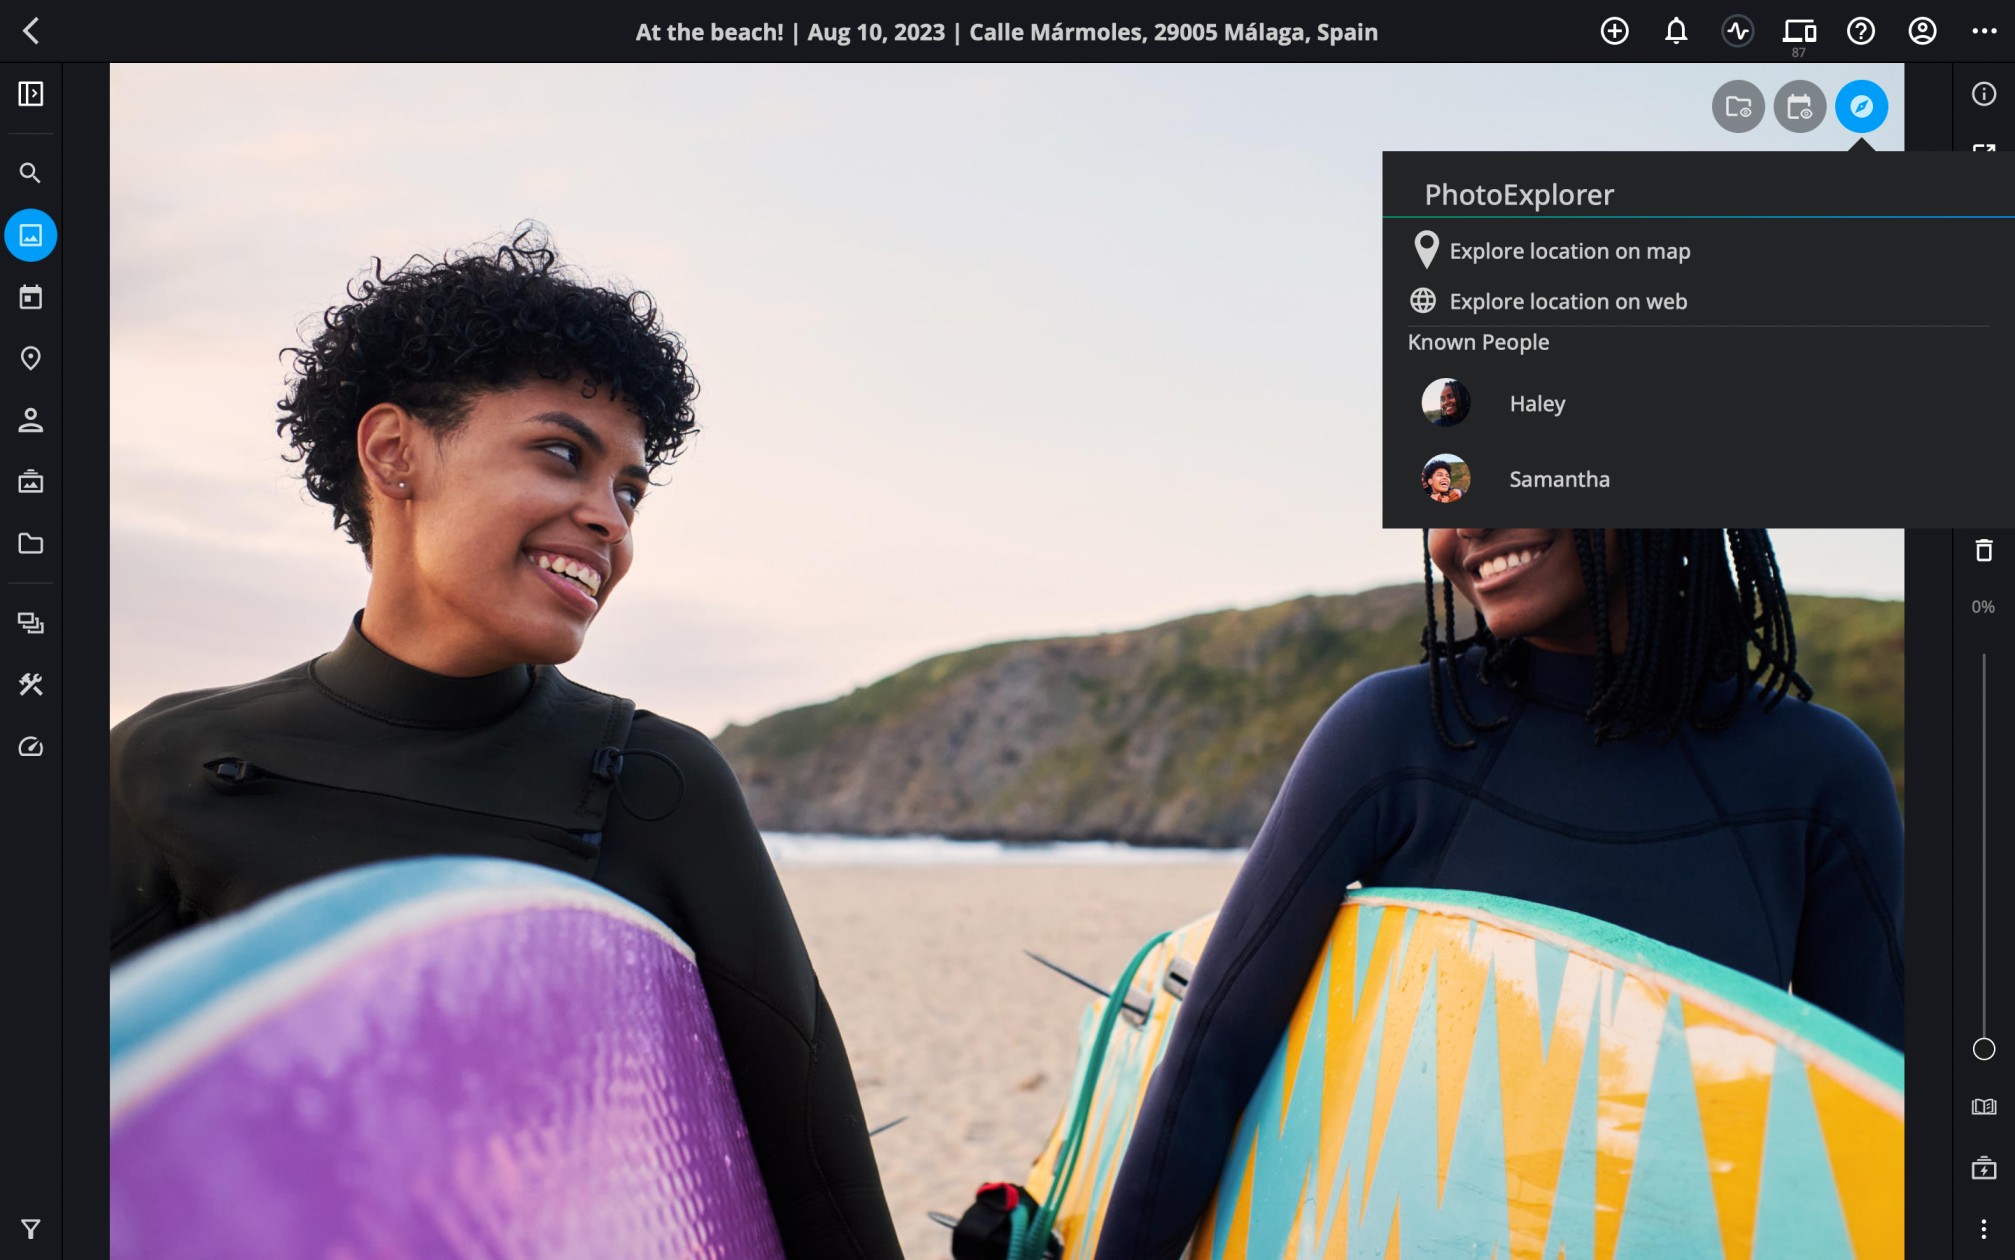
PhotoExplorer is a unique tool that allows you to find additional information about your media based on embedded GPS information, people you’ve tagged in your photos, and more.
If a photo has embedded GPS information, you can quickly view a photo’s location in the Mylio Photos Map view, perform a web search using your photo’s GPS information to view the surrounding area, get driving directions, or even make a restaurant reservation. Mylio Photos works with your default web browser and lets you select your preferred online map service (Apple Maps, Bing Maps, Google Earth, Google Maps, or Open Street Maps).
![]()
If you’ve tagged faces in a photo, you can easily switch to the People view to see more photos of those in that photo. If you’ve added their contact information, you can create an email or text message to share the selected image or even initiate a call.
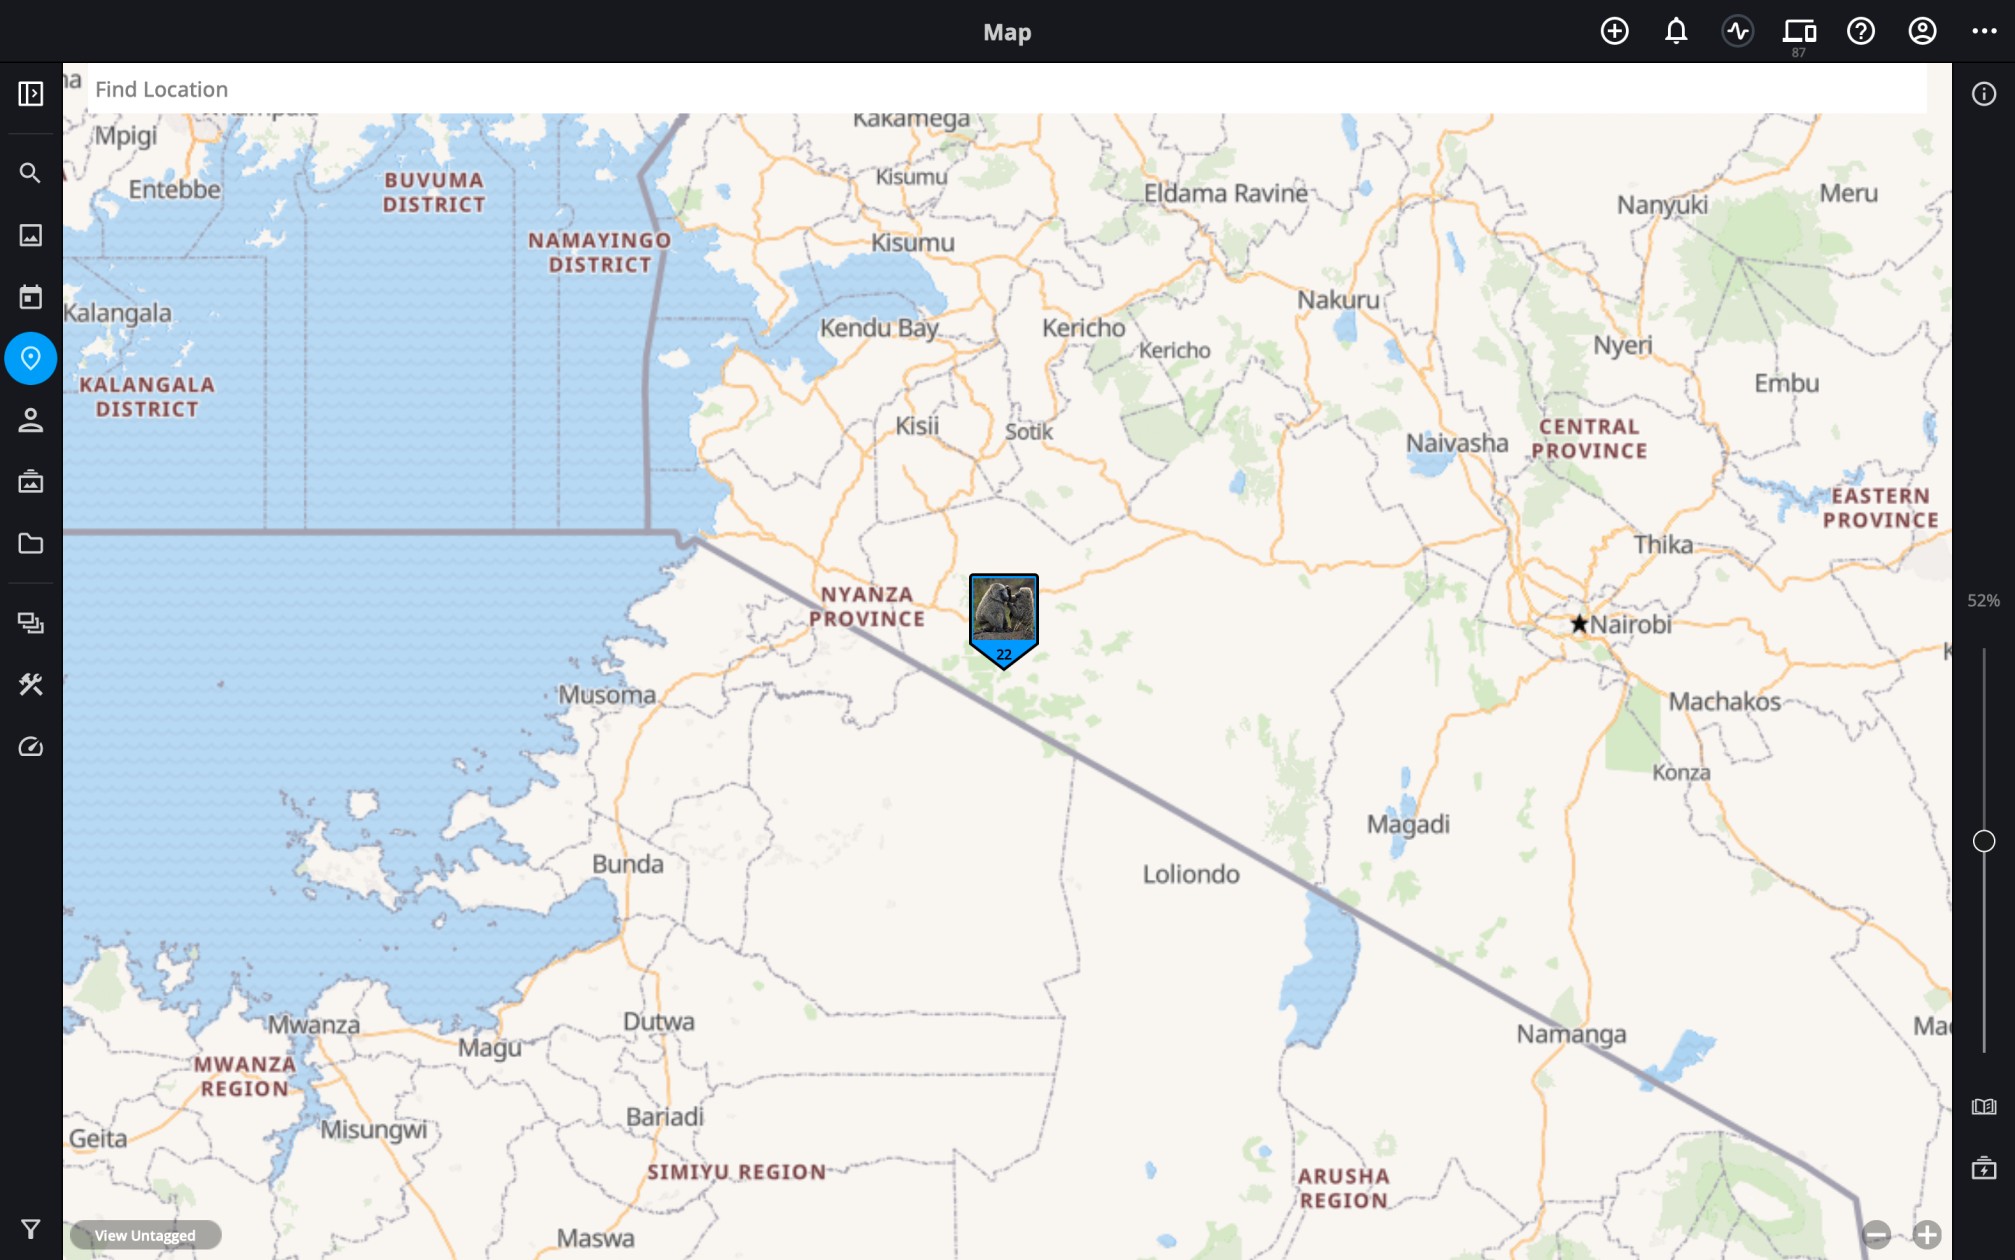
- Using PhotoExplorer to Show Media in the Map View
-
- Select an image with GPS information and open the image in single photo view.
- Click the PhotoExplorer icon
![]() in the upper right corner of the photo and choose Explore location on map to open the image in Mylio Photos’ Map view.
in the upper right corner of the photo and choose Explore location on map to open the image in Mylio Photos’ Map view.
![]()
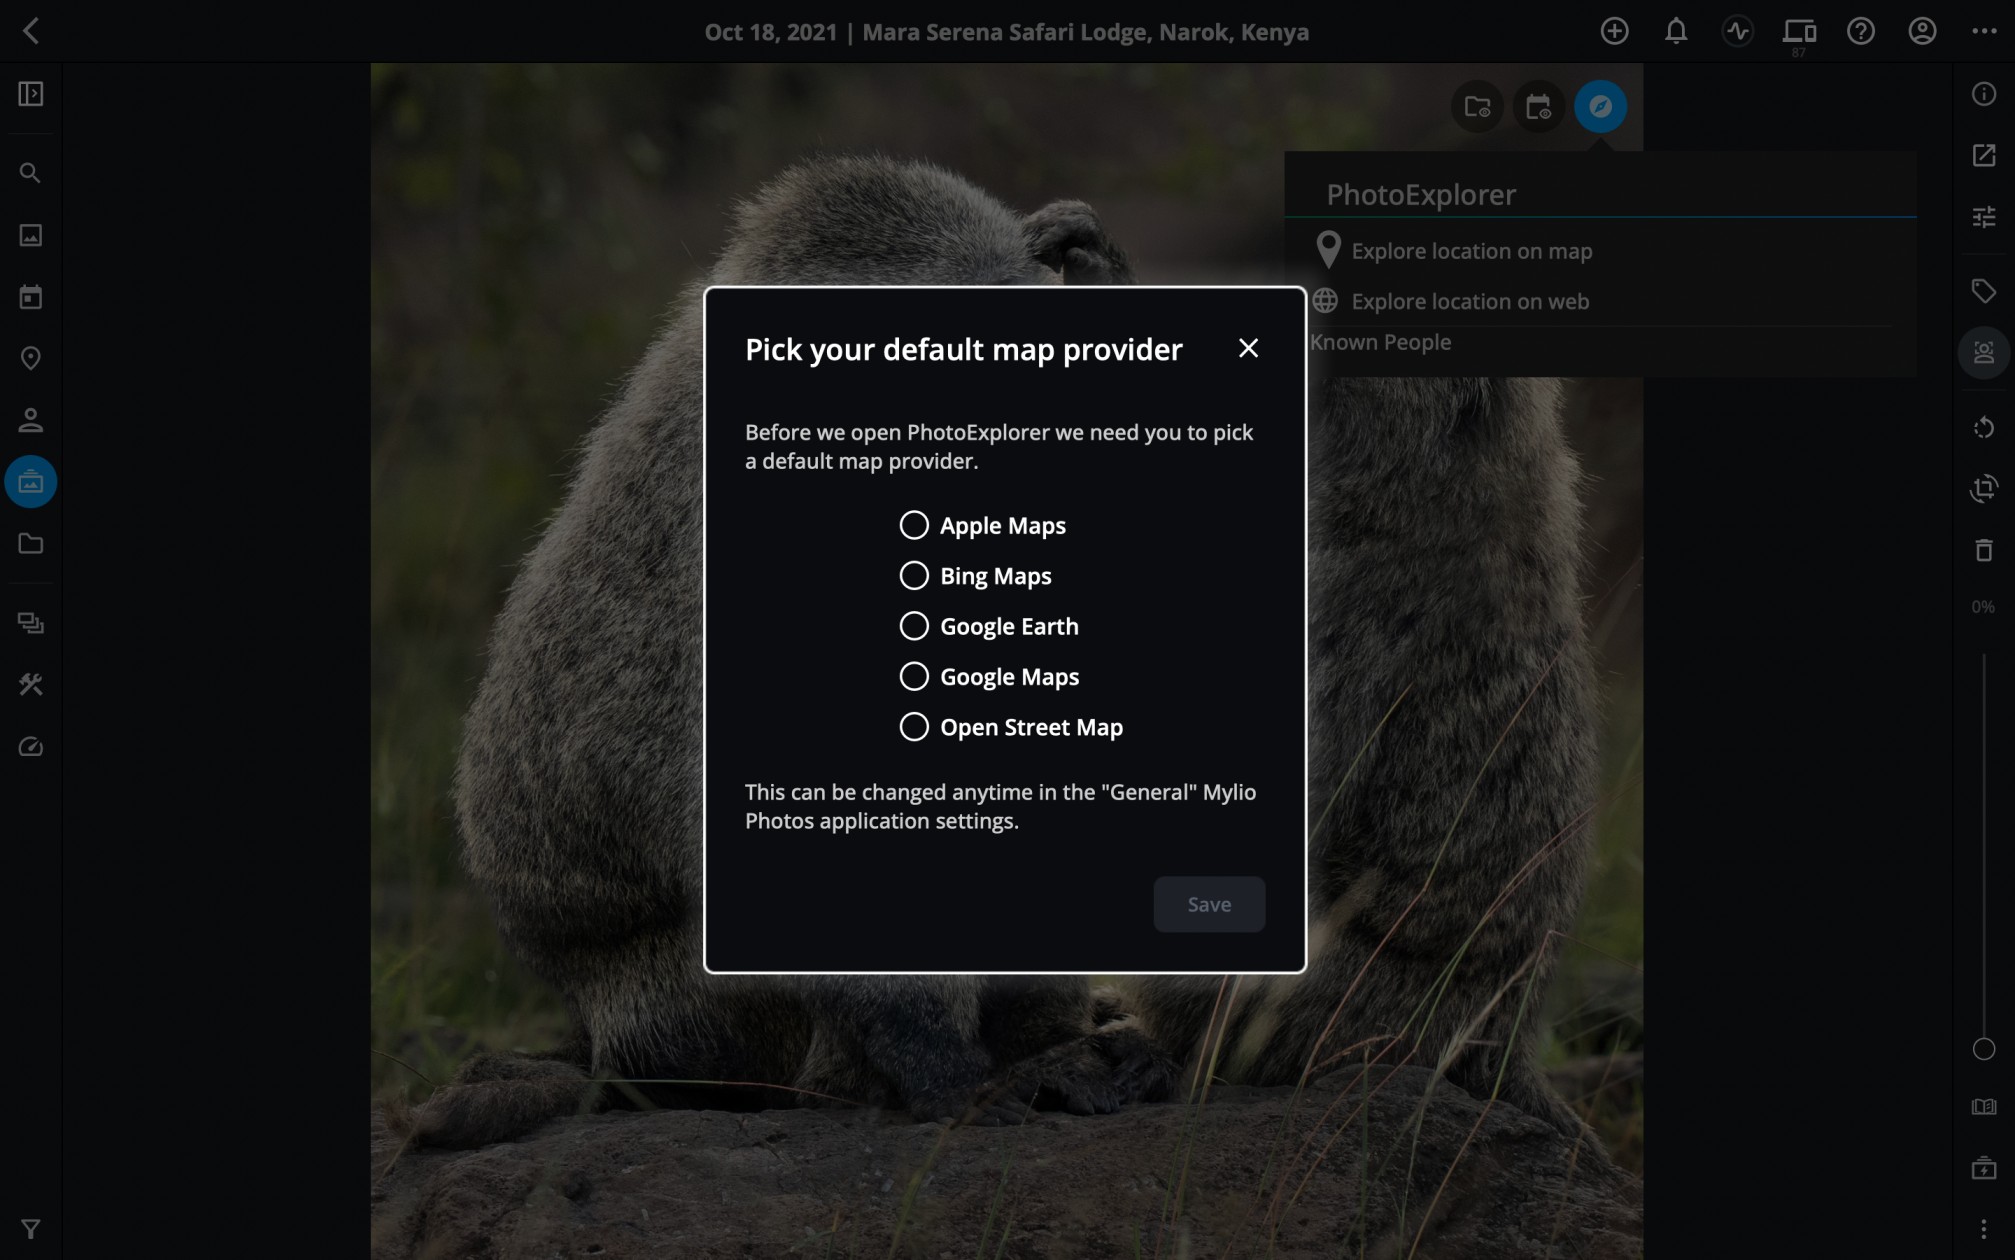
- Using PhotoExplorer to Search the Web
-
- Select an image with GPS information and open the image in Single Photo View.
- Click the PhotoExplorer icon in the upper right corner of the photo and choose Explore location on web to open the image in your browser using your preferred online map service.
- The first time you select Explore location on the web you can choose your default online map provider (Apple Maps, Bing Maps, Google Earth, Google Maps, or Open Street Maps). You can change your default online map provider at any time from the More menu > Settings > General > Web Maps Provider.
![]()
- The first time you select Explore location on the web you can choose your default online map provider (Apple Maps, Bing Maps, Google Earth, Google Maps, or Open Street Maps). You can change your default online map provider at any time from the More menu > Settings > General > Web Maps Provider.
- Using PhotoExplorer to See More Photos of People
-
- Select an image with people, and open the image in Single Photo View.
- Click the PhotoExplorer icon
![]() in the upper right corner of the photo, then click on the face of the person whose photos you wish to explore. This will open the People view and display all photos of the selected person.
in the upper right corner of the photo, then click on the face of the person whose photos you wish to explore. This will open the People view and display all photos of the selected person.
![]()
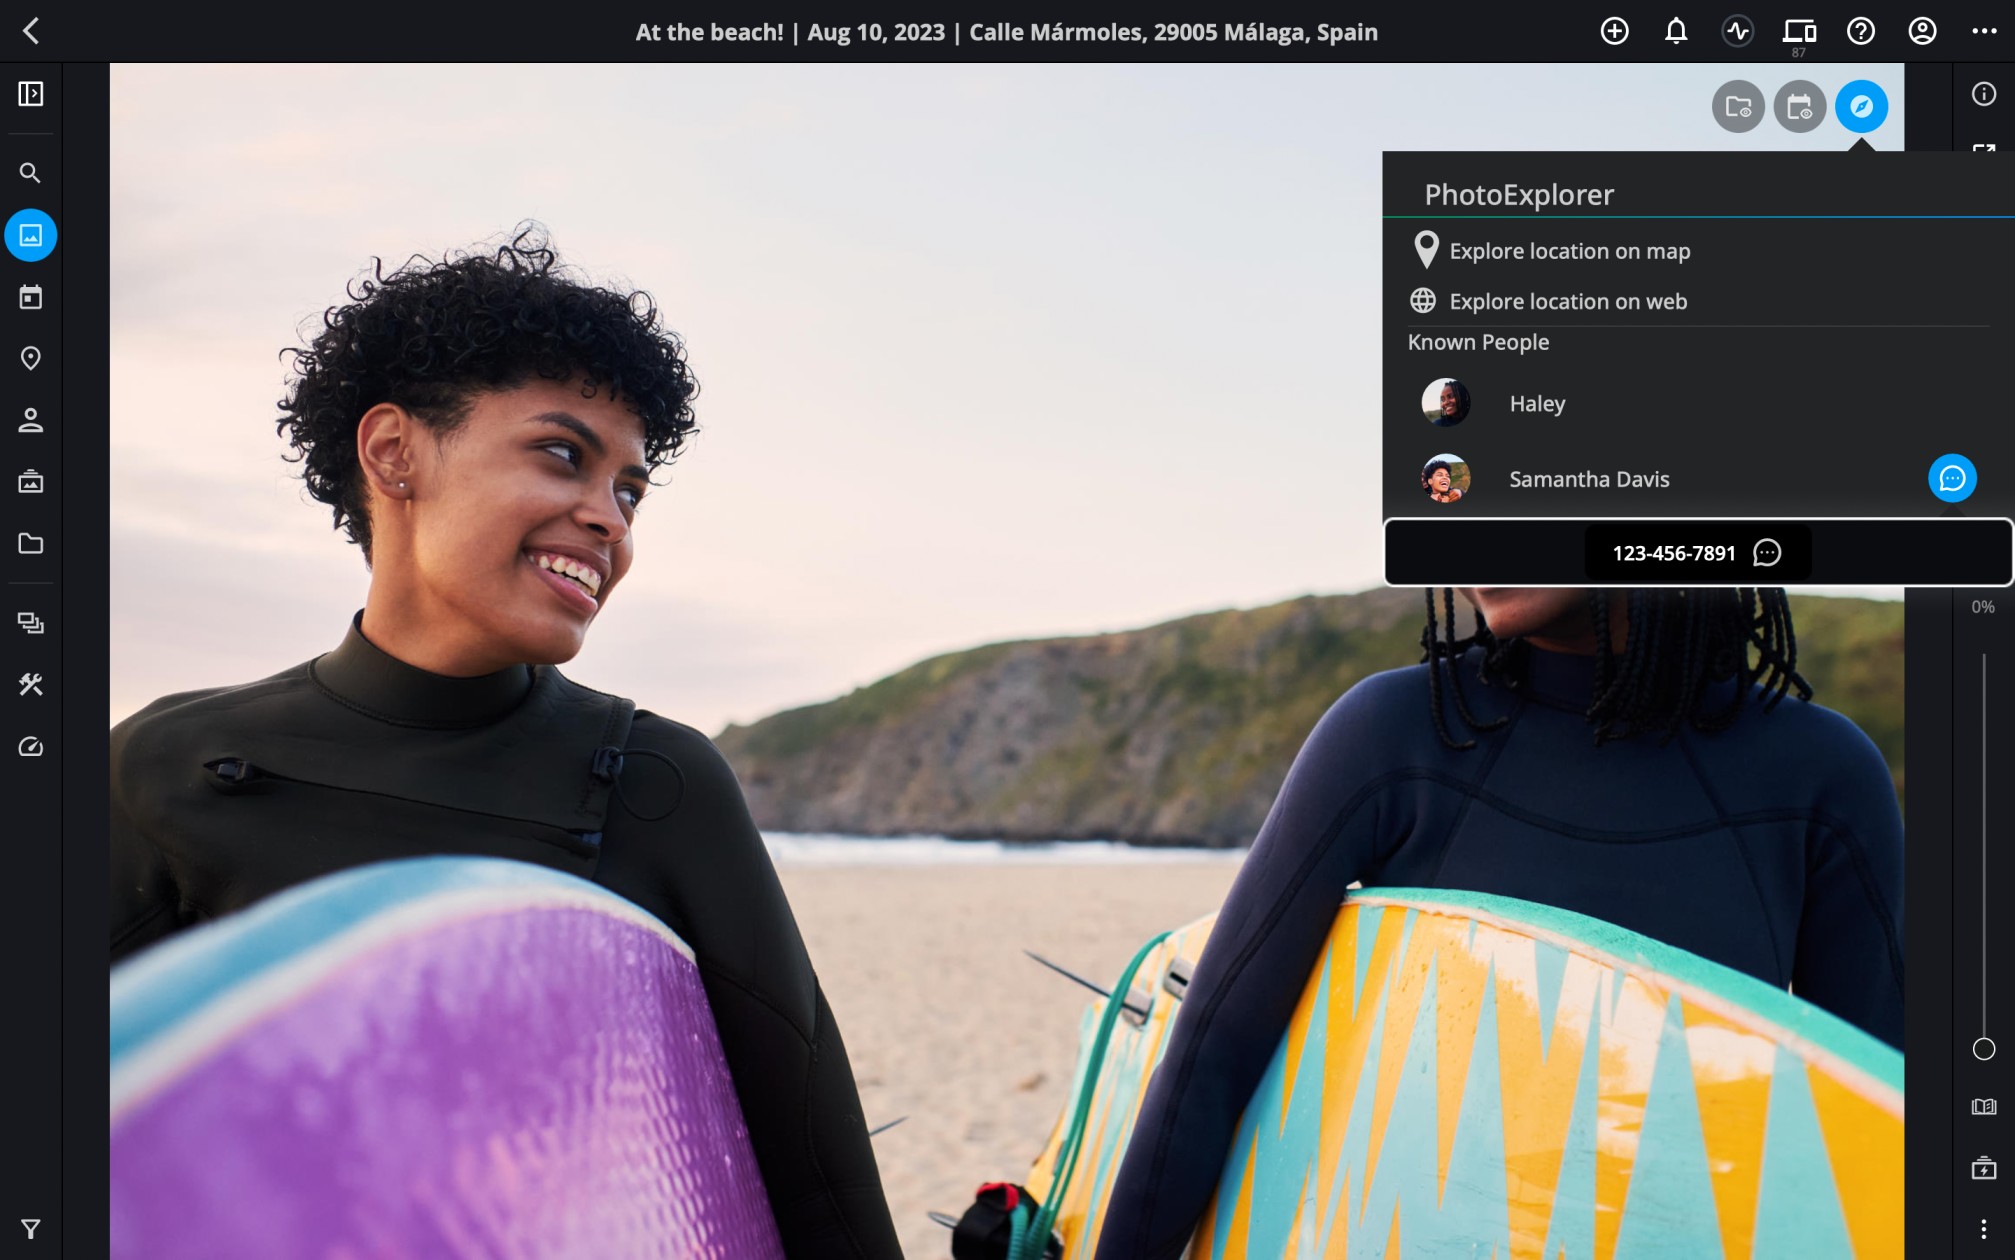
- Using PhotoExplorer to Send a Message, Email a Photo, or Make a Call
-
If you’ve added contact information to the people you’ve tagged in Mylio Photos, you can use PhotoExplorer to quickly share photos with friends and family in just a few clicks, or give them a call.
- Select an image with people, and open the image in Single Photo View.
- Click the PhotoExplorer icon
![]() in the upper right corner of the photo.
in the upper right corner of the photo.
- Click the chat bubble icon
![]() next to a name to send a text message with the selected photo (iOS, macOS, and Android)
next to a name to send a text message with the selected photo (iOS, macOS, and Android) - Click the email icon
![]() next to a name to create an email message in your system’s default email client with the selected photo (iOS, macOS, Android, and Windows).
next to a name to create an email message in your system’s default email client with the selected photo (iOS, macOS, Android, and Windows). - Click on the phone icon
![]() next to a name to initiate a call with the selected person. (iOS, macOS, and Android)
next to a name to initiate a call with the selected person. (iOS, macOS, and Android)
- Click the chat bubble icon
![]()
Post your comment on this topic.