
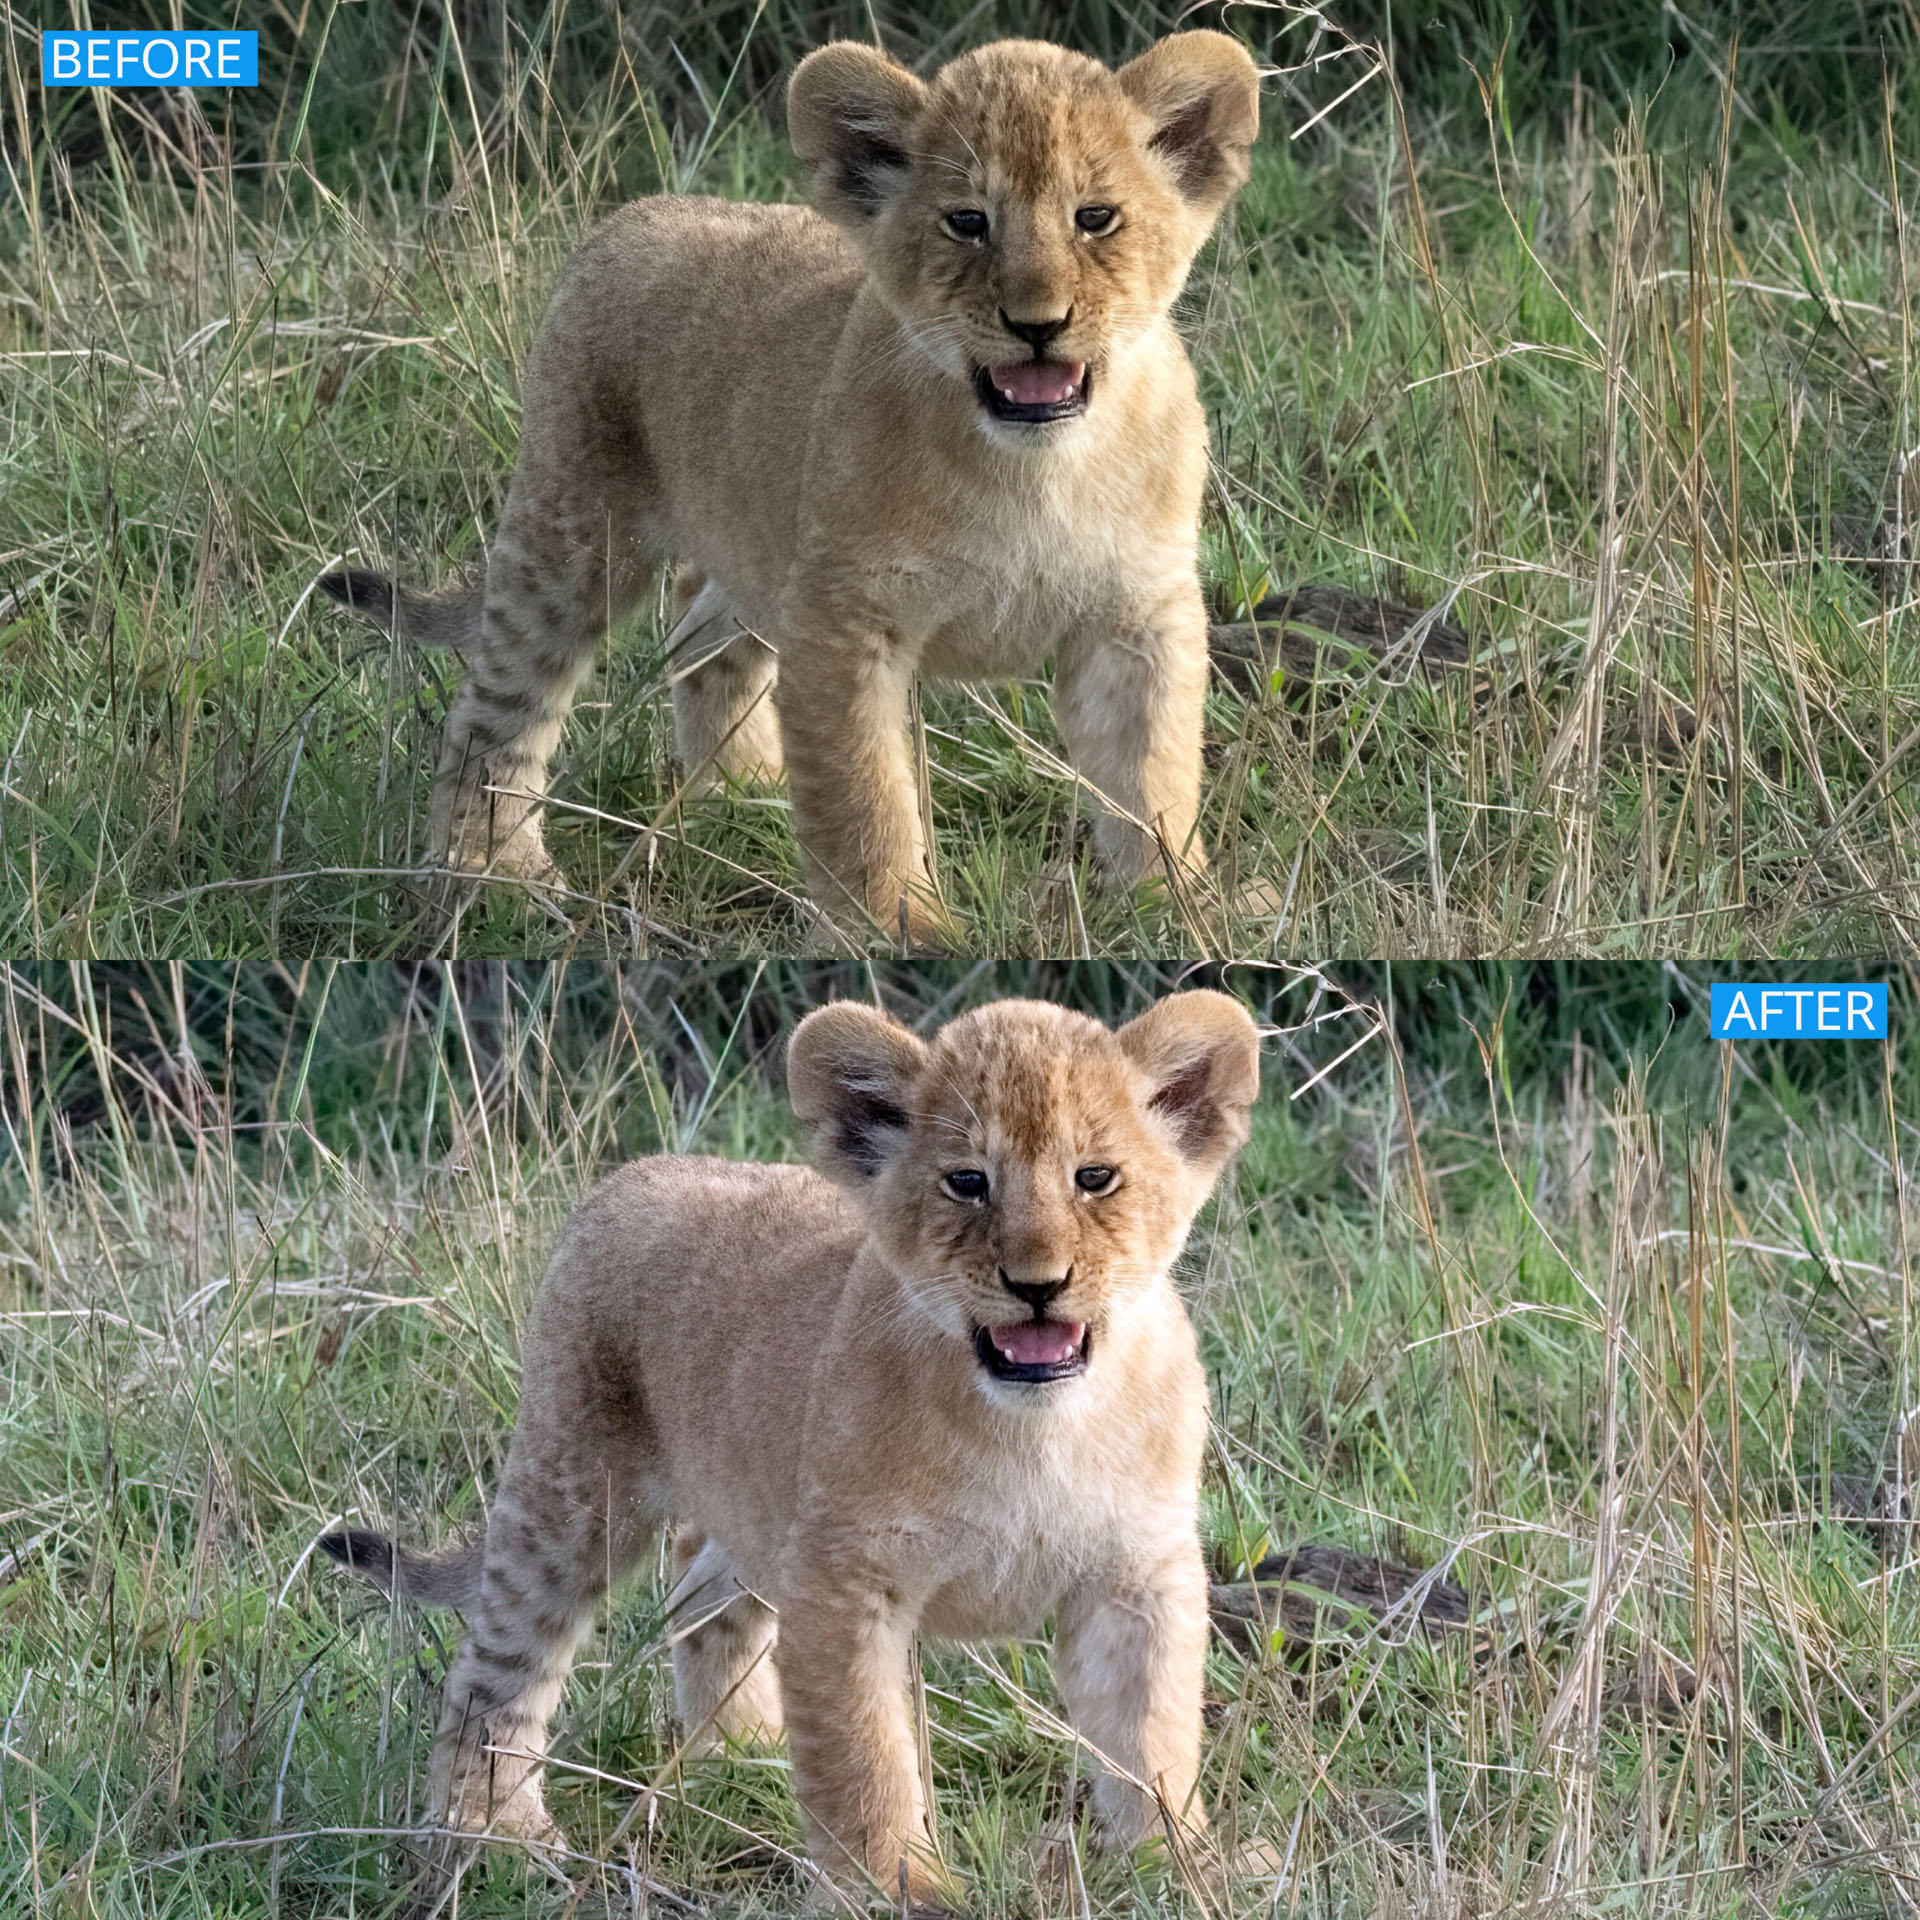
The Levels tool corrects tonal ranges and color balance issues. With Levels, you can fix poor exposure and perform color correction by manually identifying white and black points in the image. Nearly every photograph can benefit from making a Levels adjustment.
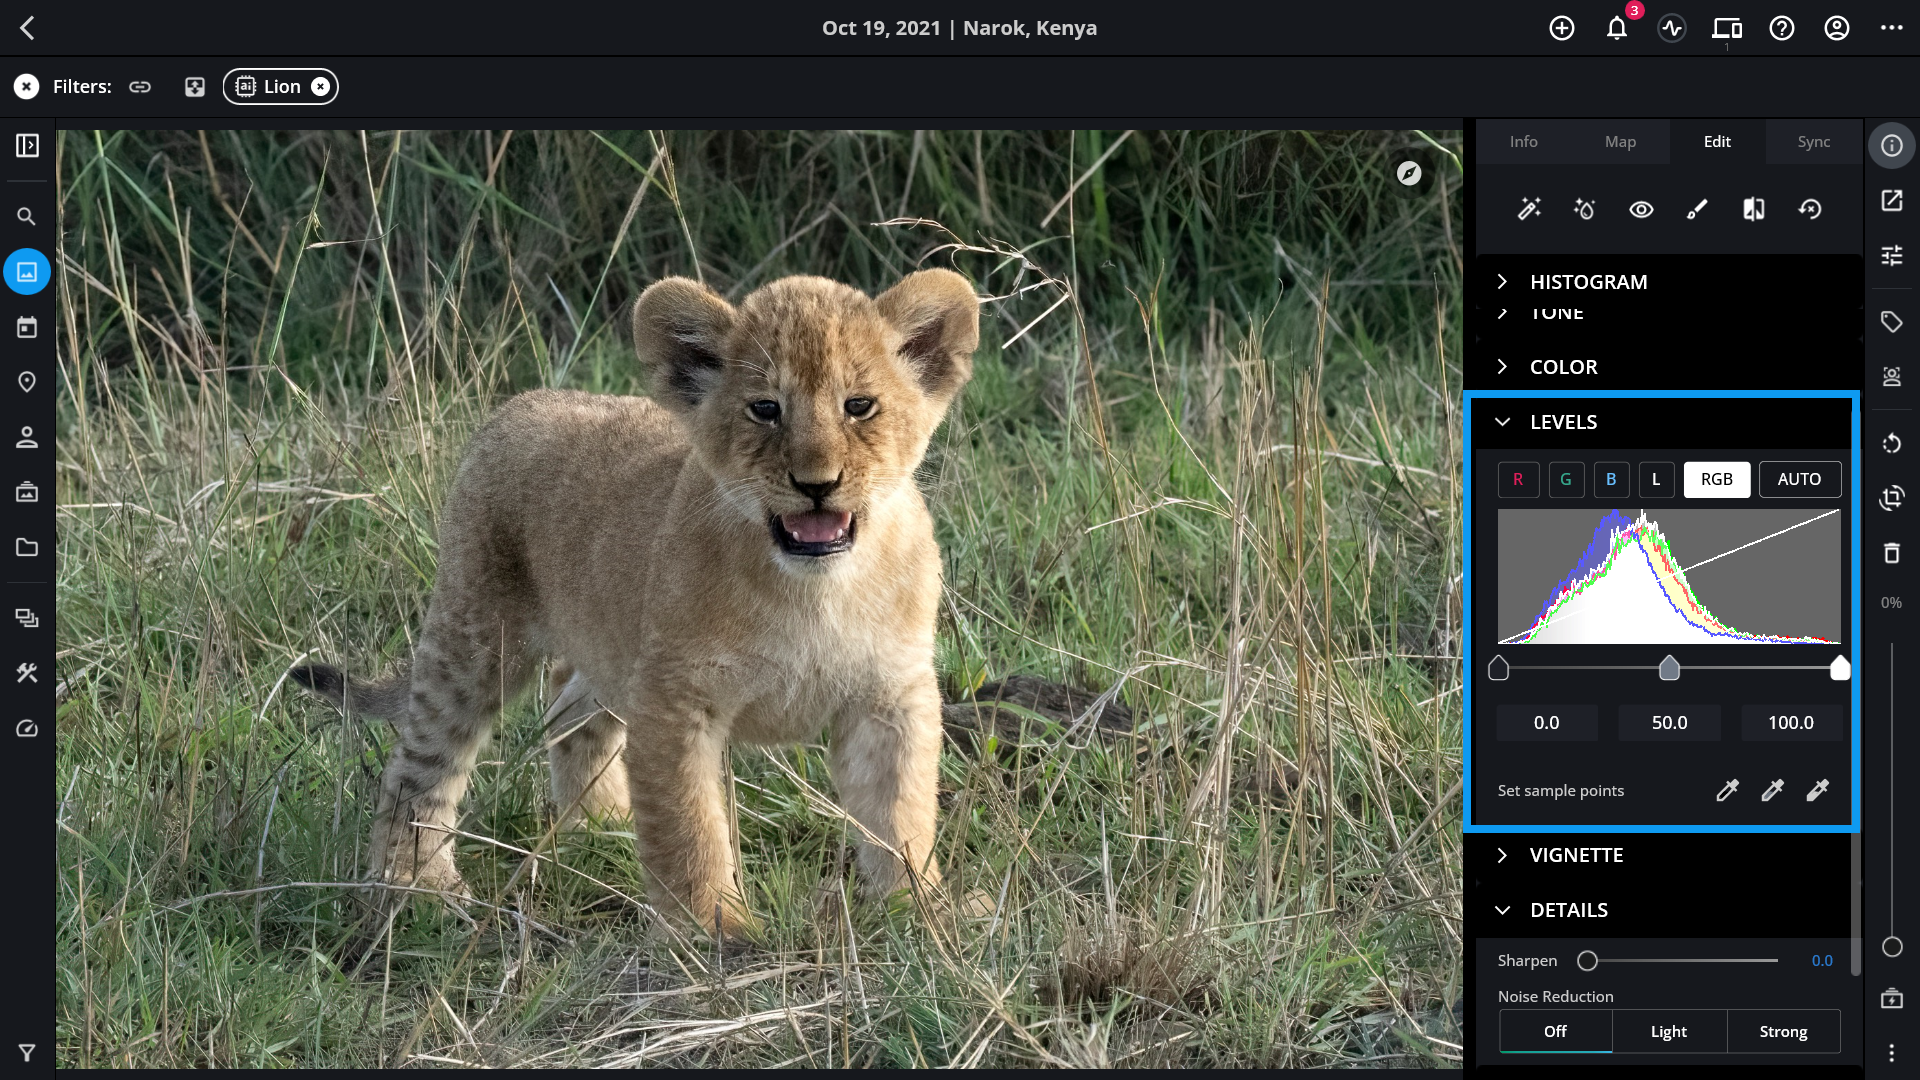
To understand Levels, reading a “histogram” is essential:https://manual.mylio.com/24.2/en/topic/using-the-histogram. The Levels tool has its own histogram that works as a visual guide for adjusting the image. A Histogram is a graphical representation of the tonal values of your image. It illustrates how the pixels in a photo are distributed across brightness levels ranging from black (0% brightness) to white (100% brightness). Histograms are a helpful way to judge the exposure and contrast of a photo and are widely used by advanced amateur and professional photographers.
Histograms are read left to right. The left edge depicts pure black. Progressing to the right, you move through the shadows, mid-tones, and highlights. The right edge represents pure white. As you move the sliders for Exposure, Shadows, Highlights, Blacks, and Whites in the Tone adjustments, you’ll notice that the histogram adjusts as tones are changed.
In addition to representing Luminance values, a Histogram also depicts Red, Green, and Blue color channels. By default, the RGB view shows the luminance and color values together. However, you can view each channel separately by clicking the histogram and choosing between RGB, Red, Green, Blue, and Luminance. These different views help spot color balance and other issues.
Fixing Exposure and Contrast with Levels
In this example, we’re using a stunning backlit photo of a lion. However, the image feels flat and lacks contrast due to how the subject is lit. We’ll use the Luminance channel in Levels to correct the tone and contrast issues.
- Open an image in Single Photo View, then click the edit icon
![]() to open the Edit Panel.
to open the Edit Panel. - Twirl down the arrow
![]() next to Levels.
next to Levels. - Click or tap on the L (luminance) button, then move the white point slider slowly to the left. This affects the image’s white point and allows you to reassign where white should begin in the image.
- Move the black point slider slowly to the right. The more you move the slider to the right, the more contrast is introduced into the image.
- Move the midtones slider. Moving the slider to the left will add more light, and moving it to the left will subtract light.
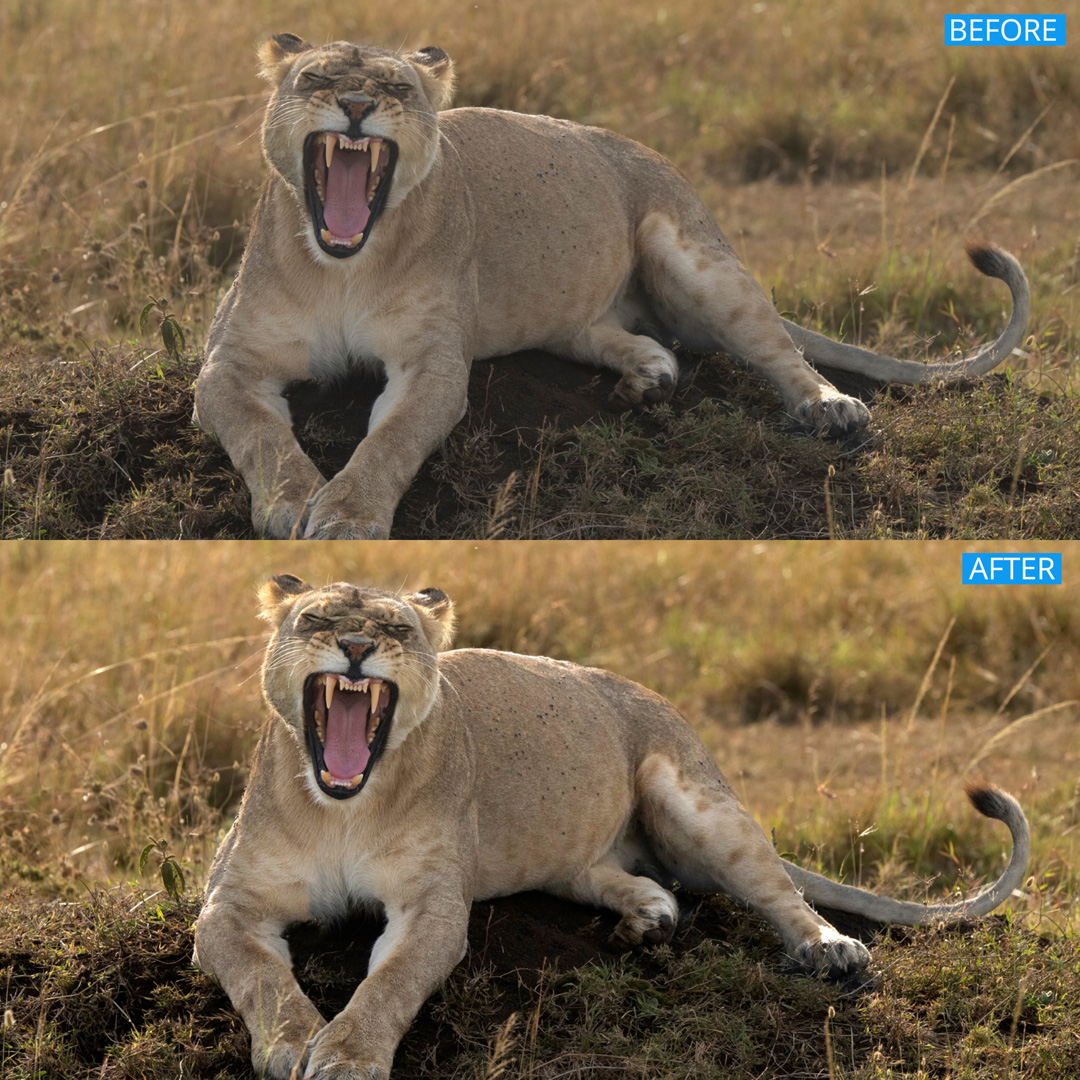
Correcting Color Balance with Auto Levels
You may have noticed the Auto button when working with the Levels tool. Auto Levels analyzes the histogram data and uses that information to modify the individual R (red), G (green), and B (blue) channels. In many cases, Auto will correct or markedly improve color balance and exposure issues.
In this example, we’ll use a photograph of a young Cheetah. The original has a mild green colorcast and is slightly underexposed.
- Click or tap on the Auto button in the Levels section to automatically adjust color.
- Move the midtones slider to refine the Auto adjustment to taste. Moving the slider to the left will add more light, and moving it to the left will subtract light.
Removing Color Casts with Precision
In the first example, we made a Levels adjustment to all channels evenly. In the second example, we let Mylio Photos automatically adjust each channel using the Auto button. The Levels tool allows you to view and adjust each color channel independently. This will enable us to correct color cast issues, incorrect white balance, or photos captured with mixed or colored lighting. In this example, we’ll use the eye dropper tools and work with each color channel to obtain perfect color on an image with a trio of young wild cats.

- Click the black point eyedropper in the Levels section.
- Move your mouse over the photo and locate an area that should be pure black.
- Click to set a sample point. For this image, I chose an area near the cat’s eye.
- Click the white point eyedropper, move your mouse over the photo, locate an area that should be pure white, and click to set a sample point. In this photo, I chose an area with a very bright highlight on a blade of grass on the right side of the image.
- Click the gray point eyedropper, move your mouse over the photo, locate an area that should be a neutral gray, and click or tap to set a sample point. For this image, I chose a spot on the cat’s chest. When you’re finished with the eyedropper tools, click or tap Done at the bottom of the screen.
- If necessary, select the R (red), G (green), and B (blue) channels. Use the blacks, midtones, and whites sliders below each color channel to adjust the result to your taste.
Post your comment on this topic.