
Mylio Photos can be easily integrated into your existing Lightroom Classic workflow or used as a replacement for Lightroom’s digital asset management.
By linking folders cataloged by Lightroom Classic to Mylio Photos, users can use Mylio Photos’ intuitive views to browse and leverage Dynamic Search and QuickFilters to find photos when needed quickly.
With a Mylio Photos+ subscription, users can access their entire media library, manage industry-standard metadata from their computers, tablets, and phones via the Mylio Photos application, automate backups, and automatically keep everything in sync.
Mylio Photos can detect when Lightroom Classic is installed and will automatically install a plugin for quick and easy editing to accommodate several workflows.

- Setting Up the Mylio Photos Plugin for Lightroom Classic
-
The first time you use Mylio Photos with Lightroom, you’ll need to set up the Mylio Photos Plugin in Lightroom Classic.
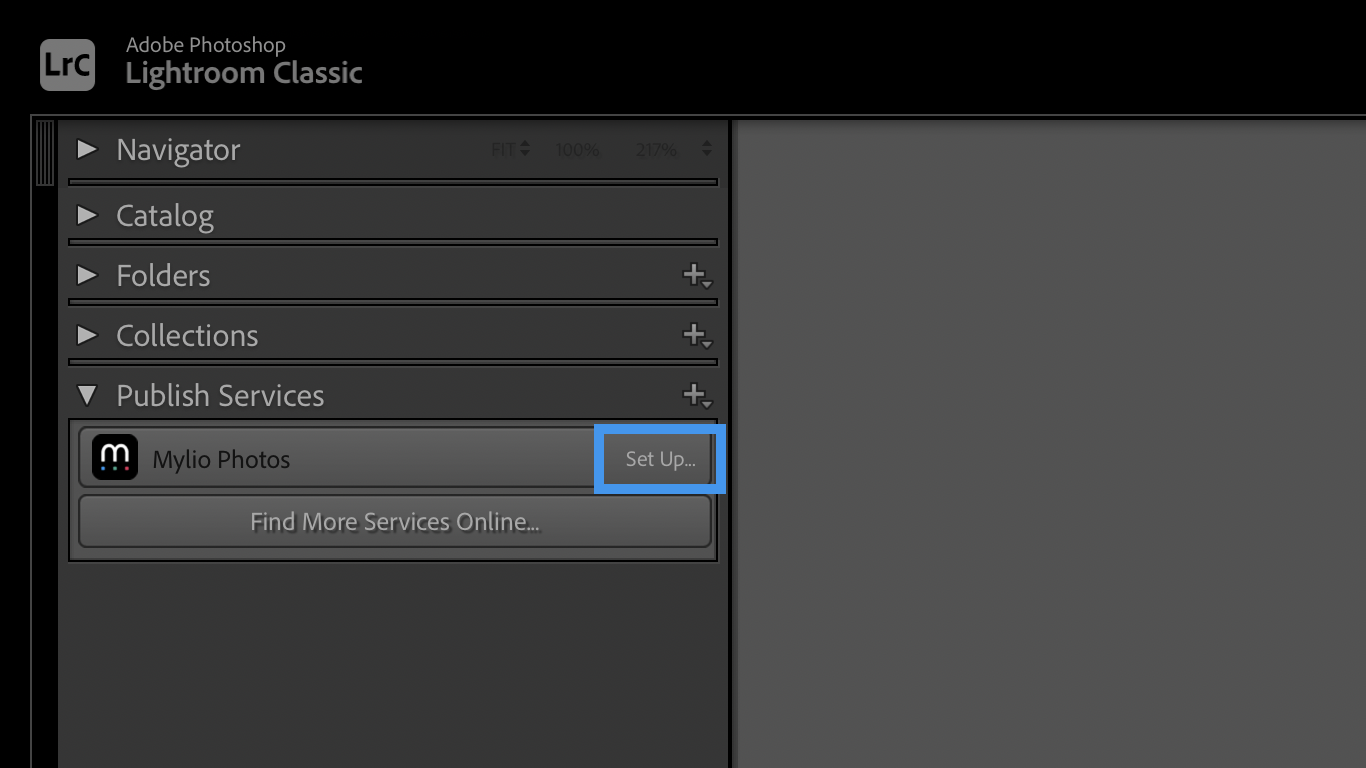
- Launch Lightroom Classic.
- From Lightroom’s Library module, expand Publish Services in the left panel.
- Next to Mylio Photos, click Set Up.
![]()
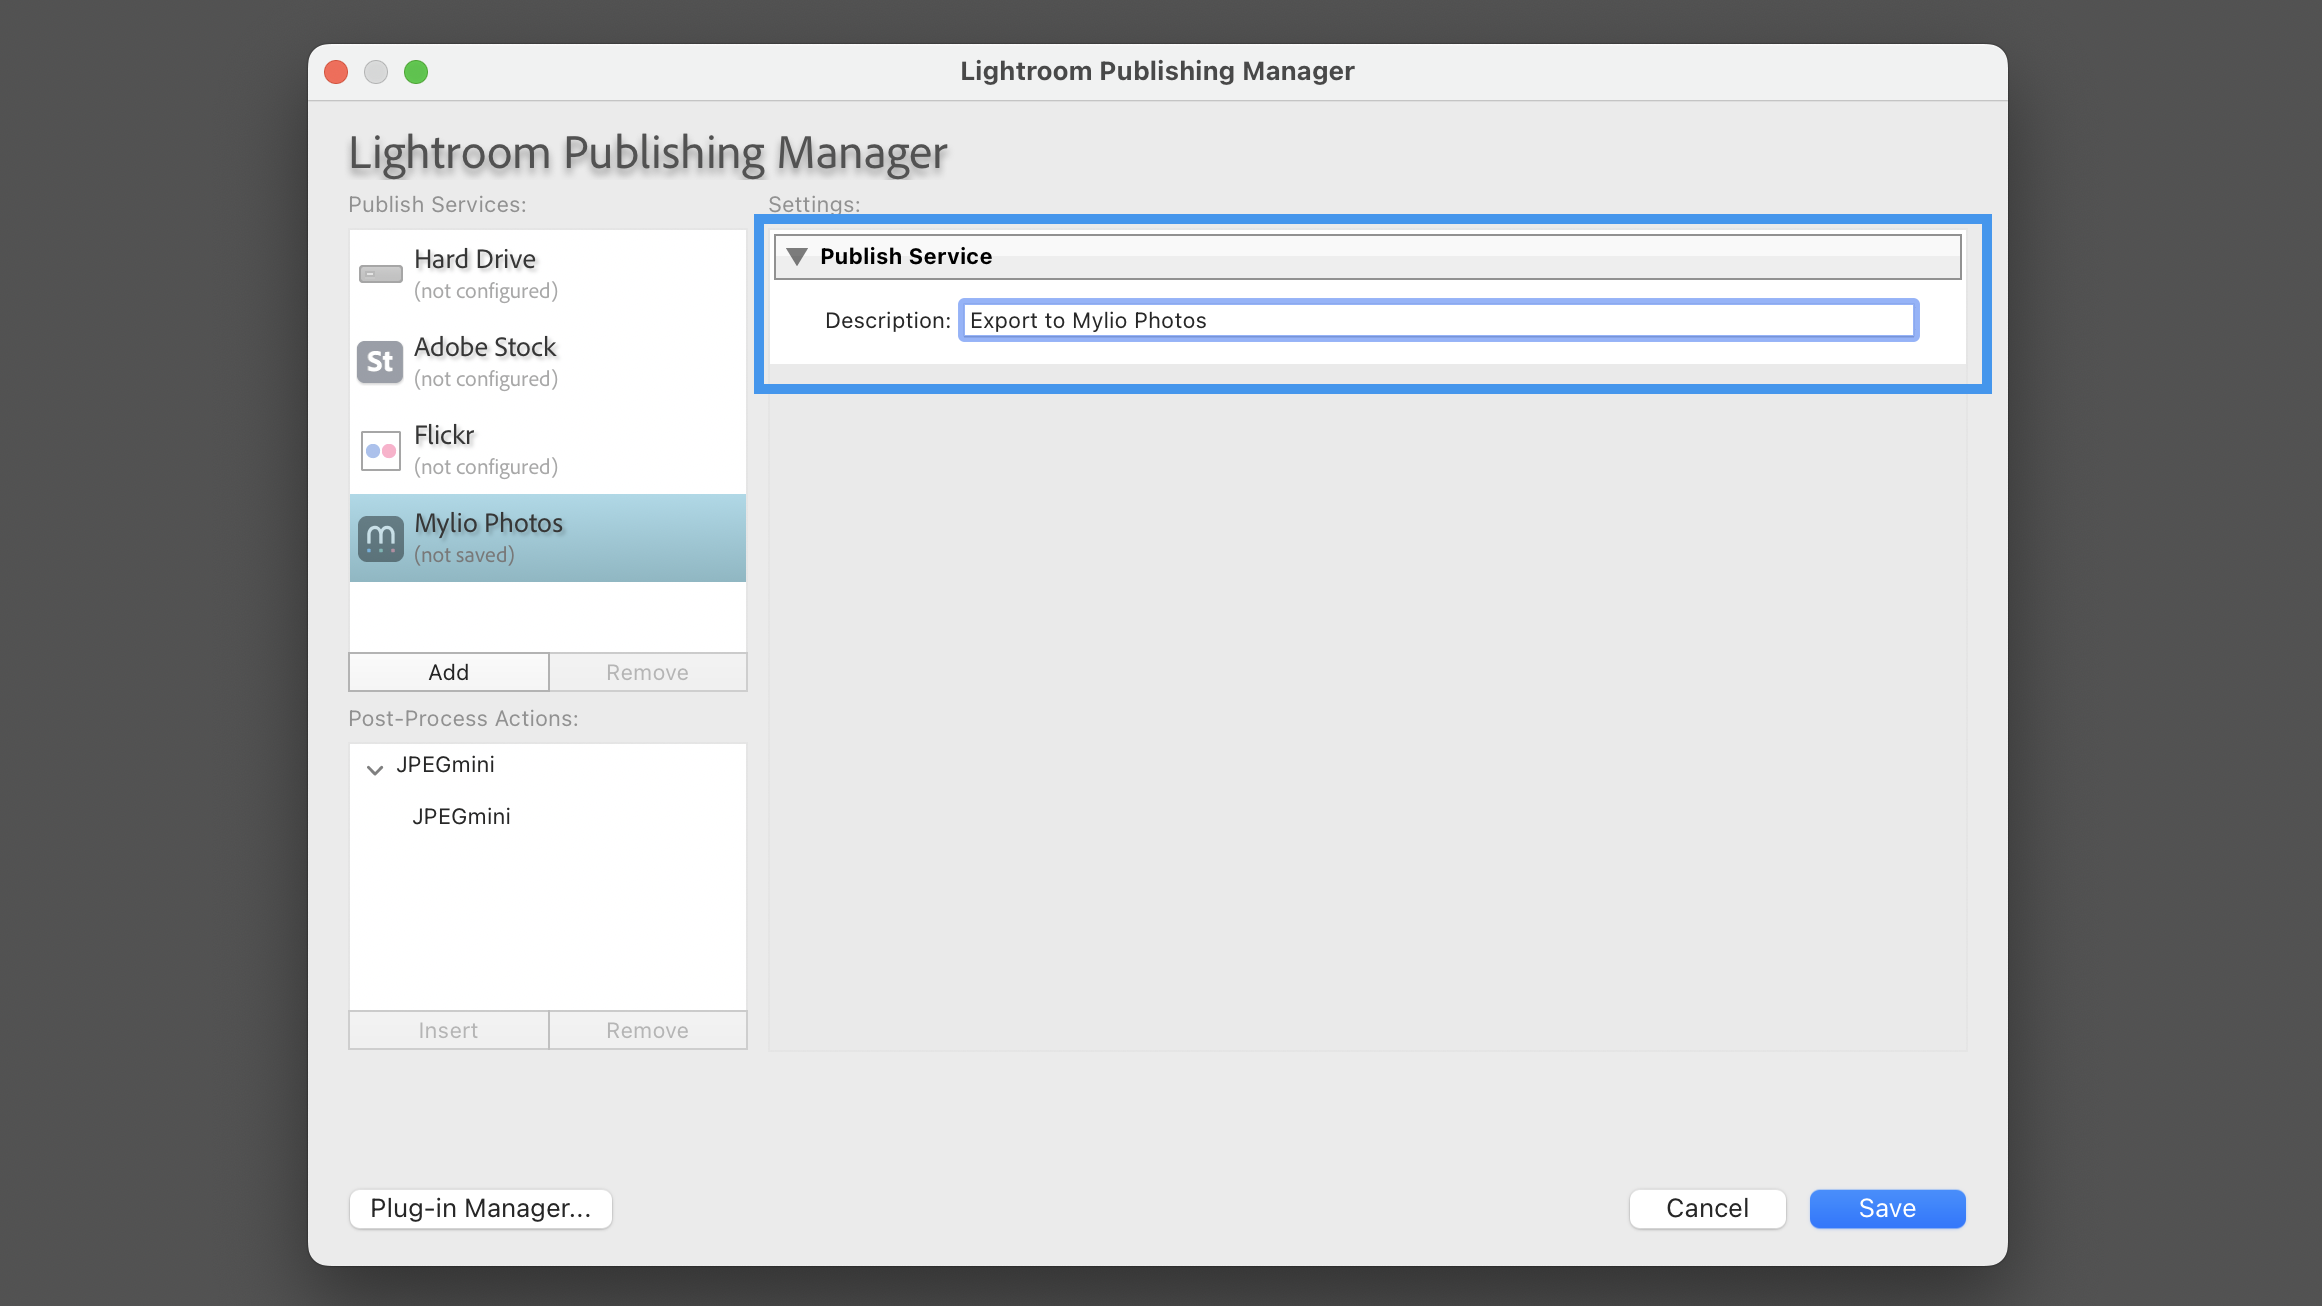
- In the Plugin Manager, enter Export to Mylio Photos in the Description field and click Save.
![]()
- A shared Photostream option will appear in the Mylio Photos Publish Services. You’re now set up to use Lightroom Classic with Mylio Photos.
- Moving from Lightroom Classic to Mylio Photos
-
The steps below will guide you through saving your Lightroom Classic catalog information to XMP sidecar files. This includes metadata changes and any adjustments made in the Develop module. Mylio Photos can read industry-standard XMP files, meaning information such as keywords, face tags, star ratings, and color labels will be visible in Mylio Photos.
Edits from Lightroom Classic, made in the Develop module, are preserved in your XMP files but are proprietary to Adobe and cannot be read by Mylio Photos. Your Lightroom Classic edits will not be visible in Mylio Photos but are preserved. However, by opening any image from Mylio Photos into Lightroom, Adobe Camera Raw/Photoshop, or Photoshop Elements, those edits will be visible and re-editable.
If you’d like to see your Lightroom Classic edits in Mylio Photos, you can use the Mylio Photos plugin for Lightroom Classic to create Display Images. These are full-size edited JPGs that are automatically stacked with your original images in Mylio Photos, thus allowing you to browse your edits while preserving the original, unedited files.
Saving Lightroom Classic Catalog Information to XMP Files
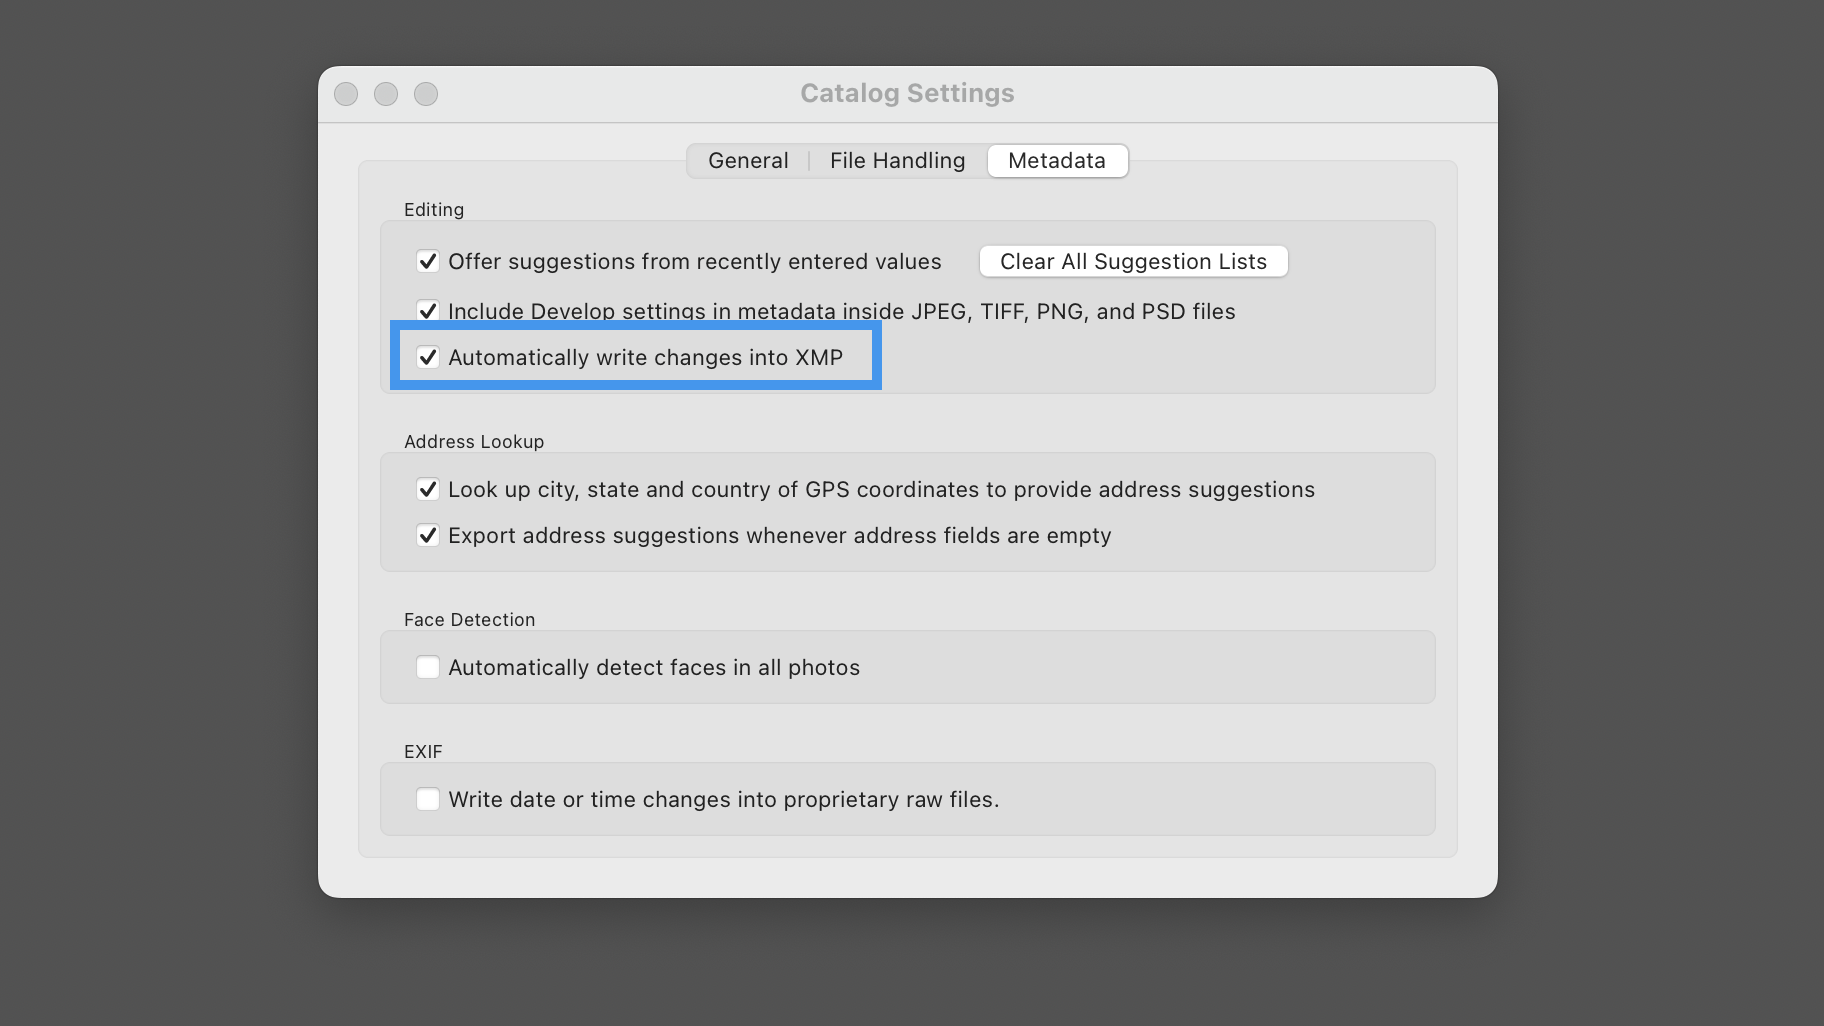
- In Lightroom Classic, go to Catalog Settings and choose the *Metadata tab.
- Check the box next to Automatically write changes to XMP. This will prompt Lightroom Classic to save all future metadata changes, including Develop settings in XMP sidecar files.
![]()
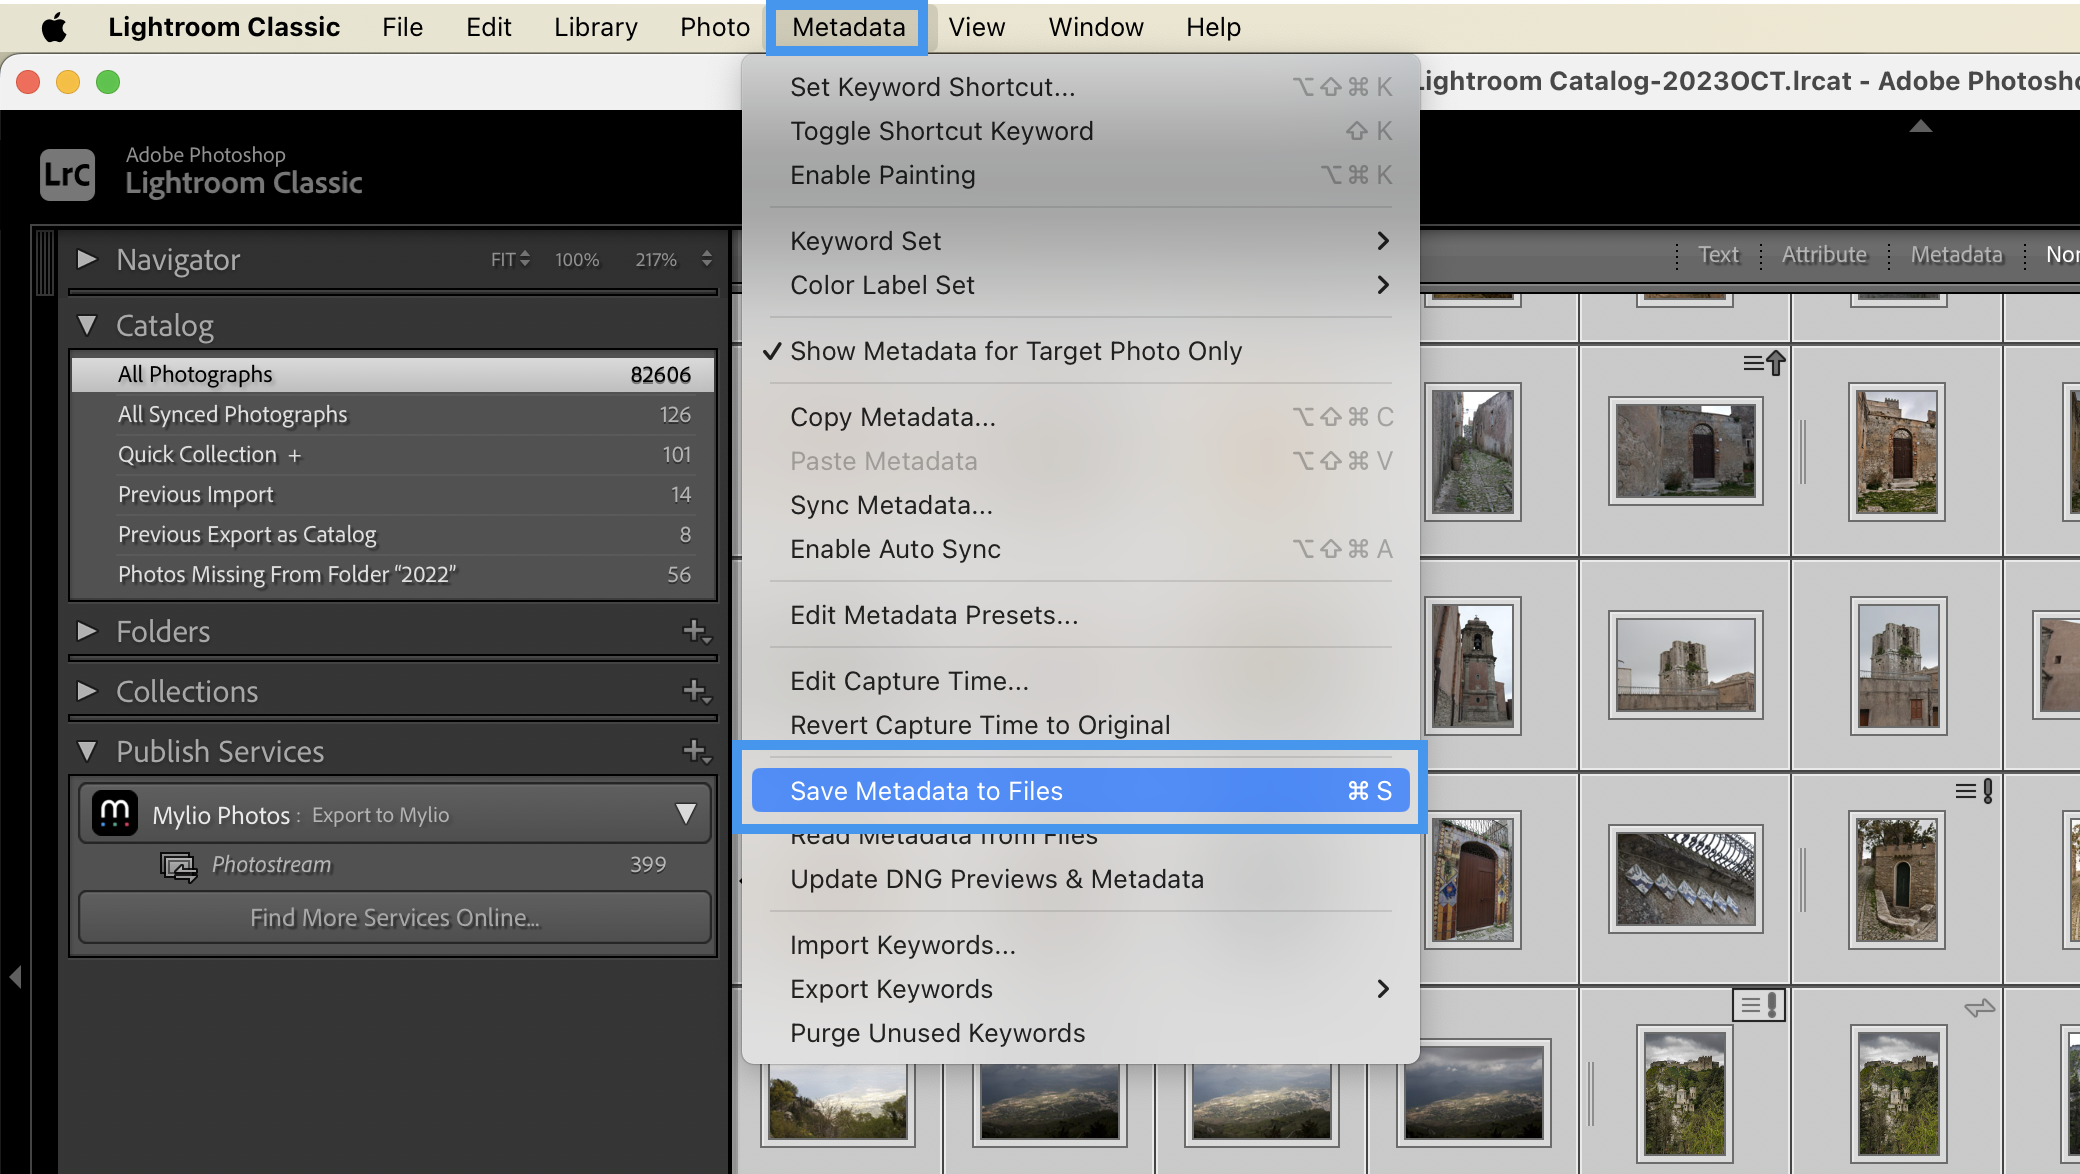
- Go to the Library module, select Catalog in the left panel, then choose All Photographs.
- On the keyboard, enter
cmd/ctrl + Ato Select All. - Open the Metadata menu in the menu bar, choose Save Metadata to Files, then click Continue. Depending on the size of your library, this may take some time.
![]()
- Open Mylio Photos.
- Locate the folders where your Lightroom images are stored, and use the Link Them option to Add Media in Mylio Photos. This will allow Mylio Photos to catalog your media without moving it from its current location.
Viewing Lightroom’s Develop Edits in Mylio Photos
- Before getting started, set up the Mylio Photos plugin for Lightroom Classic.
- Users can choose to select individual edited images to show in Mylio Photos or show all edits.
- To show edits for ALL images:
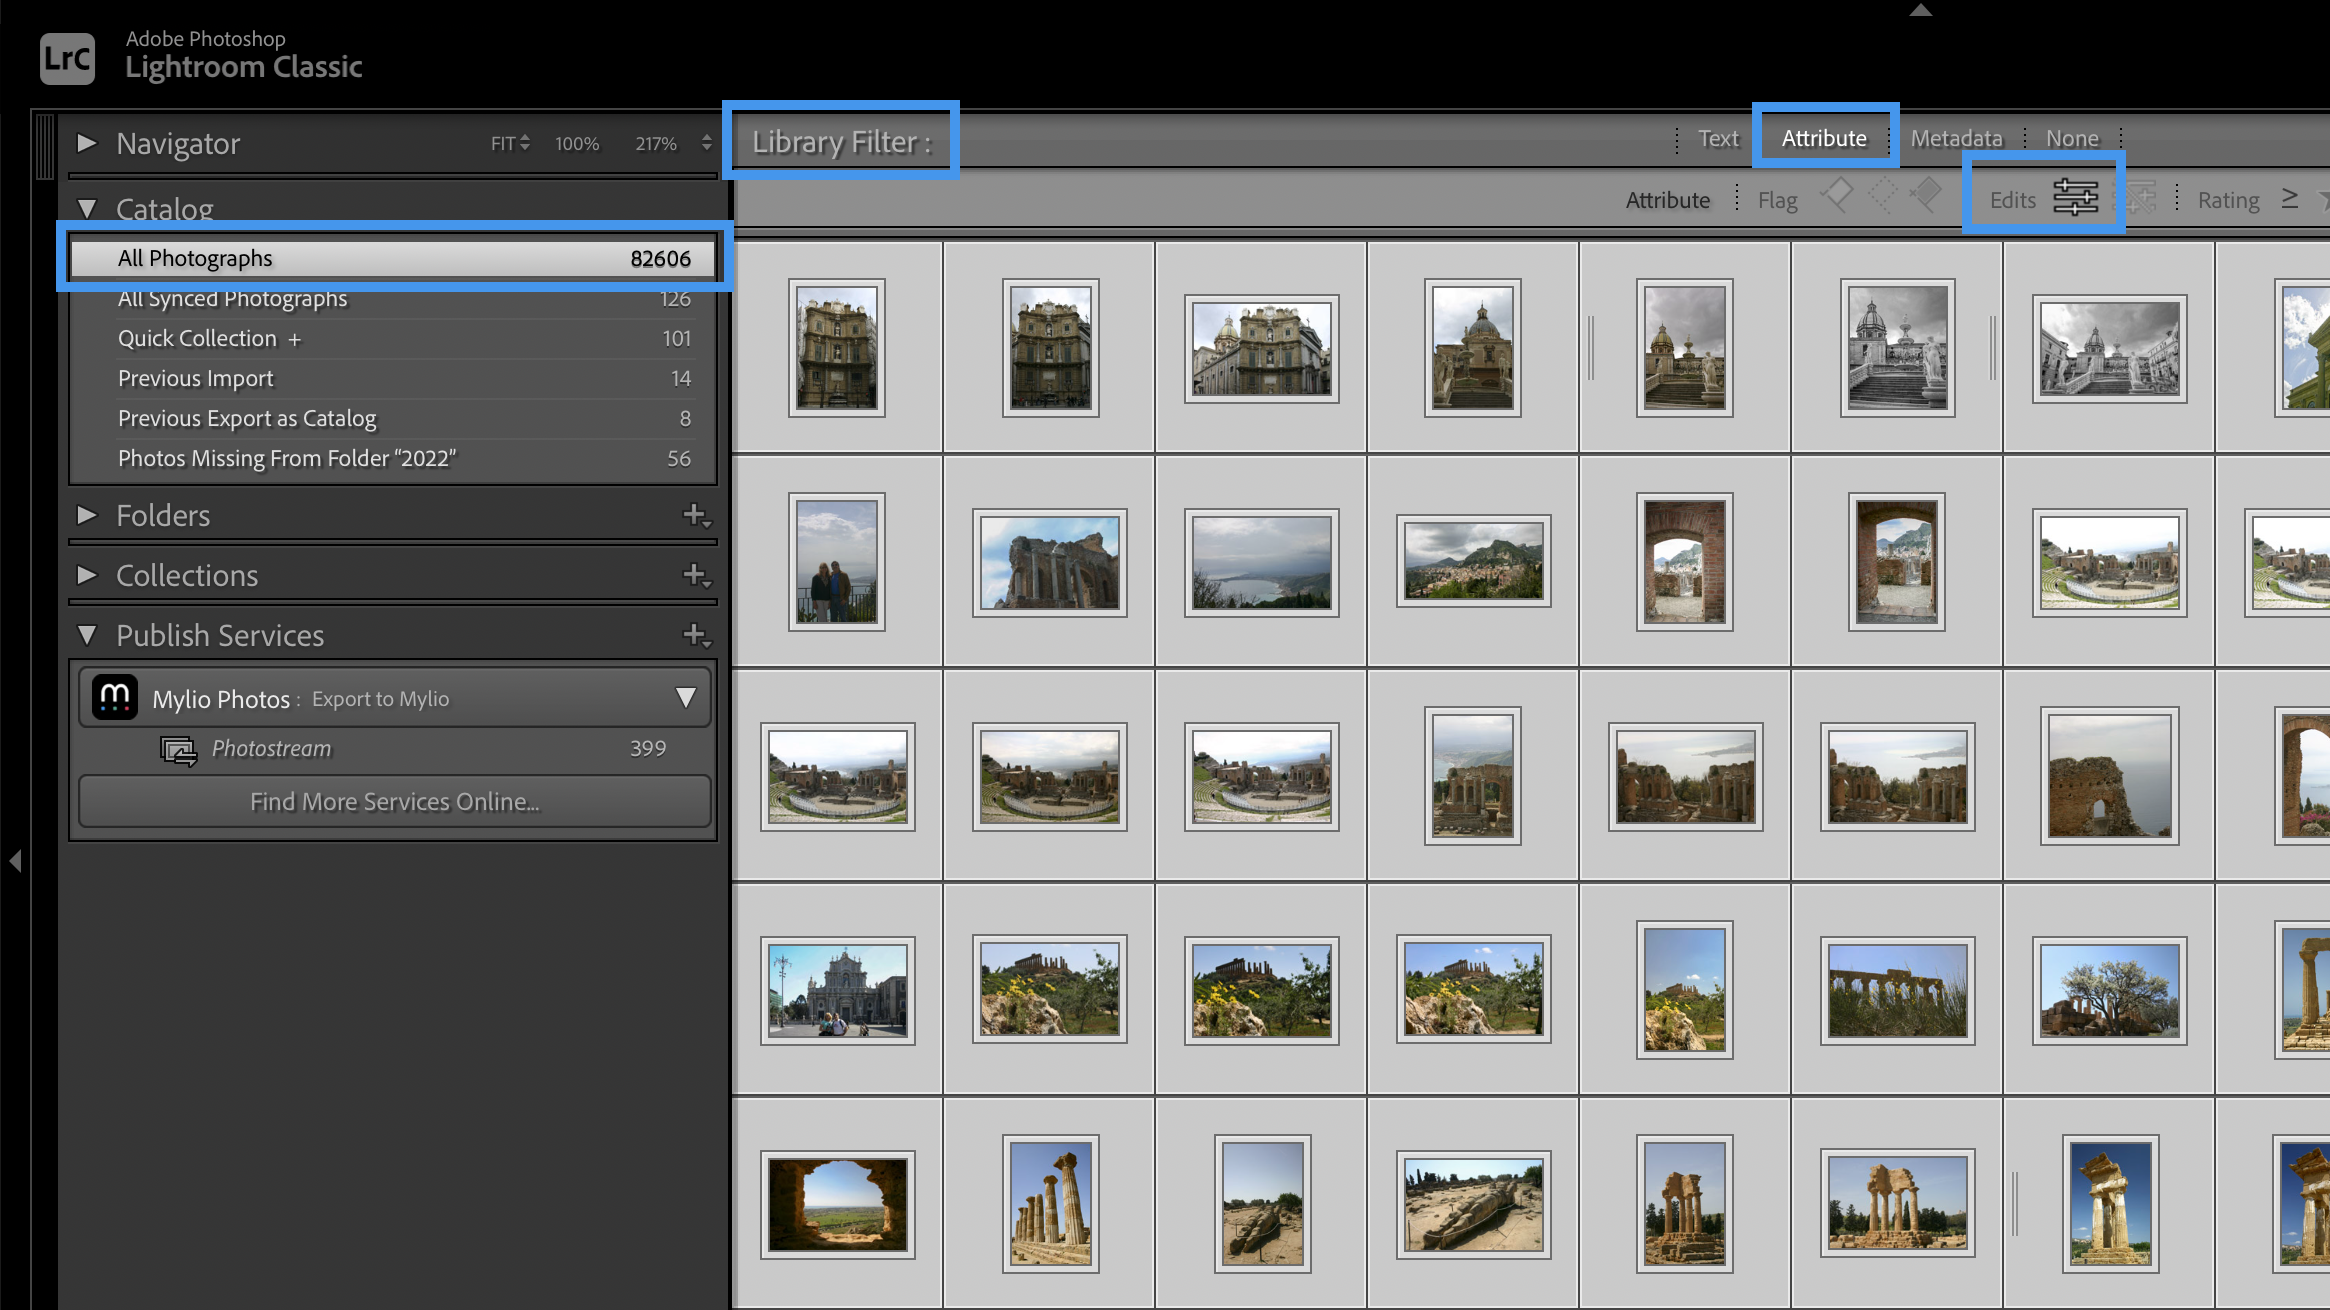
- In Lightroom, from Library > Catalog > All Photographs, use Library Filter > Attribute > Edits > Edited Photos Only to show only edited media.
![]()
- On the keyboard, enter
Cmd/Ctrl + Ato Select All.
- In Lightroom, from Library > Catalog > All Photographs, use Library Filter > Attribute > Edits > Edited Photos Only to show only edited media.
- To show edits for selected images:
- In Lightroom, select the images you wish to display with edits in Mylio Photos.
- To show edits for ALL images:
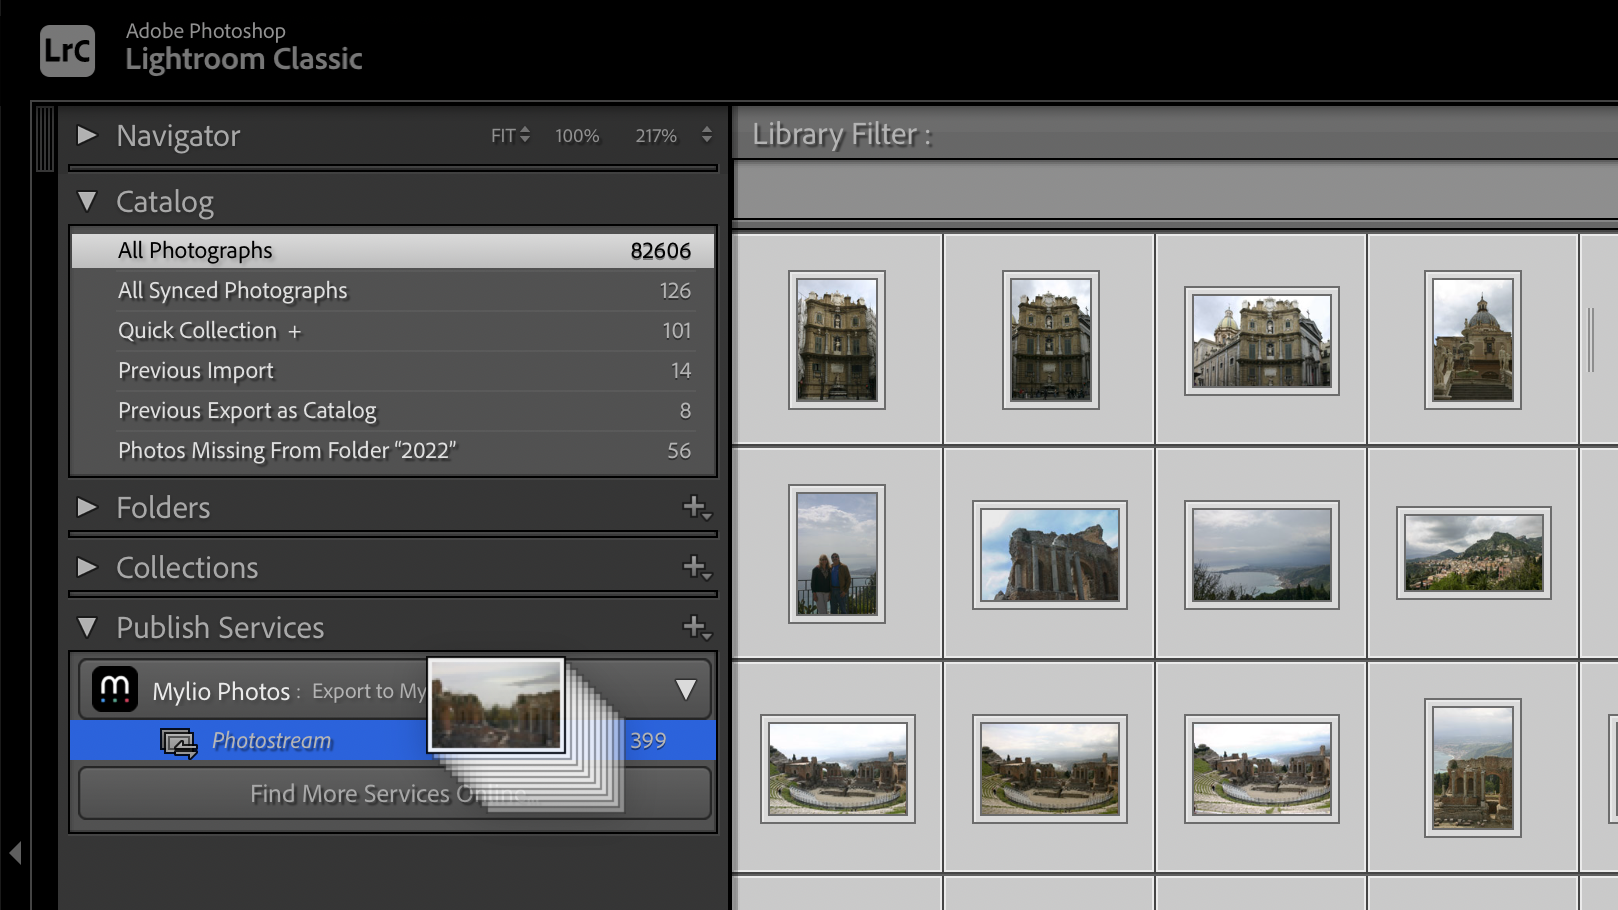
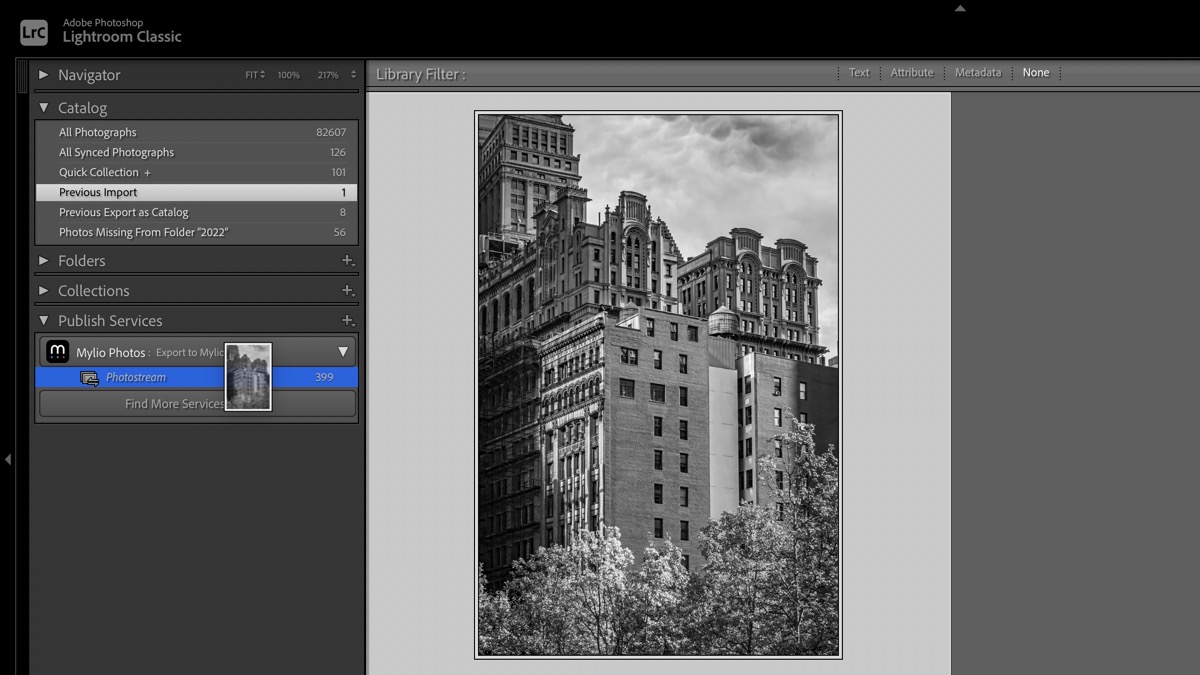
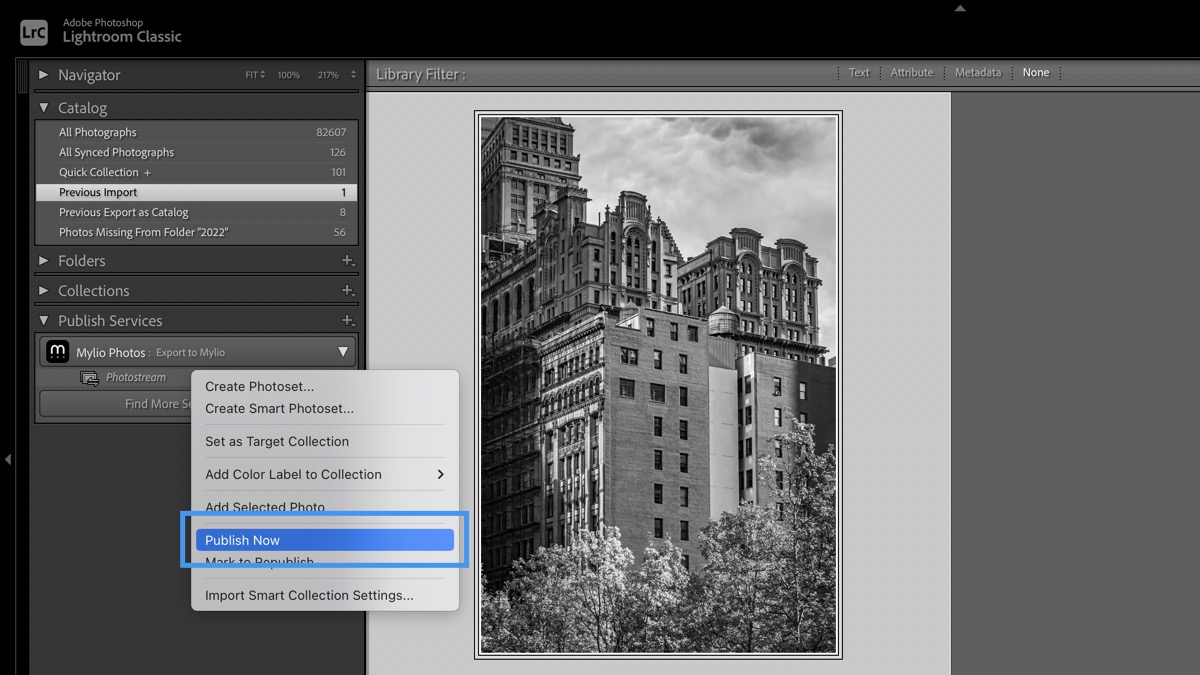
- Drag your edited photos to the Photostream under Mylio Photos in the Publish Services section. Open the Photostream and click Publish. This will create display images with your Lightroom edits. If you’re publishing a large number of images, this can take some time to process.
![]()
- Upon returning to Mylio Photos, your display images will be stacked with the Original, unedited photos.
Once Lightroom Classic has created XMP files for your library and any images you wish to view with edits have been published using the Mylio Photos plugin, you can quit Lightroom Classic and work exclusively with Mylio Photos as your primary digital asset manager.
- Integrating Mylio Photos into a Lightroom Classic Workflow
-
When working with applications like Lightroom Classic or Mylio Photos, the best practice is to choose one application as your primary asset manager.
If Mylio Photos is your primary asset manager (preferred), you can use Lightroom Classic as an external editor.
If Lightroom Classic is your primary asset manager, you can use Mylio Photos’ Dynamic Search, QuickFilters, and other views to browse and enjoy your library. Mylio Photos+ subscribers can also use cloud-independent sync to access media across multiple devices and automate their backup process.
Using Lightroom Classic as an External Editor
Using Mylio Photos’ Open With > Lightroom Classic option is designed for those who want to use Mylio Photos as their primary photo organizer and wish to access Lightroom Classic’s editing capabilities.
- Before getting started, set up the Mylio Photos plugin for Lightroom Classic.
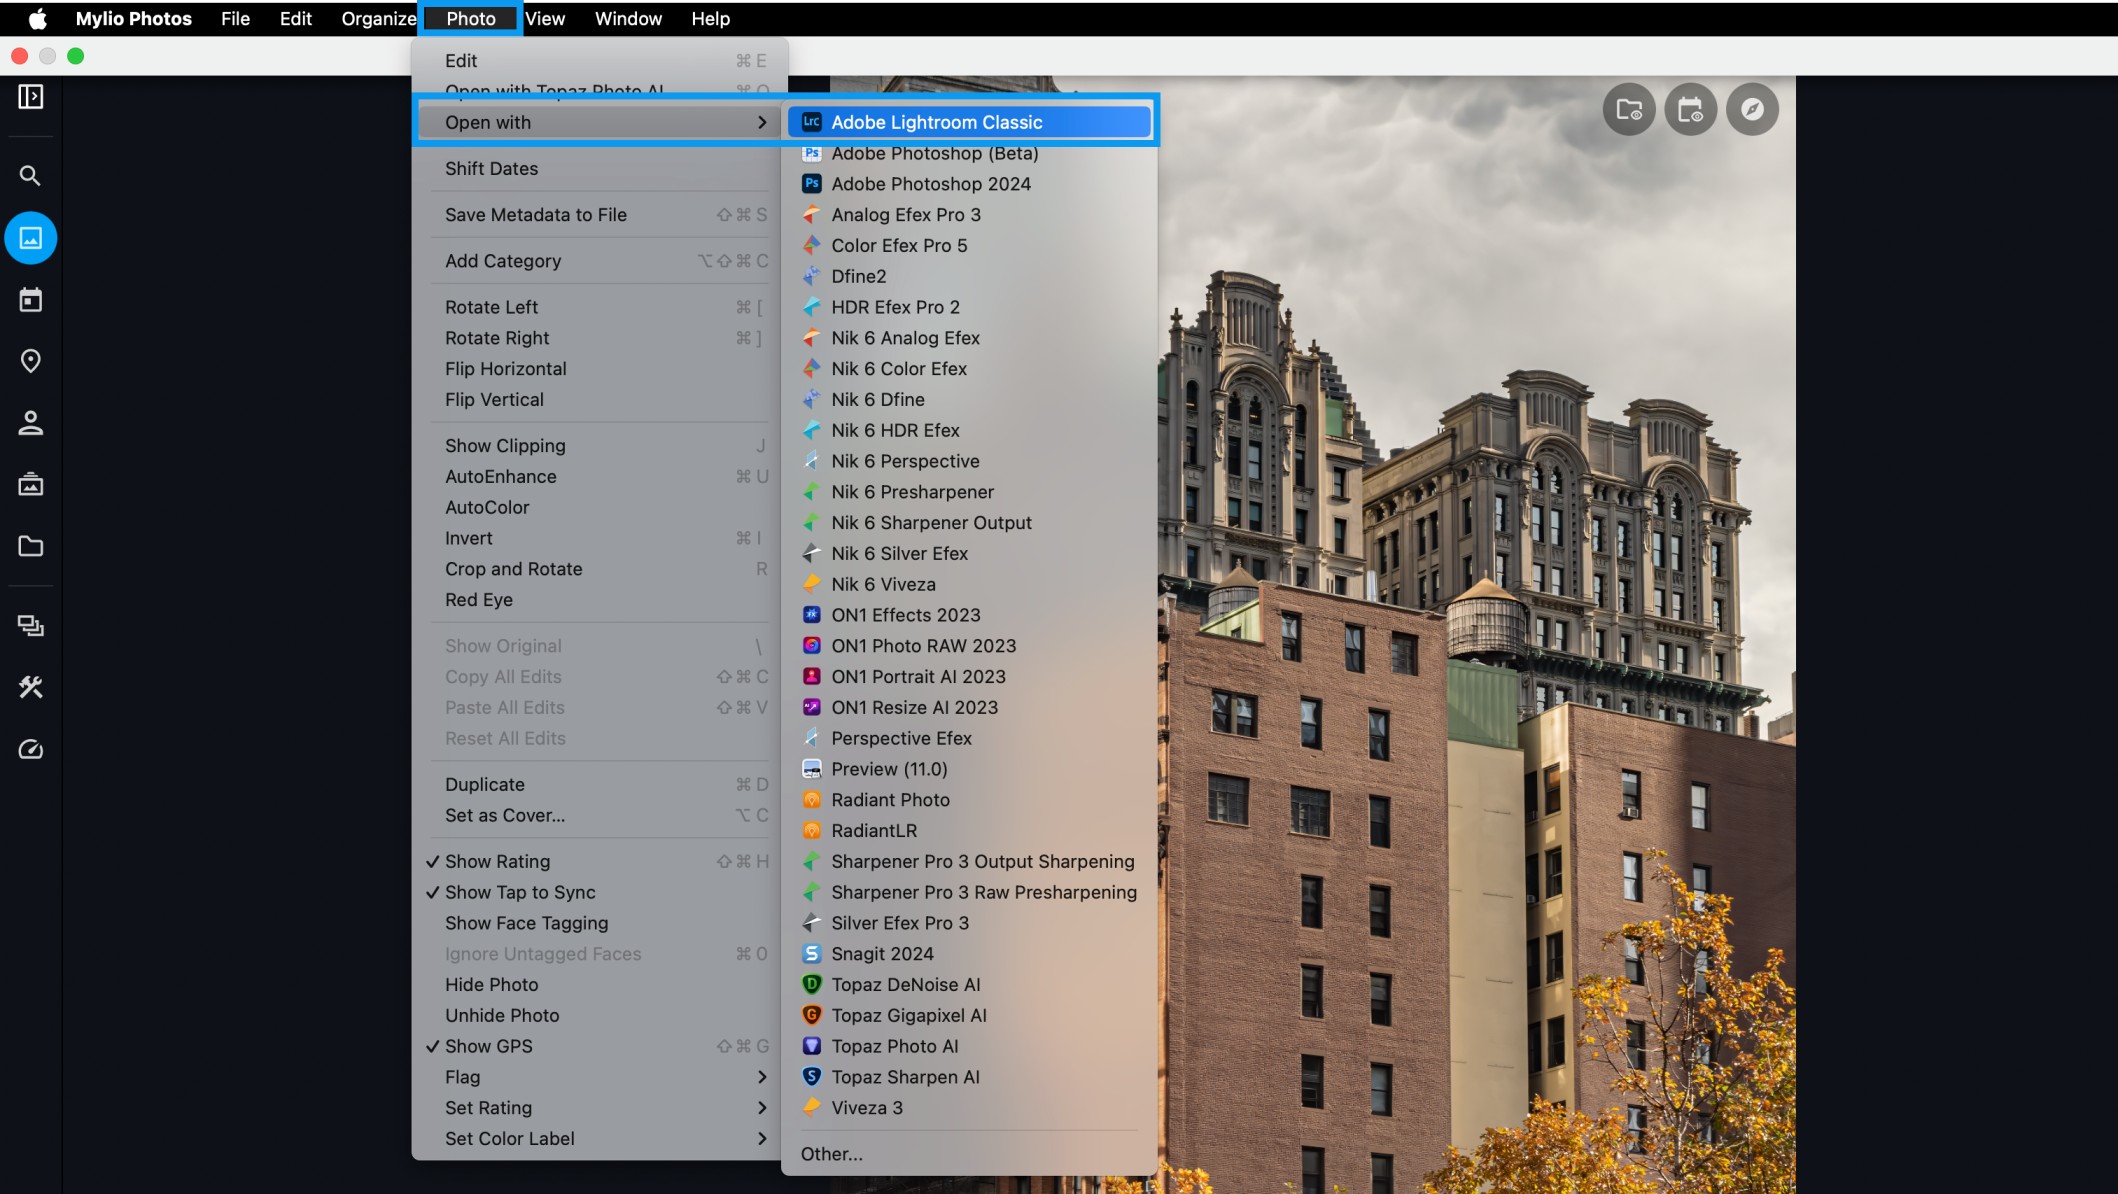
- Select the images you wish to edit, then go to the Photo menu in the operating system menu bar. Choose Open With, then select Lightroom Classic. This will launch Lightroom Classic’s import screen.
![]()
- Lightroom has several import options. These are the recommended settings:
- The source folder is automatically selected based on the image(s) you’re sending from Mylio Photos.
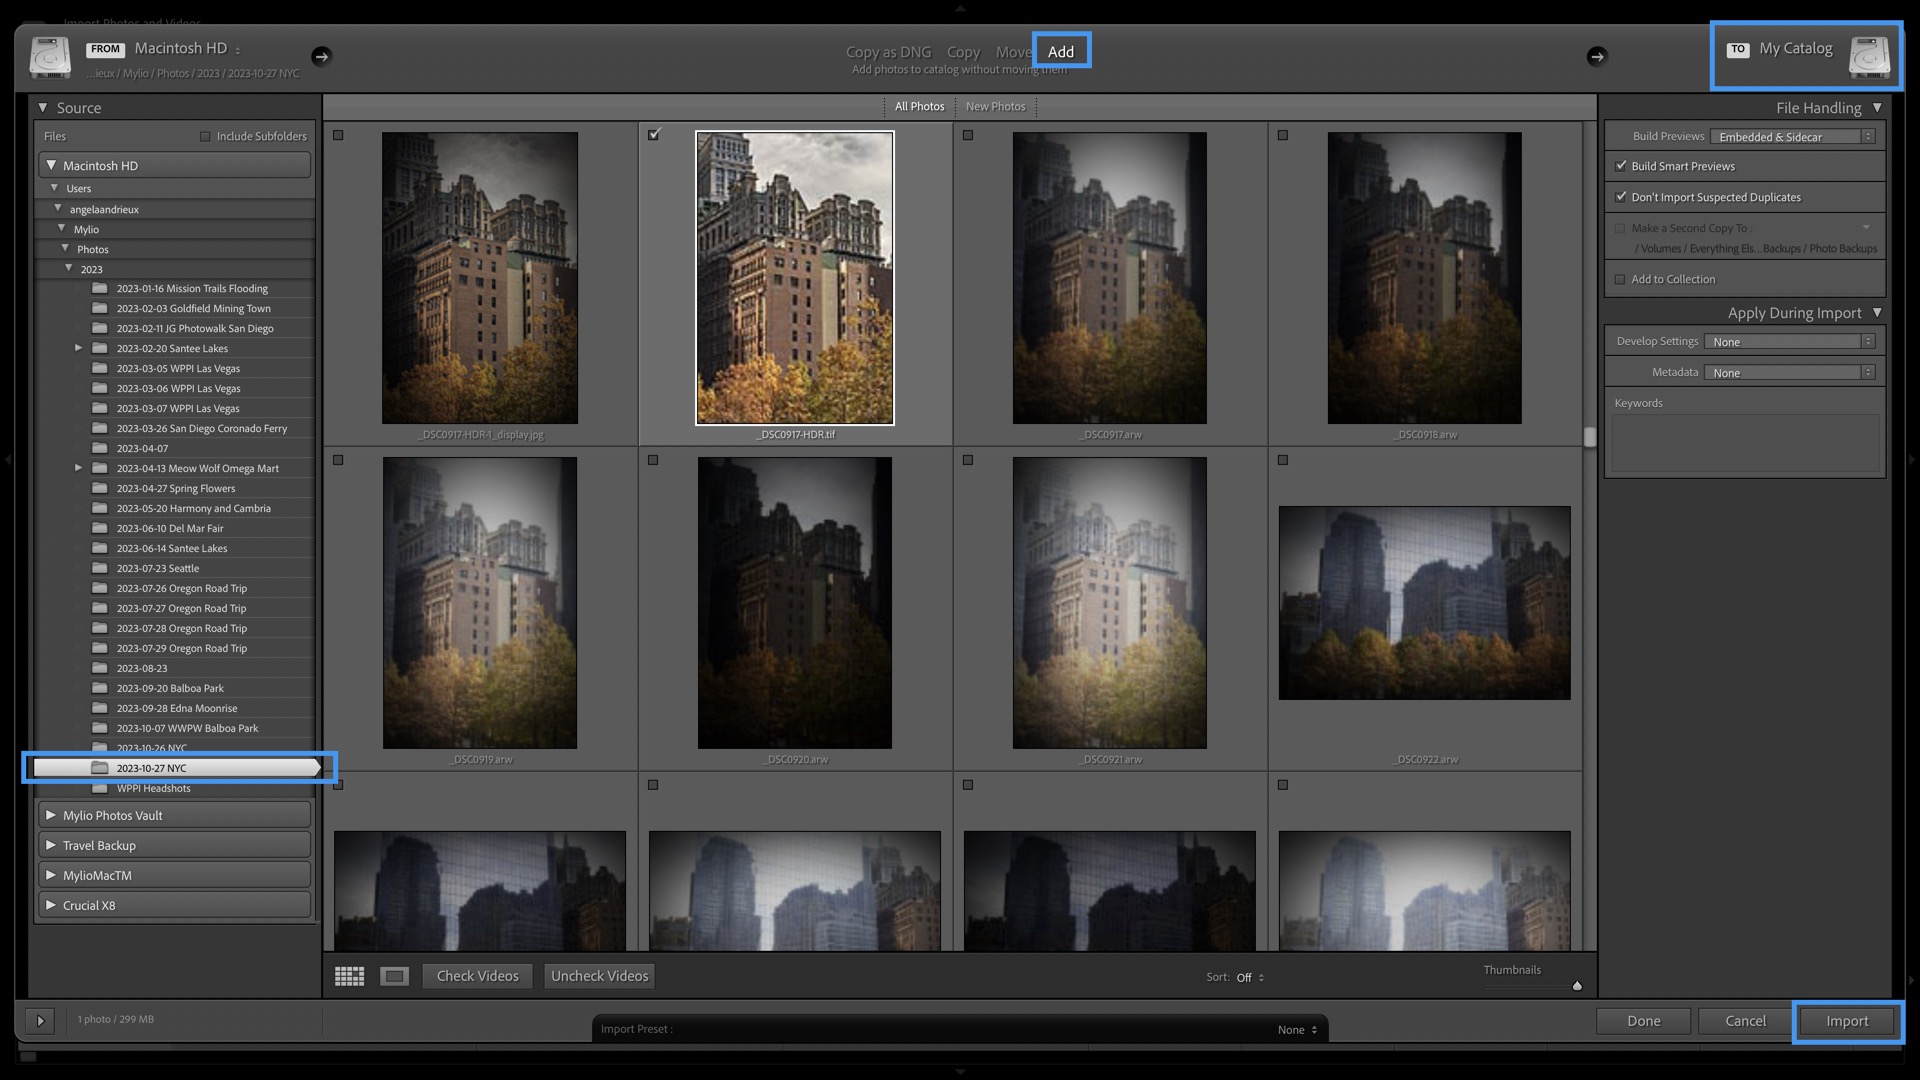
- You can Copy as DNG, Copy, Move, or Add. We recommend you select Add. This will add your photo to your Lightroom Library without moving it from its original location.
![]()
- The destination will be your primary Lightroom Catalog.
- Click Import to bring your photo into Lightroom.
- From Lightroom’s Develop module, edit as desired.
![]()
- After editing, return to the Library module and drag your edited photo(s) to the Photostream under Mylio Photos in the Publish Services section. Right-click on the Photostream and choose Publish, or Open the Photostream and click Publish. This will create a display image with your Lightroom edits.
![]()
- Upon returning to Mylio Photos, your display image will be stacked with the Original, unedited photo. To access your full-resolution file with edits, open Lightroom and locate the file in your Mylio Photostream under Publish Services.
Using Mylio Photos with an Existing Lightroom Classic Catalog
If you rely on Lightroom Classic as your main asset manager, you can utilize Mylio Photos’ Dynamic Search, QuickFilters, and various Views to explore your photo library. Mylio Photos+ subscribers can additionally benefit from cloud-independent sync and remote access, allowing them to work with their media on multiple devices and streamline their backup procedures.
- Save your Lightroom Catalog information to XMP files using the steps above.
- Open Mylio Photos. Locate the folders where your Lightroom images are stored, and use the Link Them option to Add Media in Mylio Photos. This will allow Mylio Photos to catalog your media without moving it from its current location.
- If desired, use the Mylio Photos Lightroom plugin to view edits from the Develop module in your Mylio Photos Library by following the steps above.
Metadata Handling Considerations when Working with Lightroom Classic and Mylio Photos
Lightroom is consistent with most file types, allowing easy editing on multiple devices when edits are saved to sidecar XMP files. With most proprietary RAW formats, Lightroom saves to and reads edits from the sidecar XMP file. With JPG, PNG, TIFF, and other open formats, Lightroom always saves edits to the original file and always reads edits from the original file.
With DNG files, Lightroom Classic saves edits to the DNG file but will read edits from either the DNG or the XMP based on the most recently modified time.
Making metadata changes in Mylio Photos will create an XMP file that often has a more recent modified time. When Lightroom Classic reads the metadata for that file where the XMP is more recent, either on import on a second device or by folder synchronization or right-clicking and reading metadata, it will not import the edits in the DNG and reset any existing edits.
Post your comment on this topic.