
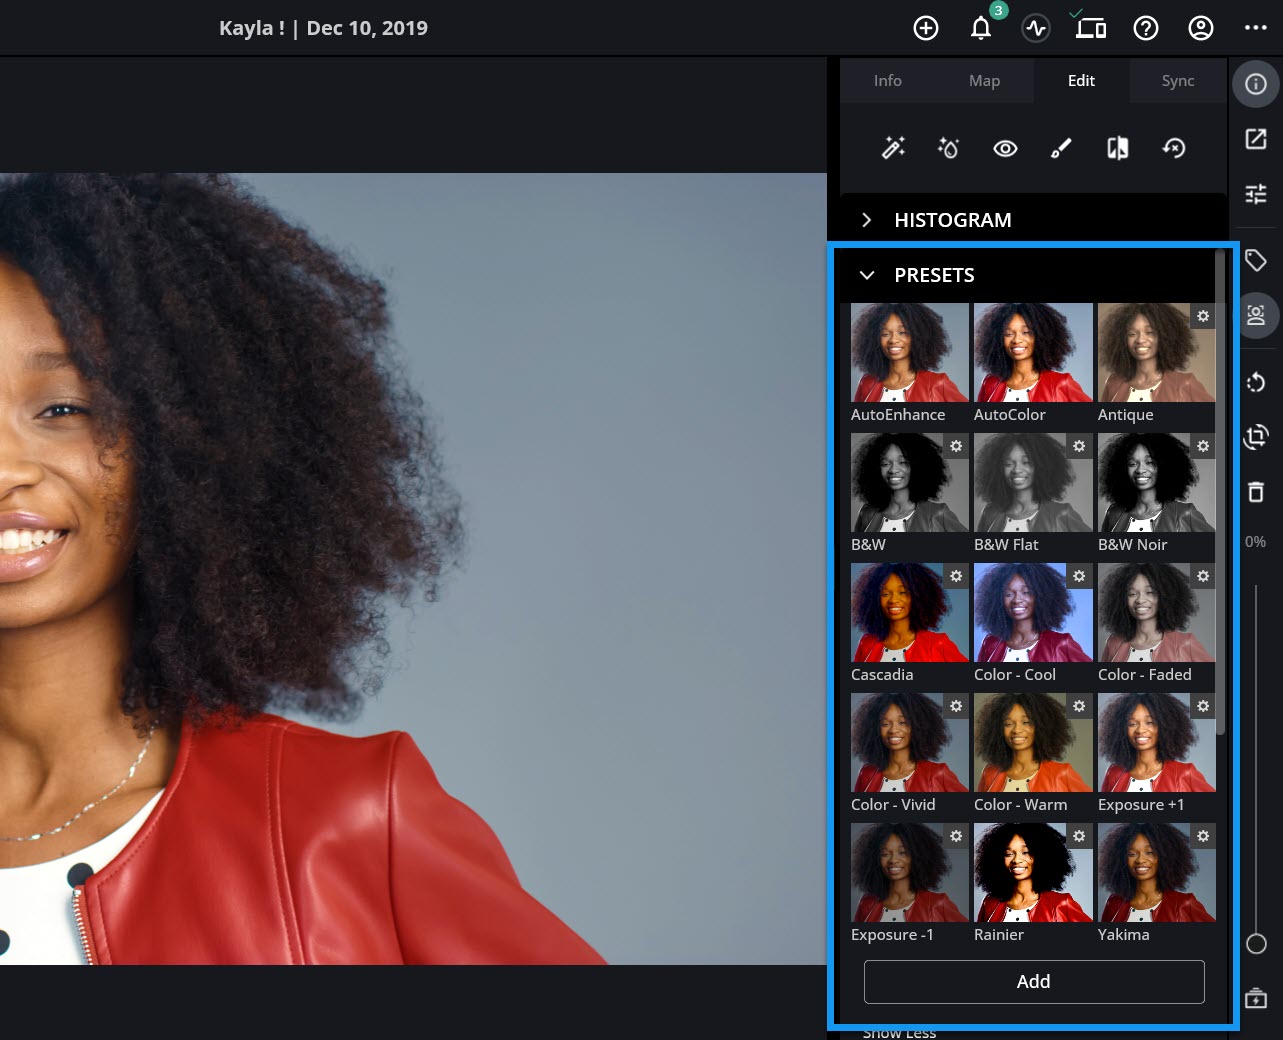
Edit Presets allow you to change your photo with a single click instantly. Each Preset includes a saved adjustment set that applies a unique, stylized look to your photograph. You can use the presets included with Mylio Photos or create your own. Presets can be used as a one-click solution to edit a picture, as a learning tool to see how the adjustments affect your photo, or as a starting point for more creative editing.
- Open an image in Single Photo View, then click the edit icon
![]() to open the Edit Panel.
to open the Edit Panel. - On a computer or tablet, twirl down the arrow
![]() next to Presets, then click on a preset to apply it to your photo
next to Presets, then click on a preset to apply it to your photo
- On a phone, tap the Presets icon
![]() then choose a preset.
then choose a preset.
- On a phone, tap the Presets icon
- If desired, refine the results using Mylio Photos’ other editing adjustments.
- Create and Save a Custom Preset
-
If you’ve created an editing recipe you love, you can easily reuse it by saving a Custom Preset. If you’re a Mylio Photos+ subscriber, you’ll be able to access this preset from all your connected devices.
- Open an image in Single Photo View, then click the edit icon
![]() to open the Edit Panel.
to open the Edit Panel. - Edit your photo using any of Mylio Photos’ available presets and adjustment tools.
- When you’ve finished editing on a computer or tablet, scroll up to the Presets section and click the Add button at the bottom of the Presets list. (If the Add button is not visible, click Show More to reveal the rest of the list.)
- On a phone, tap the Presets icon
![]() and choose Add.
and choose Add.
- On a phone, tap the Presets icon
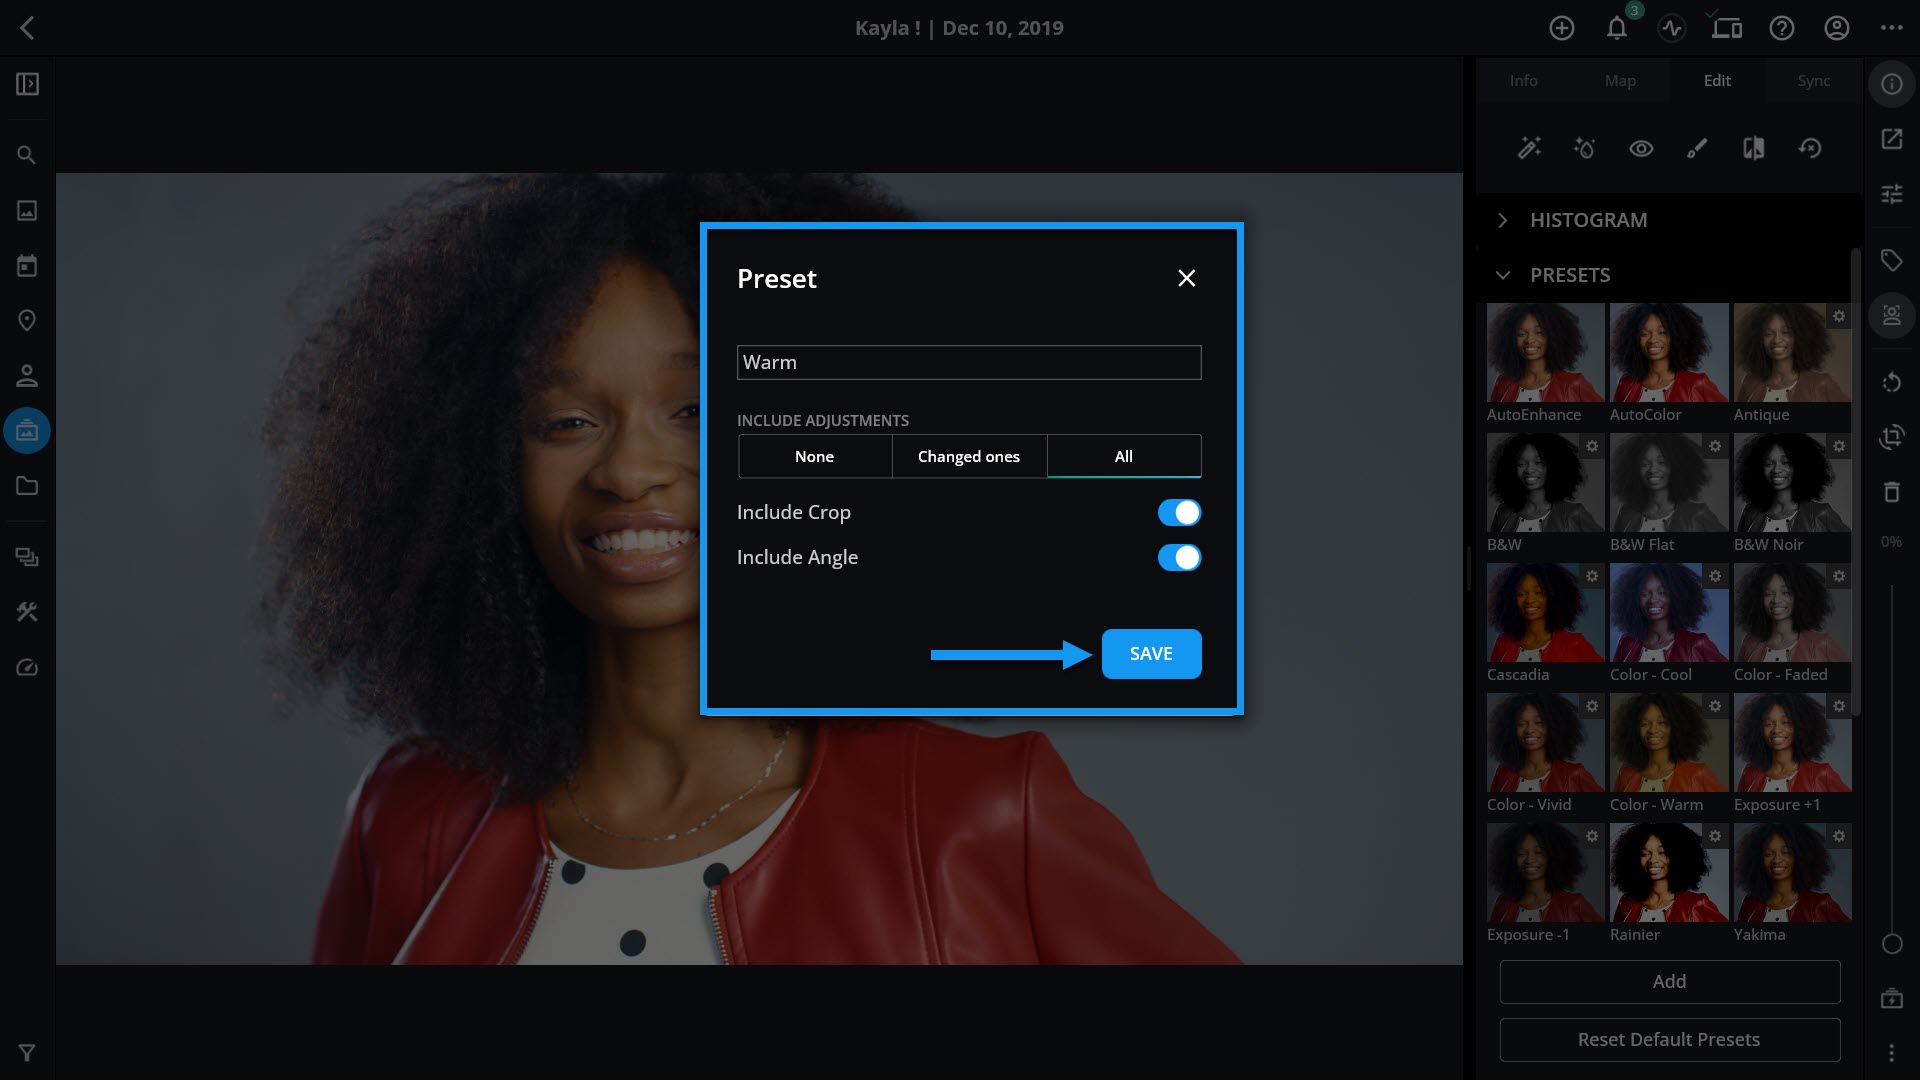
- Create a Name for your Preset. Under Include Adjustments, you have the following options:
- None – This will not save any editing adjustments but will allow you to save the Crop and Rotate settings in your Preset.
- Changed ones – This will save your editing adjustments, and when applied to another image, it will only adjust those sliders that were changed and preserve settings in sliders that are not referenced.
- All – This will save all applied editing adjustments, and when this preset is applied to another image, it will reset and adjust all sliders to match the new preset settings.
- Toggle the switch next to Include Crop if you want your custom Preset to include crop settings.
- Toggle the switch next to Include Angle if you’d like your custom Preset to include rotation settings.
- Click Save – your new Custom Preset is now ready to use on additional photos.
![]()
- Open an image in Single Photo View, then click the edit icon
- Rename a Preset
-
Assigning a descriptive name to a preset can help you quickly find it or remember its style.
- Open an image in Single Photo View, then click the edit icon
![]() to open the Edit Panel.
to open the Edit Panel. - Twirl down the arrow
![]() next to Presets.
next to Presets. - Locate the preset you’d like to rename and click on the Gear
![]() icon at the top-right of the preset.
icon at the top-right of the preset. - Select Rename.
- Enter the new name, then click the Rename button.
- Open an image in Single Photo View, then click the edit icon
- Delete a Preset
-
If you decide you don’t want a preset, you can remove it from your collection.
- Open an image in Single Photo View, then click the edit icon
![]() to open the Edit Panel.
to open the Edit Panel. - Twirl down the arrow
![]() next to Presets.
next to Presets. - Locate the preset you’d like to rename and click on the Gear
![]() icon at the top-right of the preset.
icon at the top-right of the preset. - Select Delete.
- A pop-up window will appear to confirm your choice. Click the Delete button to delete the Preset permanently.
- Open an image in Single Photo View, then click the edit icon
Post your comment on this topic.