
Device Sync Policy presets like SpaceSaver or Vault work well for most situations. But if you need more control over which files are stored on a specific device, SyncCollections give you that flexibility.
SyncCollections let you define exactly what media is synced based on criteria such as:
- Rating, Label, or Flag
- Keywords
- Folder
- Date
- File Type or File Extension
- File Size
- Category
You can also save your settings as a Custom Preset to reuse on other devices.
Here are a few example use cases for SyncCollections:
- Keep all 5-star photos of family members on your phone at optimized quality, so you always have high-quality versions to view and share.
- Back up media rated 4-stars, 5-stars, or marked with Pick flags at original quality on Mylio Drive+.
- Store RAW files from a specific camera taken within the last 90 days on your laptop for offline editing.
Adding a SyncCollection
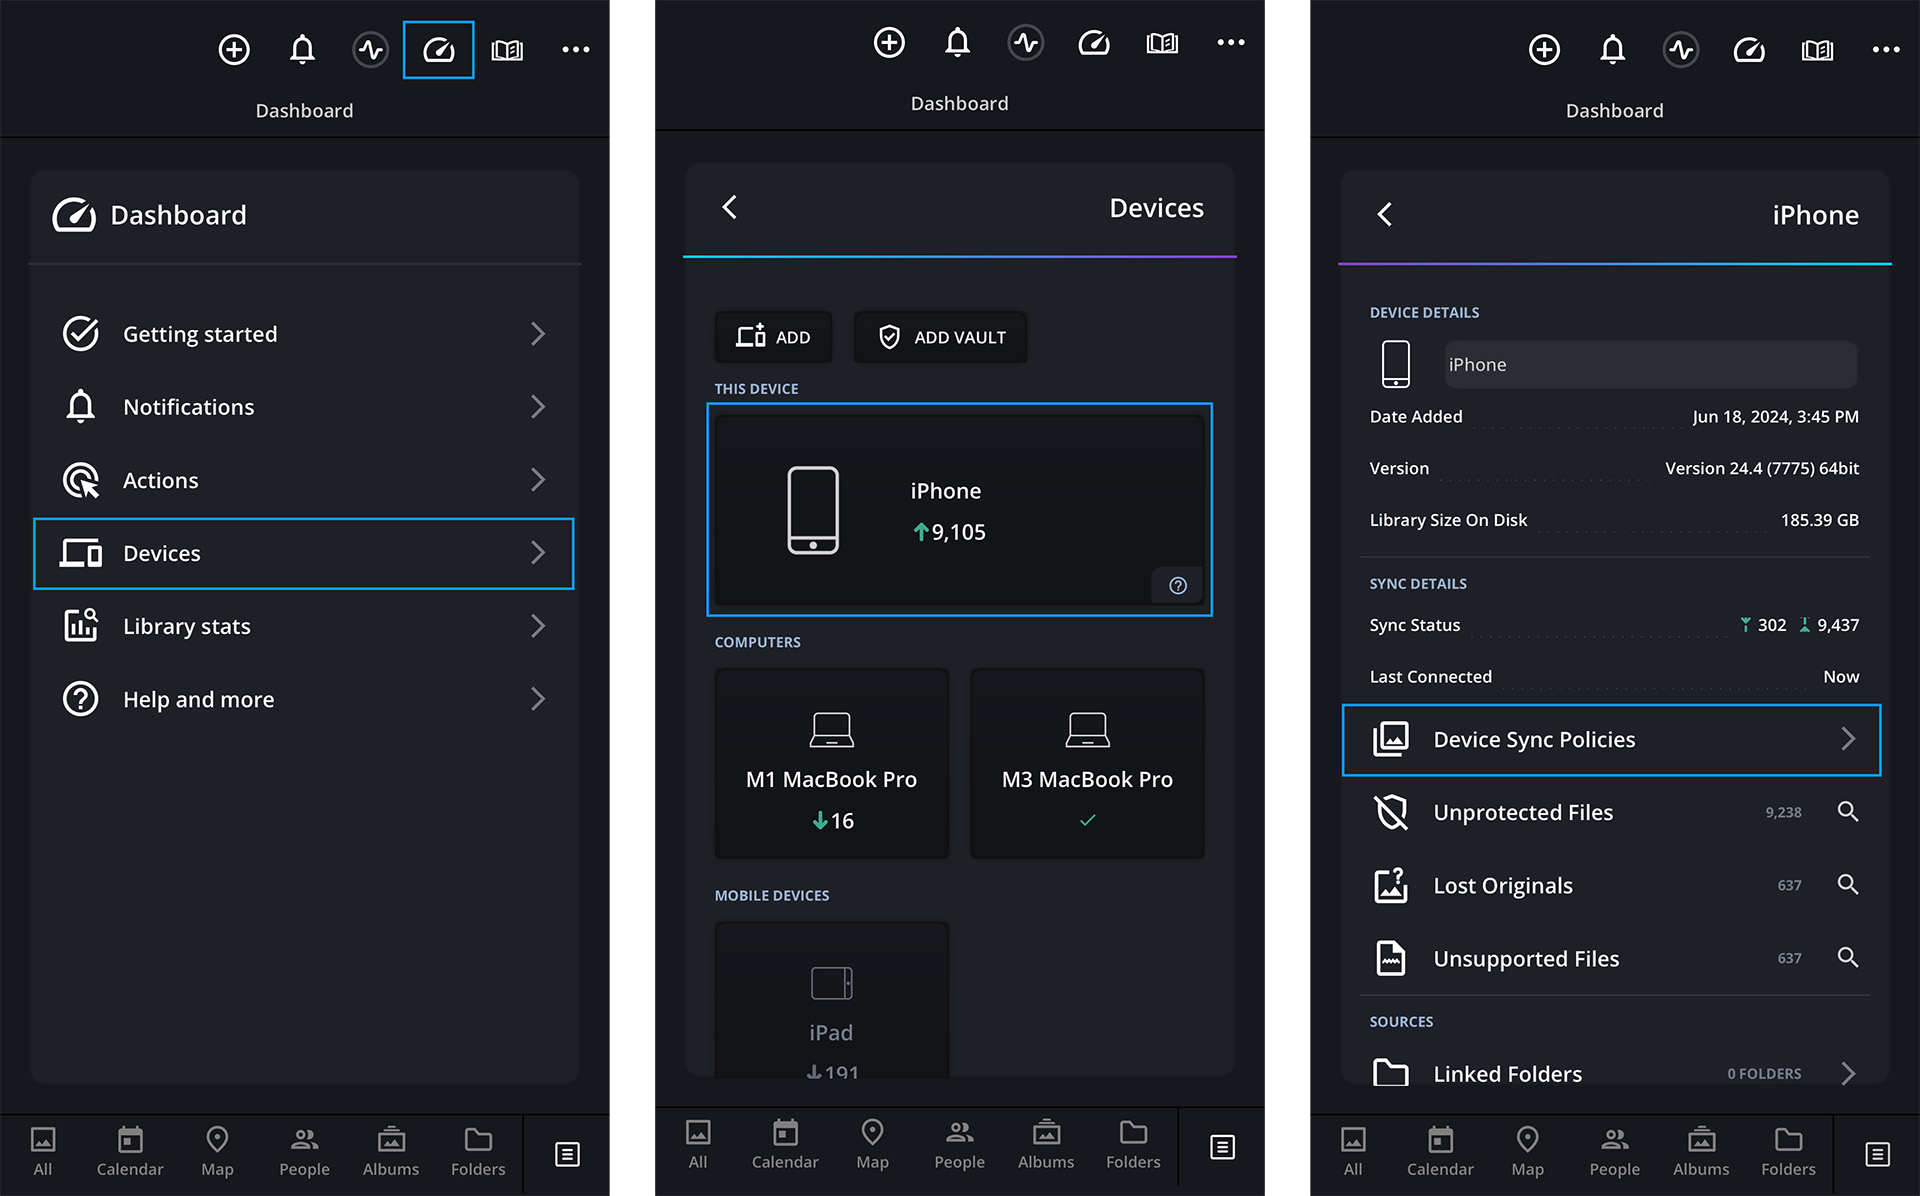
- Click the Dashboard icon
![]() in the left sidebar, then select Devices.
in the left sidebar, then select Devices. - Click on the Device Card for the device you want to configure.
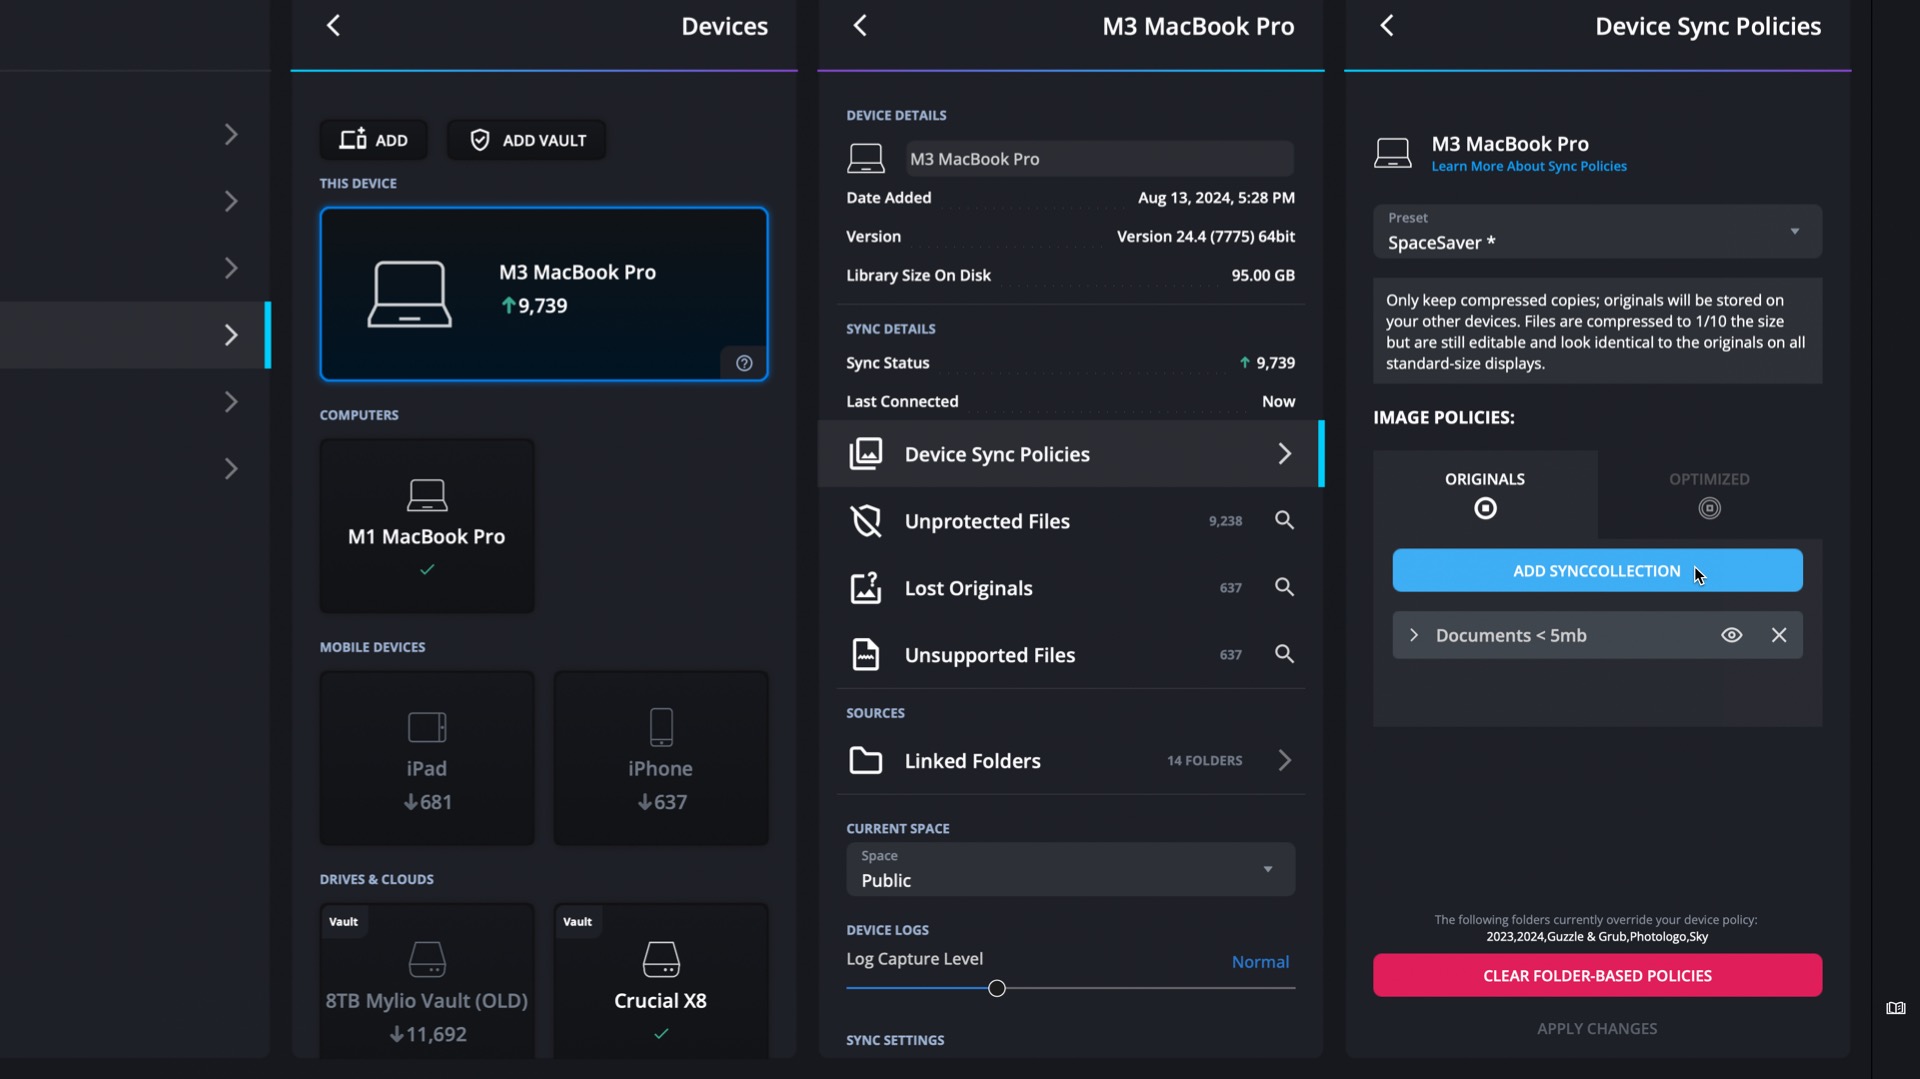
- In the Device Settings panel, click Device Sync Policies.
- Choose a sync policy preset as a starting point – SpaceSaver or Catalog Only are good options for most custom setups.
- In the Image Policies section, you’ll see two tabs: Originals and Optimized. Click the tab you want to configure, then click Add SyncCollection.
- Use the Originals tab to specify which files should be stored in full resolution.
- Use the Optimized tab todefine which files should be stored as space-saving, lower-resolution versions (~5% the size of the original).
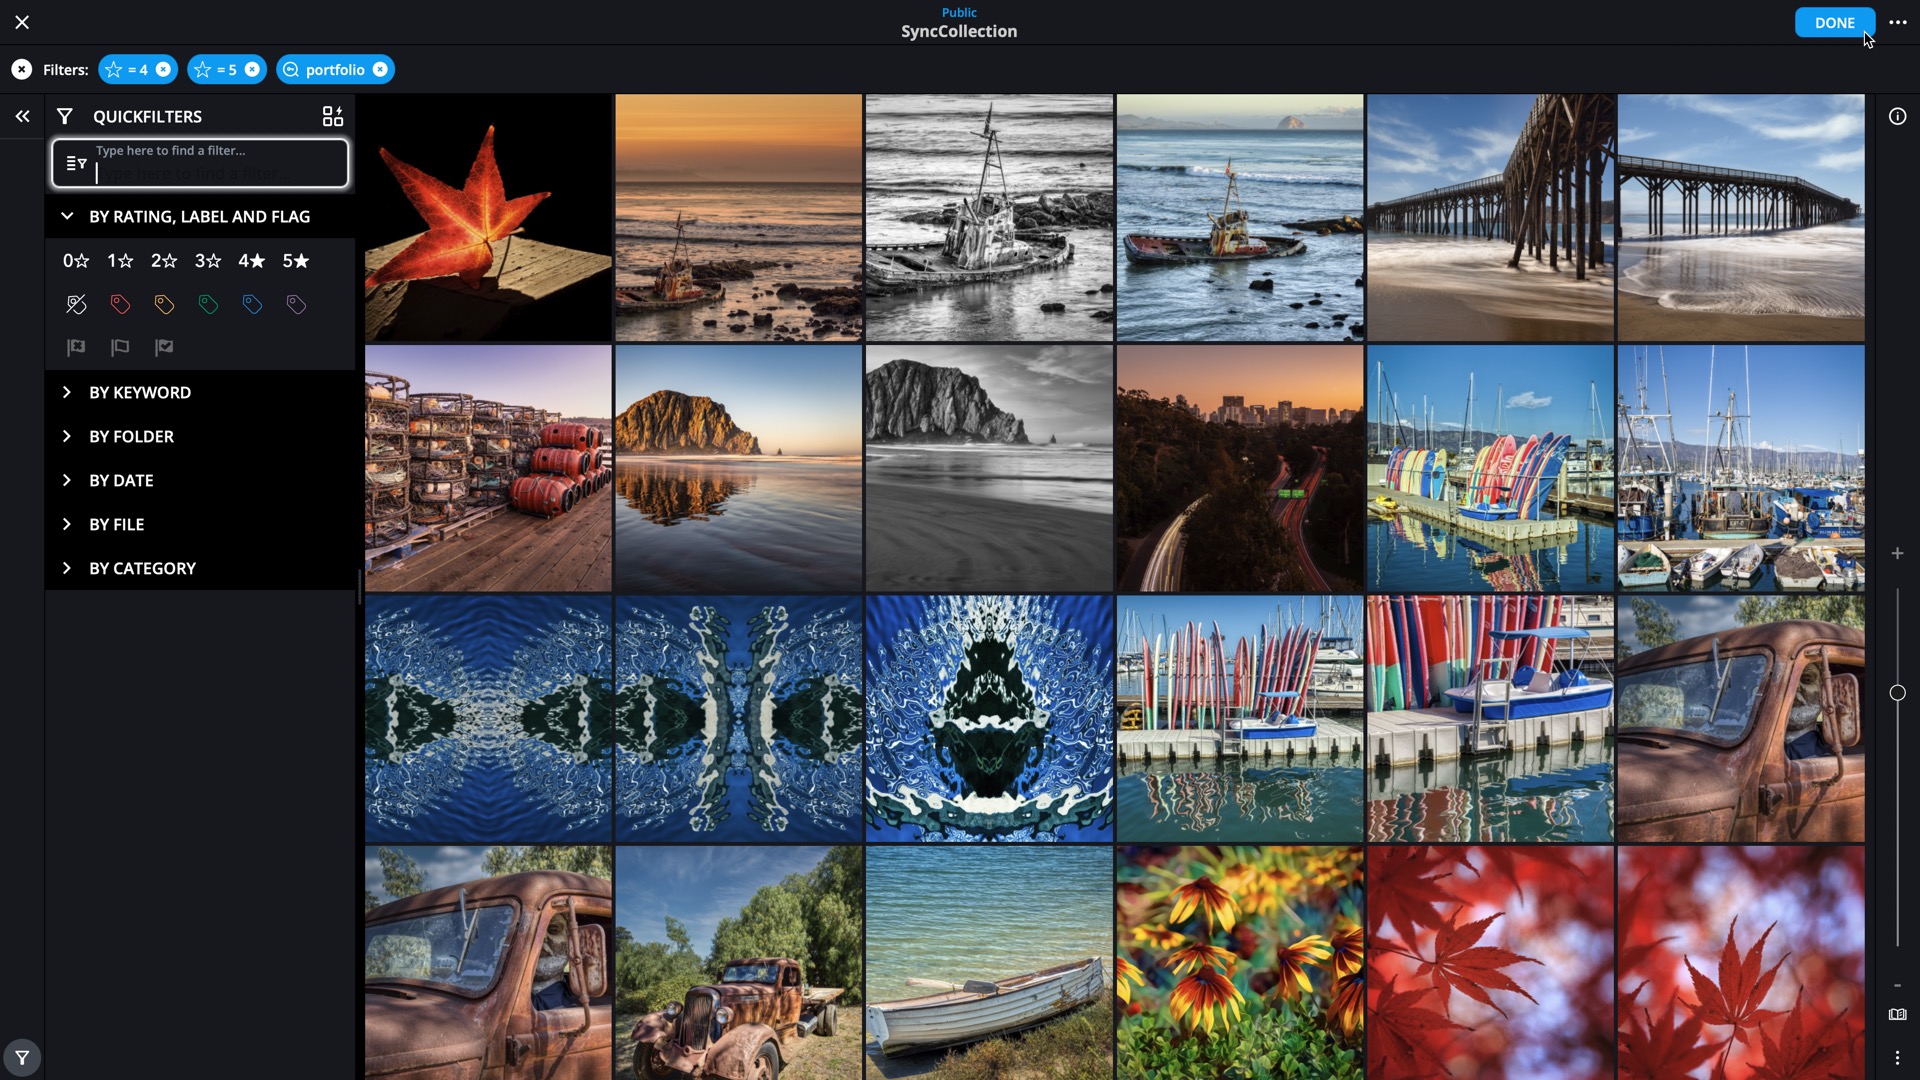
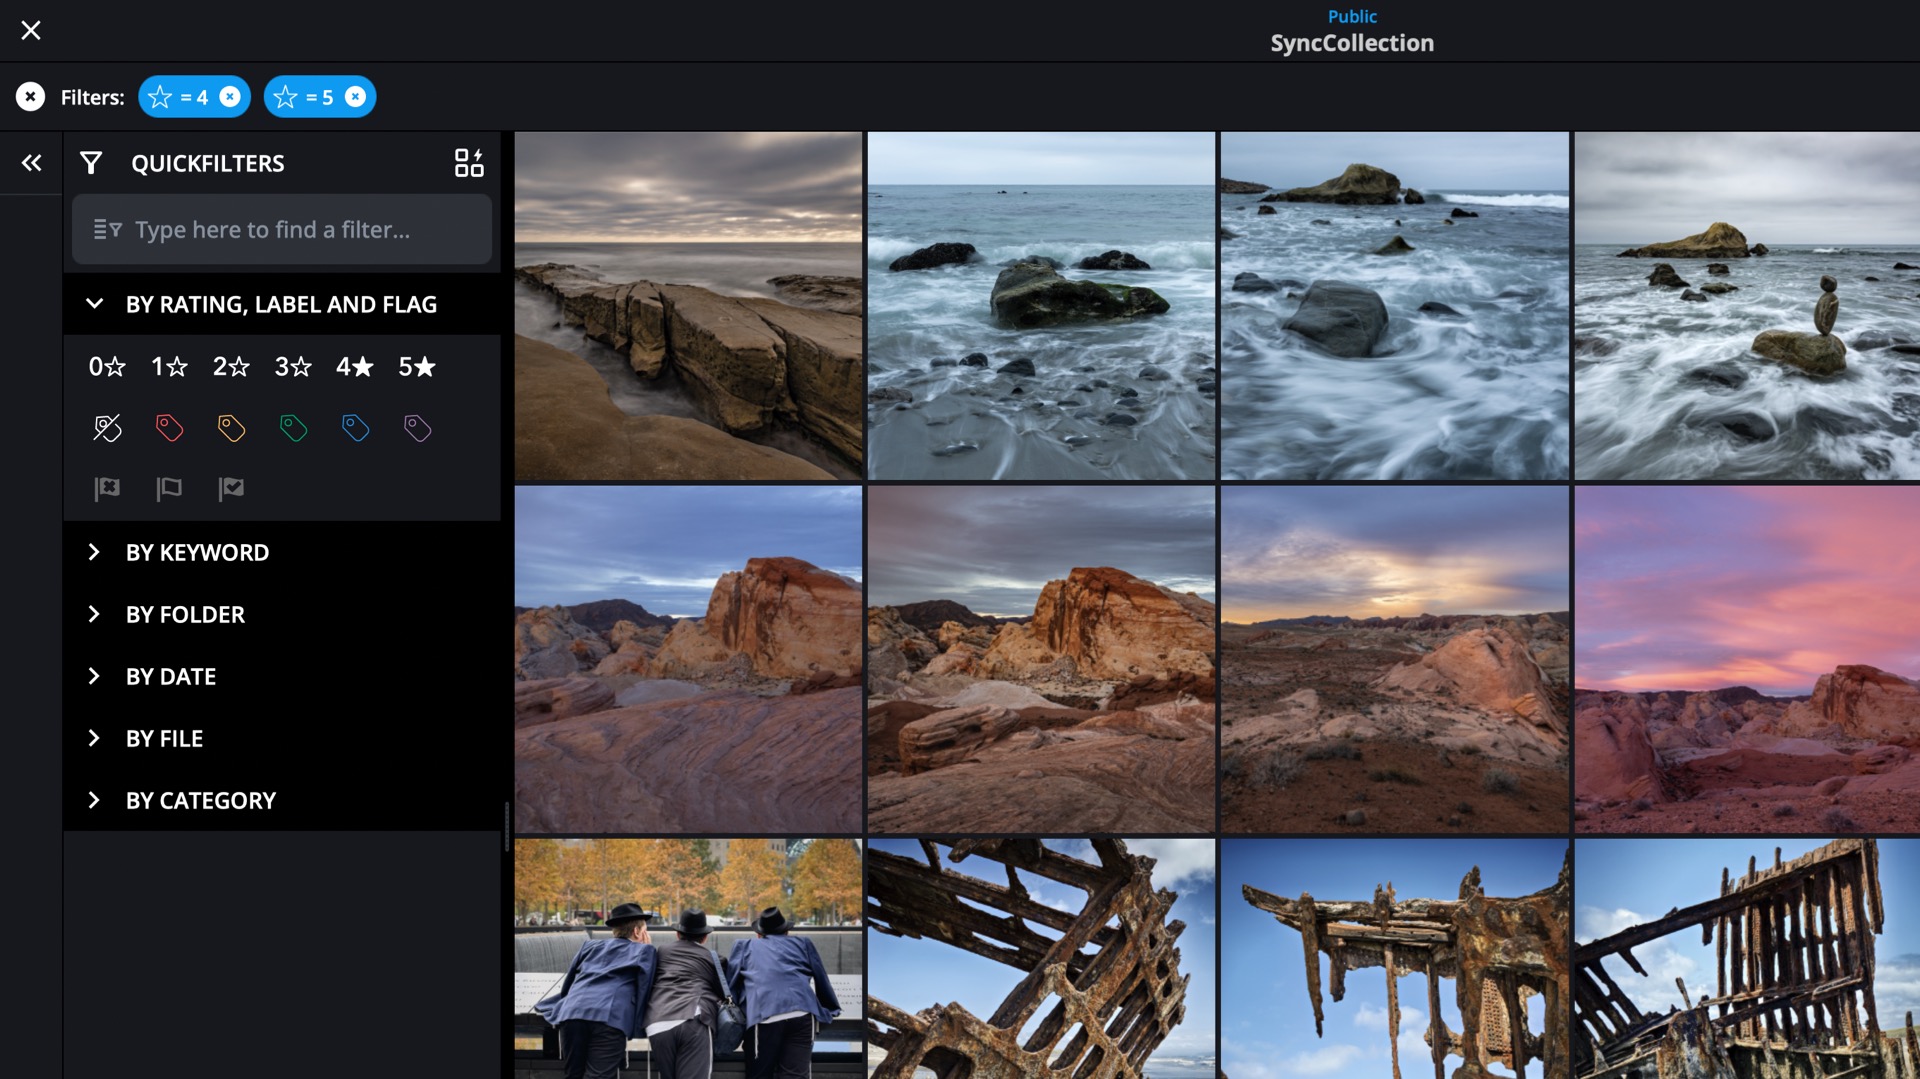
- In the SyncCollection builder, use QuickFilters to choose which files to include. You can filter by rating, label, flag, keyword, folder, date, file type, and more. the view updates in real time to show which files match your filters. When ready, click Done.
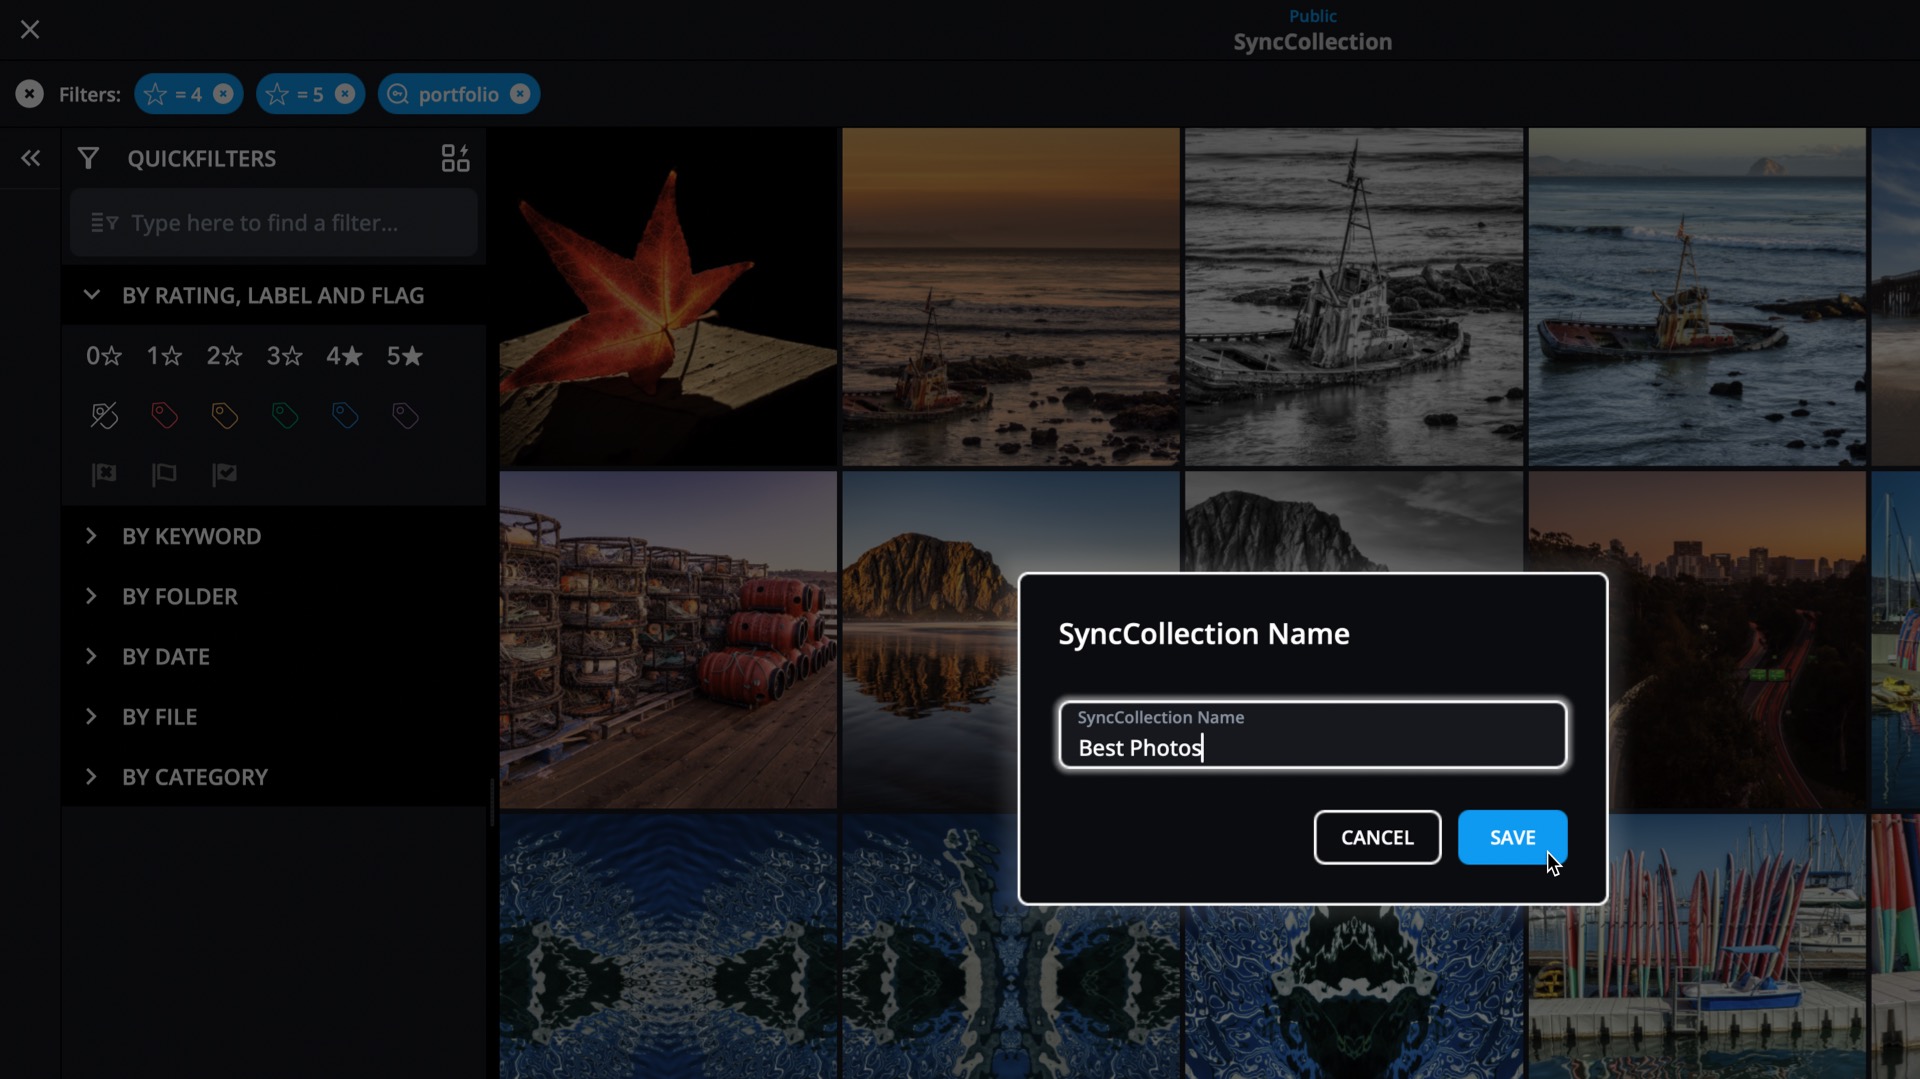
- Give your SyncCollection a descriptive name, then click Save.
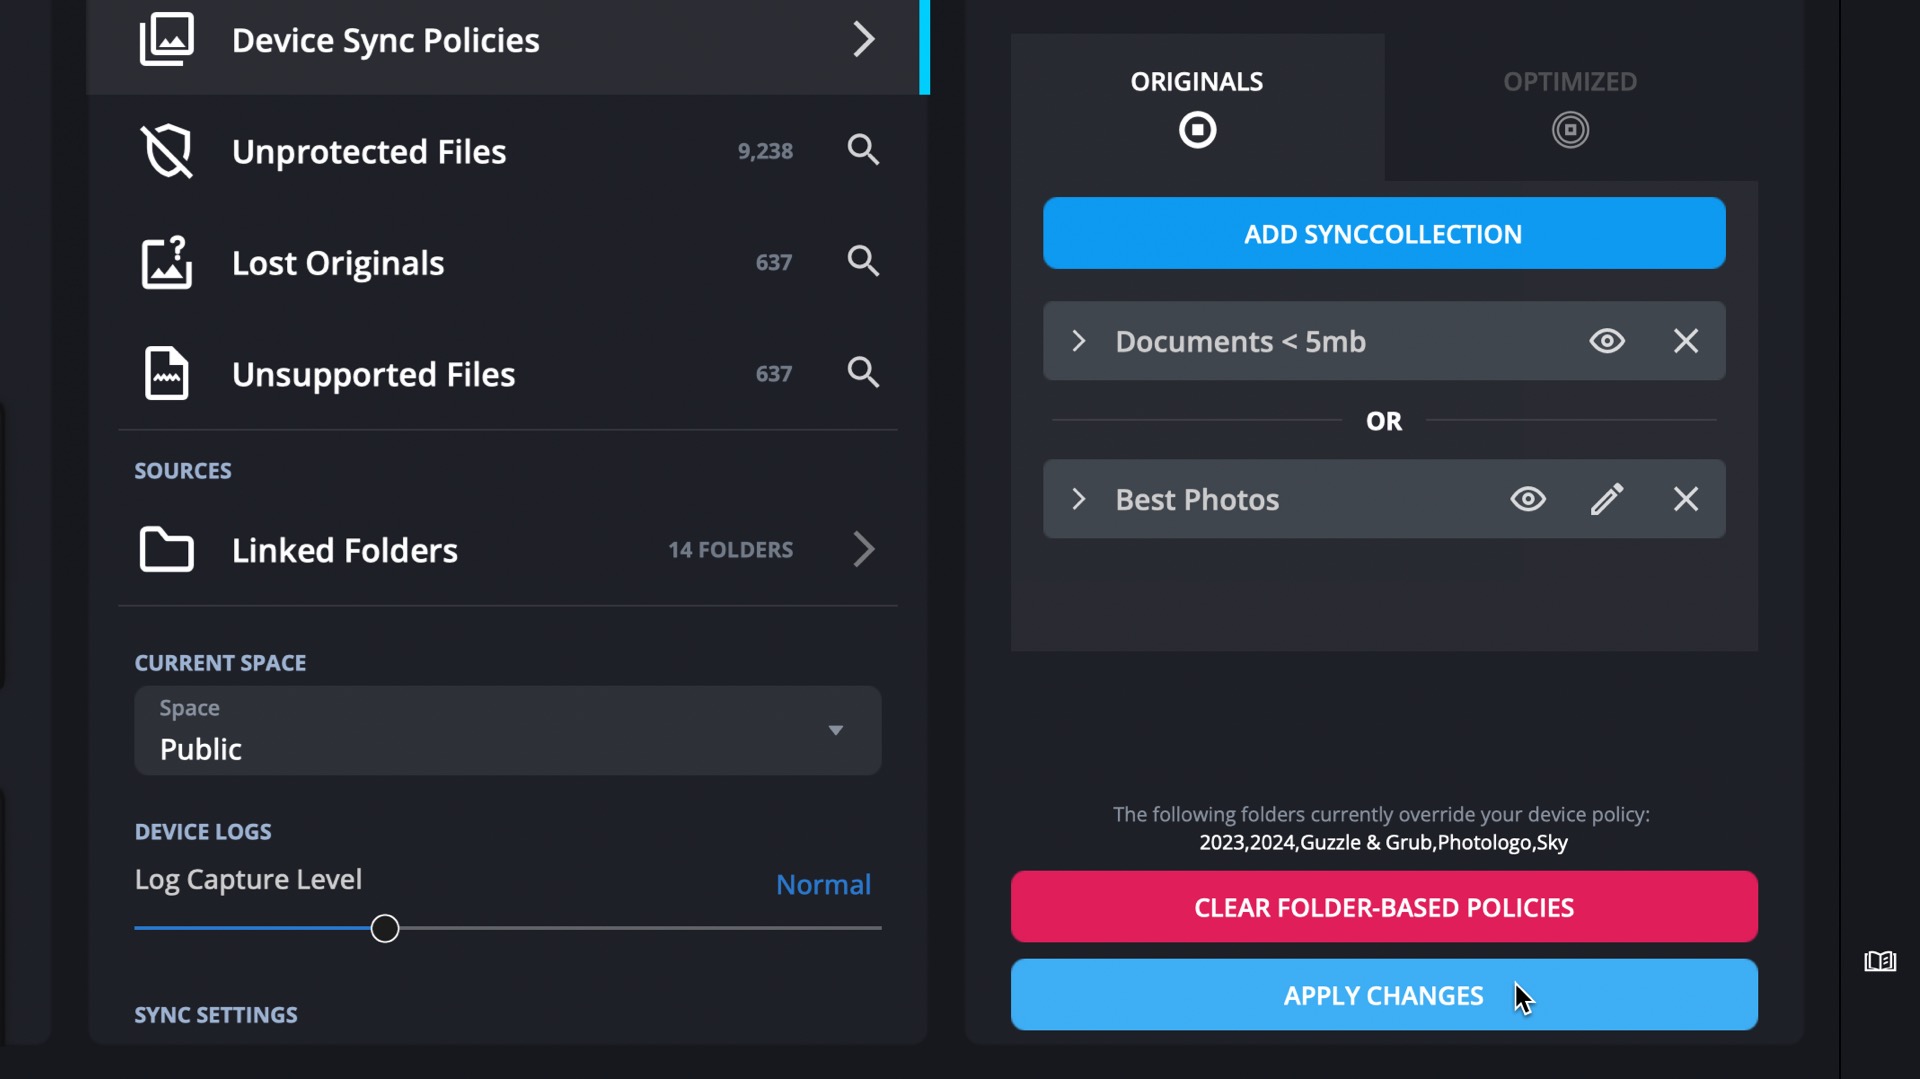
- You can create multiple SyncCollections per device. Each one adds to the list of media to sync – SyncCollections are additive.
- Once you’ve finished customizing, click Apply Changes to begin syncing based on your new policy.
- If your custom SyncCollection reduces the amount of storage needed (e.g., switching from Originals to Optimized), Mylio Photos will prompt you to free up space:
- Click Yes, Clear Cache to remove unneeded files.
- Click No, Keep Files to retain them.
- Closing the dialog acts the same as selecting No, Keep Files.
- Example 1: Keep All 5-Star Family Photos on Your Phone as Optimized-Quality Files
-
This setup ensures that your phone stores optimized-quality versions of your best family photos for easy browsing and sharing.
- Click the Dashboard icon
![]() in the left sidebar, then select Devices.
in the left sidebar, then select Devices. - Click the Device Card for your phone.
- In the Device Settings panel, click Device Sync Policies.
![]()
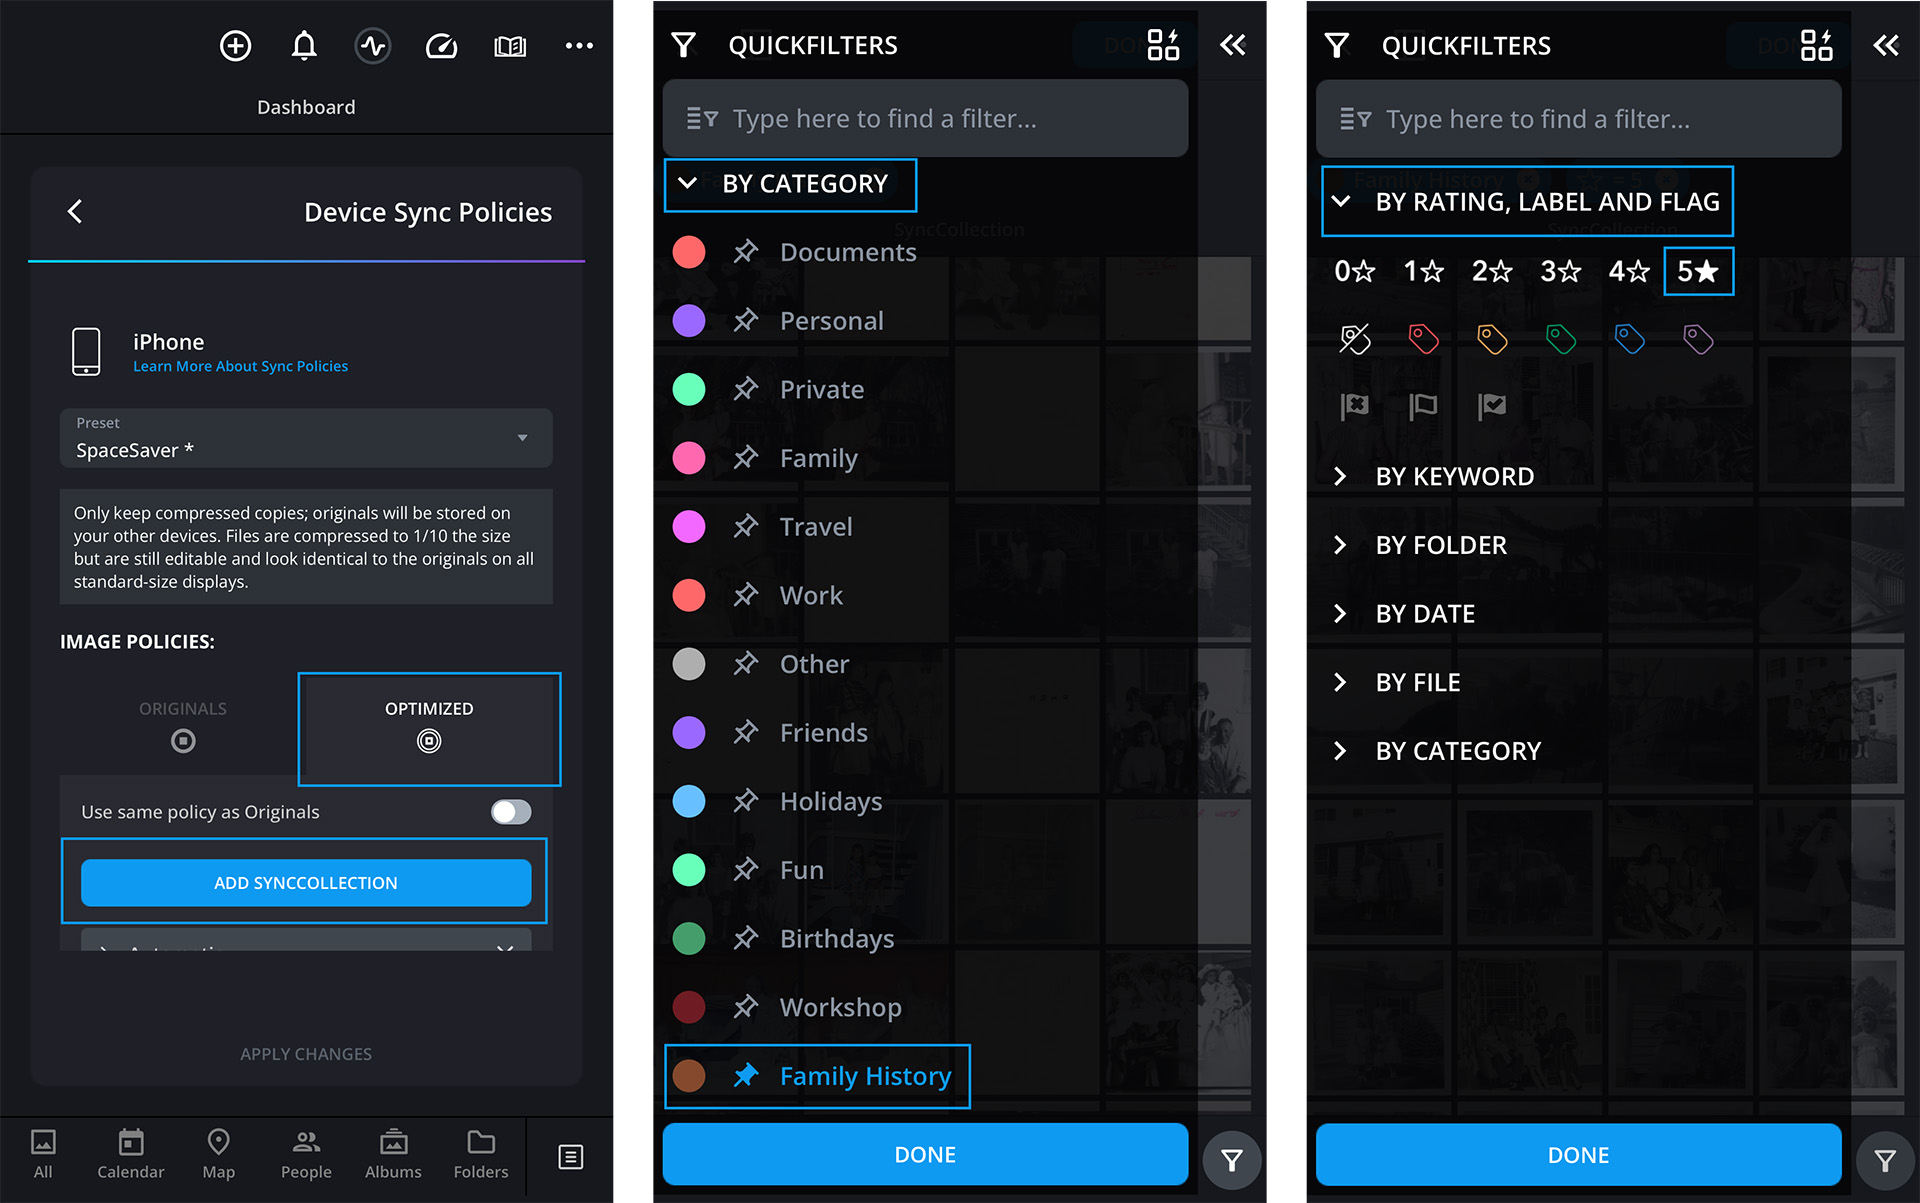
- Choose a sync policy preset as a starting point. In this example, select SpaceSaver.
- In the Image Policies section, click the*Optimized* tab, then click Add SyncCollection.
- In the SyncCollection builder, use QuickFilters to define the media you want to include.
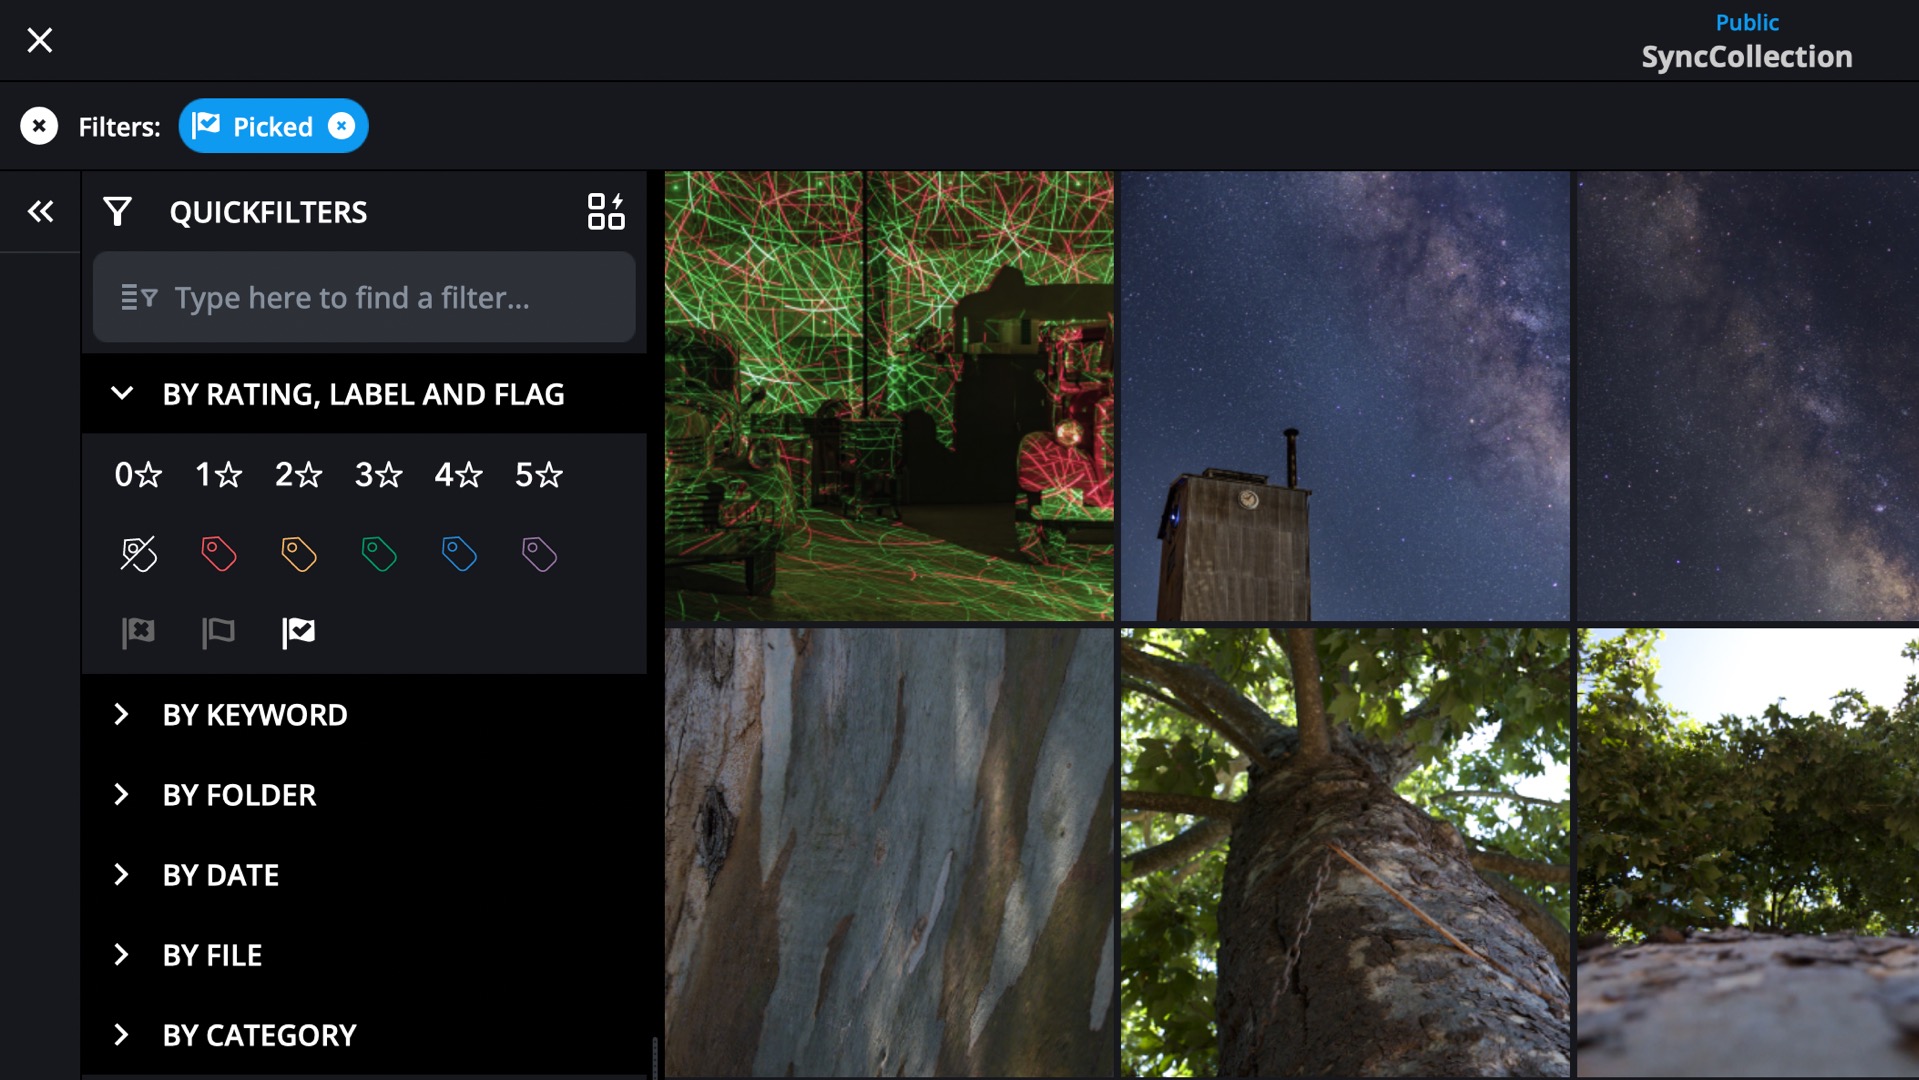
- Pin By Rating, Label, and Flag > 5-Star
- Pin By Category > Family and Family History.
![]()
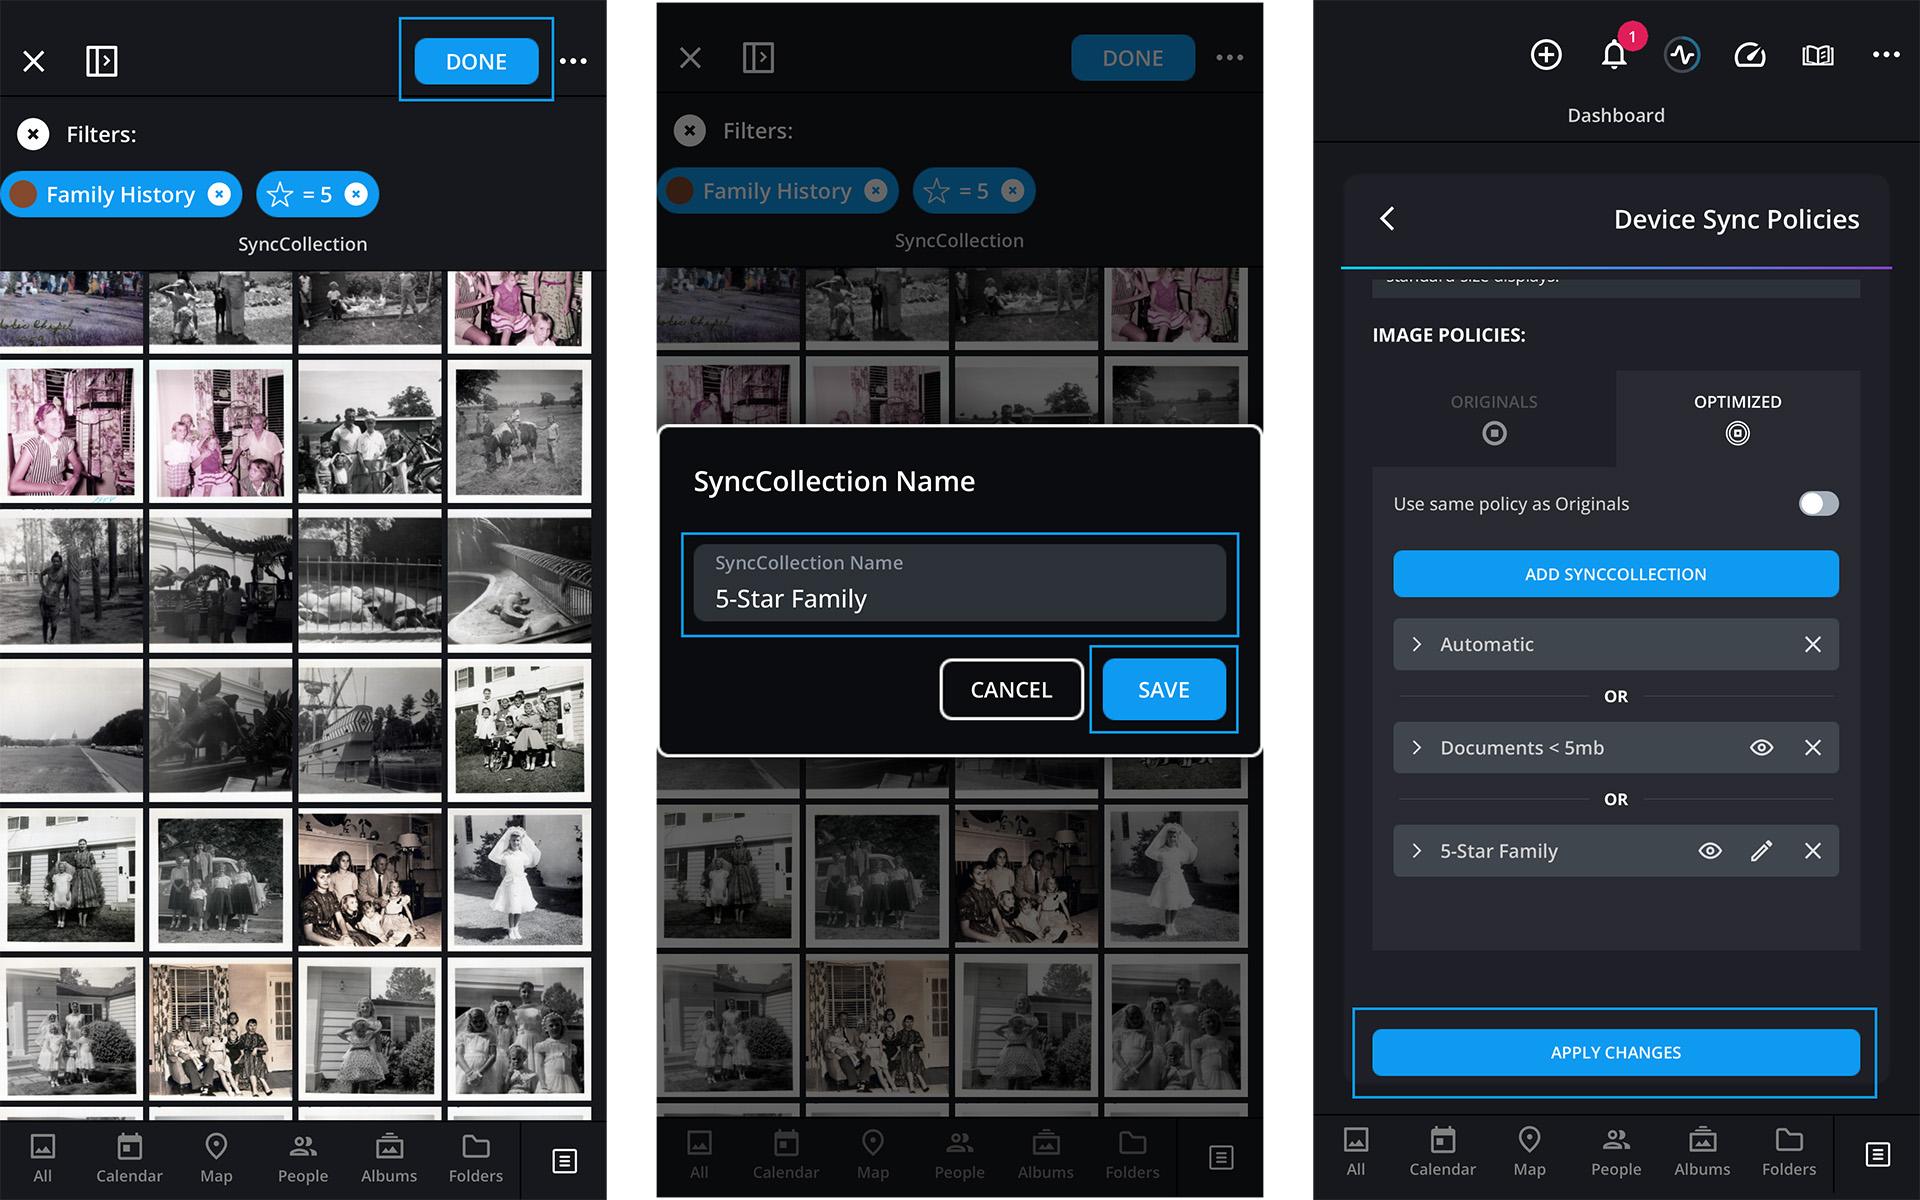
- Click Done, then give your SyncCollection a name.
- For this example, use*5-Star Family*, then click Save.
![]()
- Once you’ve finished customizing, click Apply Changes to begin syncing based on your SyncCollection.
- Click the Dashboard icon
- Example 2: Back Up 4-Star, 5-Star, and Pick-Flagged Media at Original Quality on Mylio Drive+
-
This setup ensures that your Mylio Drive+ device stores original-quality versions of your top-rated and flagged media for secure backup.
- Click the Dashboard icon
![]() in the left sidebar, then select Devices.
in the left sidebar, then select Devices. - Click the Device Card for your Mylio Drive+.
- In the Device Settings panel, click Device Sync Policies.
- Choose a sync policy preset as a starting point. In this example, select Catalog Only.
- In the Image Policies section, click the*Originals* tab, then click Add SyncCollection.
- In the SyncCollection builder, use QuickFilters to define the media you want to include.
- Pin By Rating, Label, and Flag > 4 and 5-Star
![]()
- Click Done, give your SyncCollectiona name, (e.g., 4/5-Star) then click Save.
- Click Add SyncCollection again to define a second group.
- In the SyncCollection builder, pin By Rating, Label, and Flag > Pick Flag
![]()
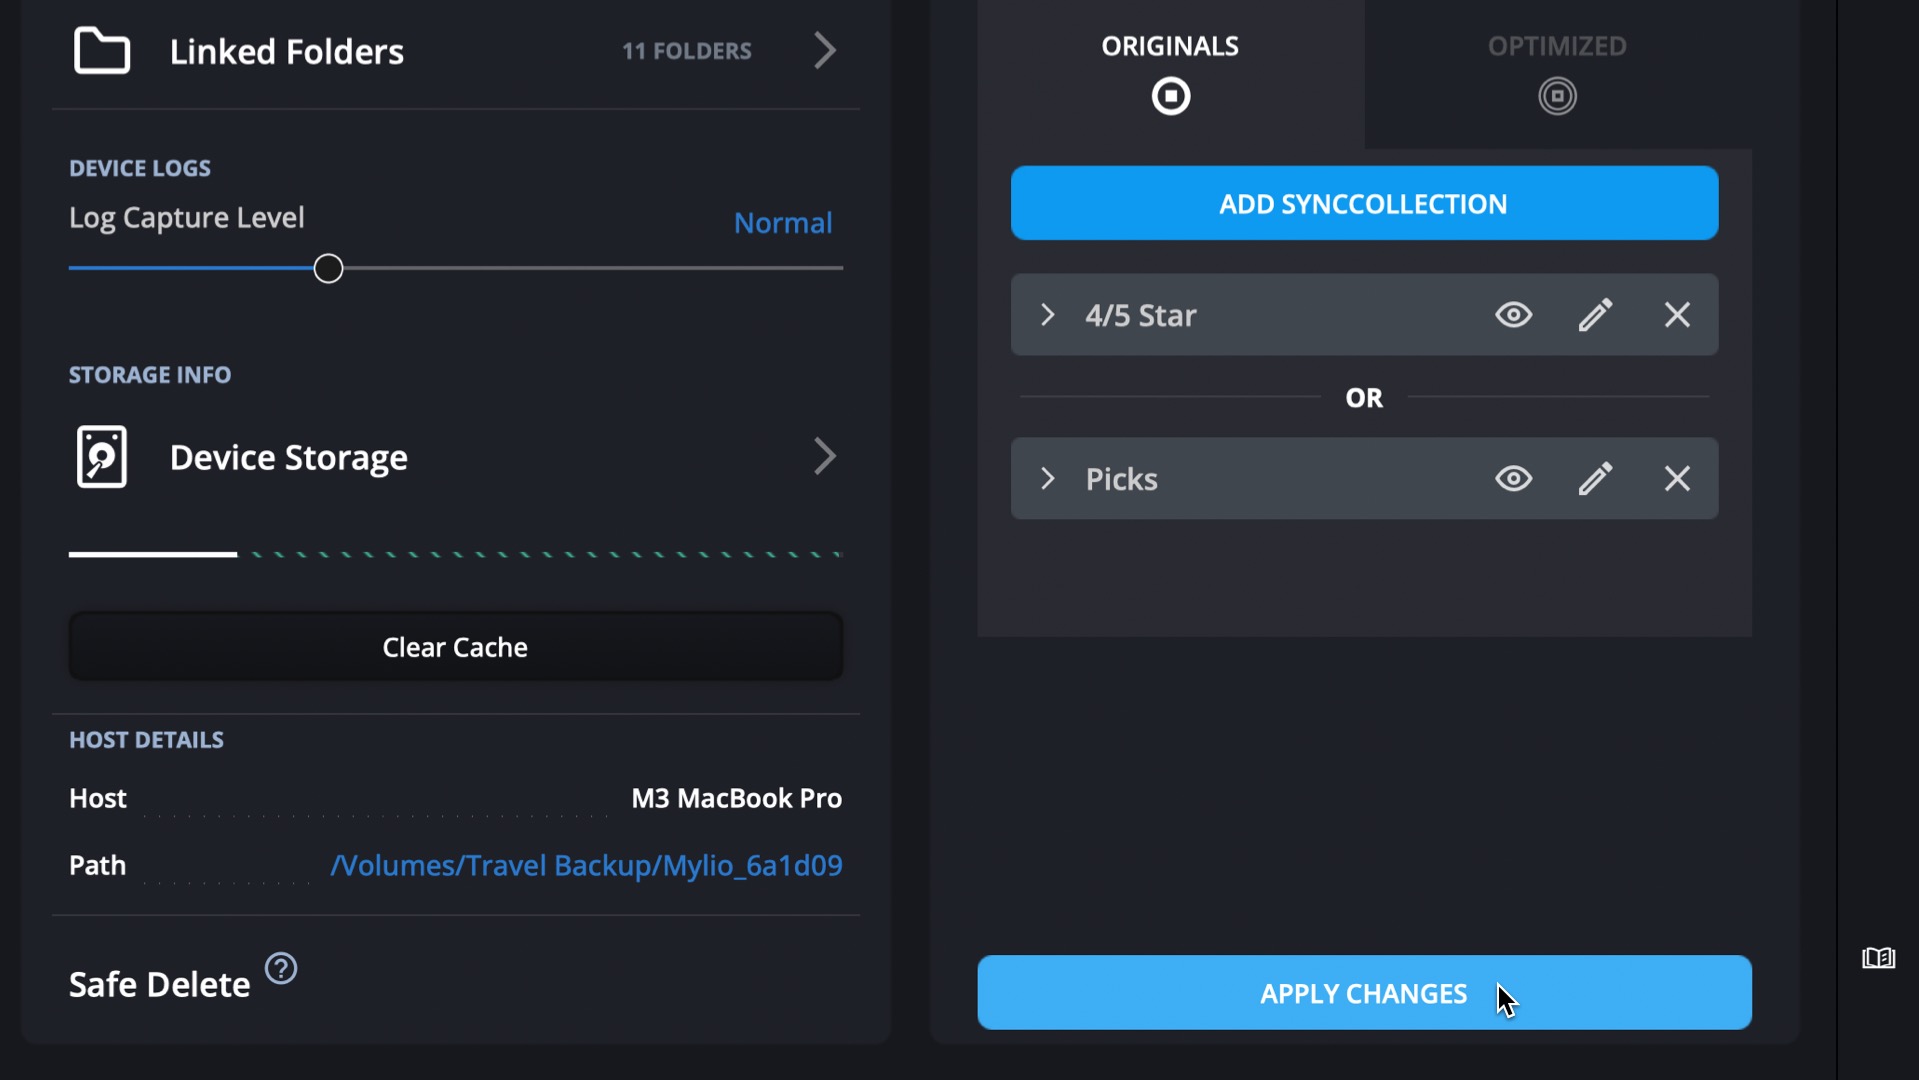
- Click Done, name this SyncCollection Picks, then click Save.
![]()
- Once you’ve finished customizing, click Apply Changes to begin syncing based on your SyncCollections.
- Click the Dashboard icon
- Example 3: Keep RAW Files from the Last 90 Days on Your Laptop for Offline Editing
-
This setup ensures that your laptop stores original-quality raw files from recent shoots, making them available for editing even without an internet connection.
- Click the Dashboard icon
![]() in the left sidebar, then select Devices.
in the left sidebar, then select Devices. - Click the Device Card for your laptop.
- In the Device Settings panel, click Device Sync Policies.
- Choose a sync policy preset as a starting point. In this example, select SpaceSaver.
- In the Image Policies section, click the*Originals* tab, then click Add SyncCollection.
- In the SyncCollection builder, use QuickFilters to define the media you want to include.
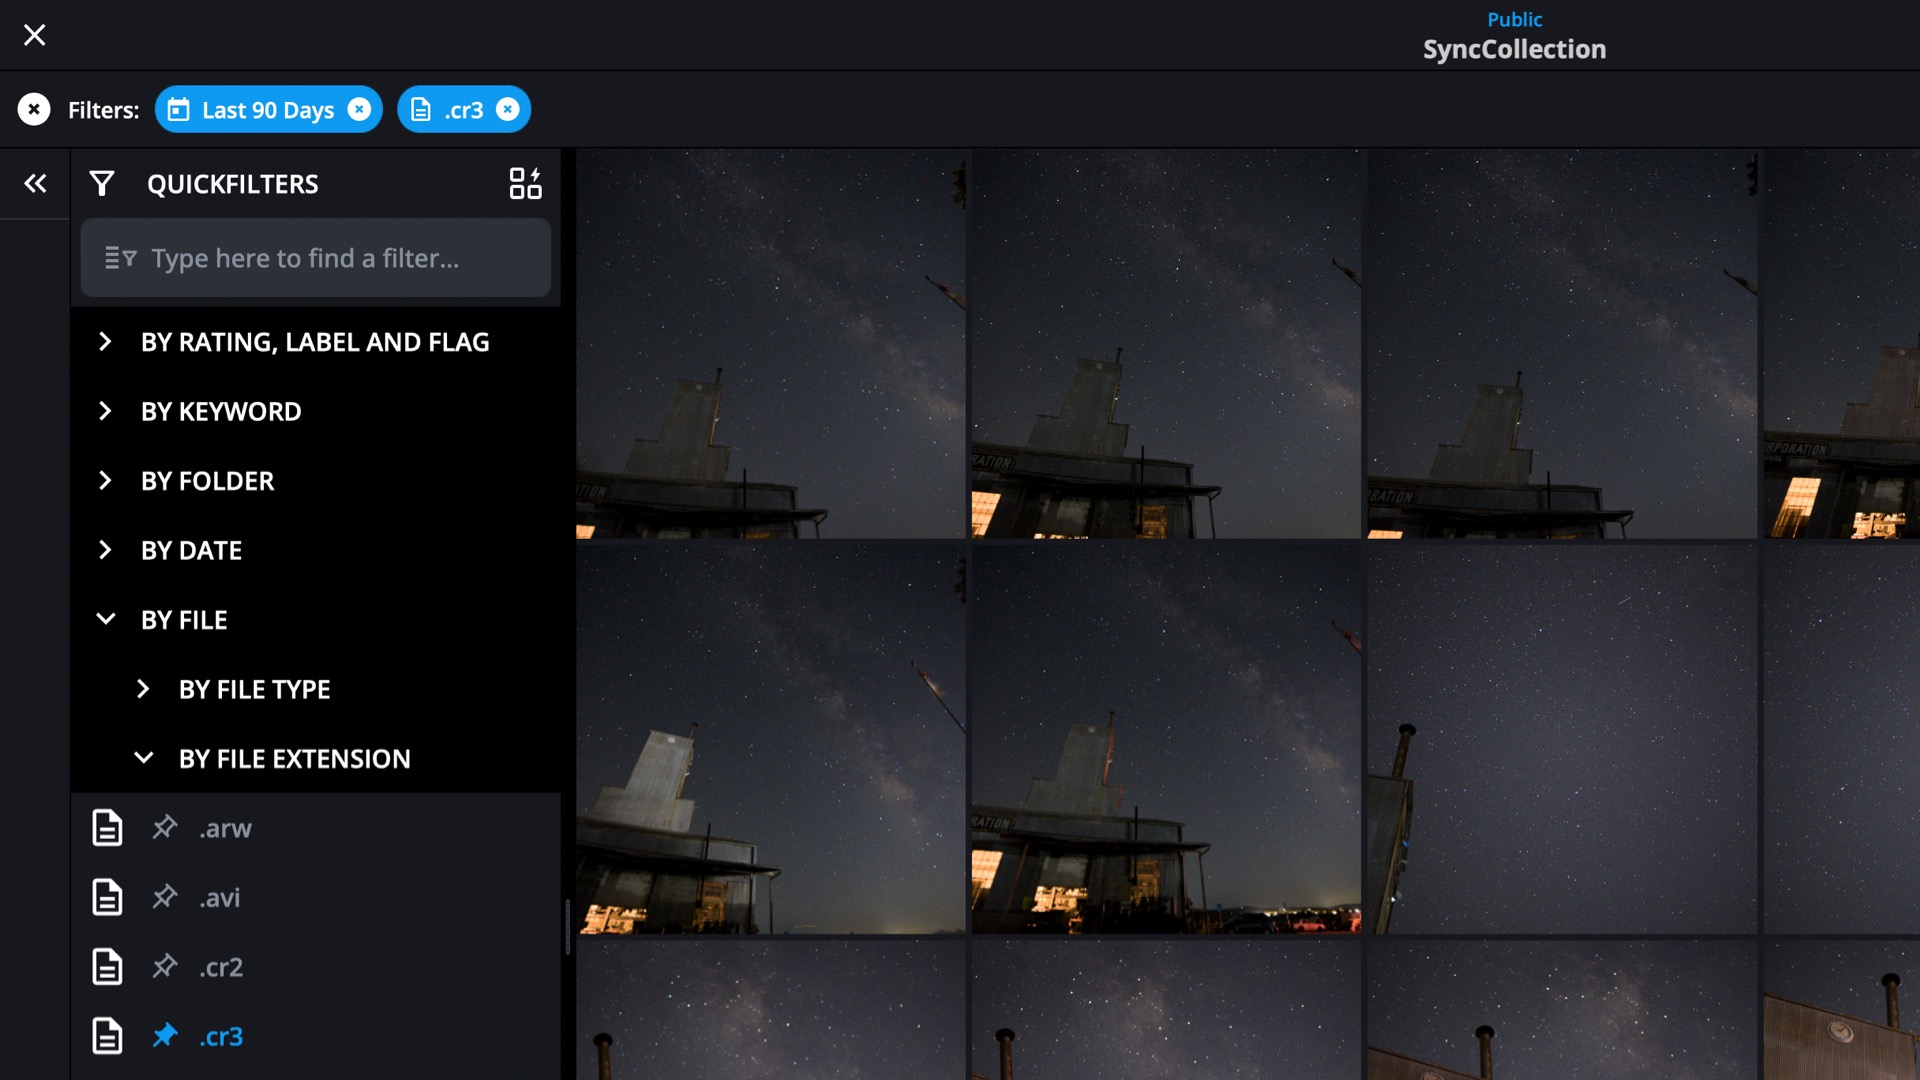
- Pin By Date > By Date Range > Last 90 Days
- Pin By File > By File Extension > raw format. In this example, we’ll select .CR3.
![]()
- Click Done, name this SyncCollection Last 3 Months CR3, then click Save.
![]()
- Once you’ve finished customizing, click Apply Changes to begin syncing based on your SyncCollections.
- Click the Dashboard icon

View, Modify, or Delete a SyncCollection
SyncCollections can be easily adjusted or removed if no longer needed.
- Click the Dashboard icon
![]() in the left sidebar, then choose Devices.
in the left sidebar, then choose Devices. - Select the device card for the device you wish to manage, then click Device Sync Policies
- Scroll down to view any applied SyncCollections.
- Click the disclosure arrow
![]() next to the SyncCollection name to view the QuickFilters used.
next to the SyncCollection name to view the QuickFilters used. - Click the eye icon
![]() to view the media contained in the SyncCollection.
to view the media contained in the SyncCollection. - Click the pencil icon
![]() to edit the SyncCollection.
to edit the SyncCollection. - Click the X icon
![]() to delete the SyncCollection.
to delete the SyncCollection.
- Click the disclosure arrow

Save a Custom Sync Policy Preset
Once you’ve created a group of SyncCollections, you may want to save it for use with other devices.
- Click the Dashboard icon
![]() in the left sidebar, then choose Devices.
in the left sidebar, then choose Devices. - Select the device card for the device you wish to manage, then click Device Sync Policies
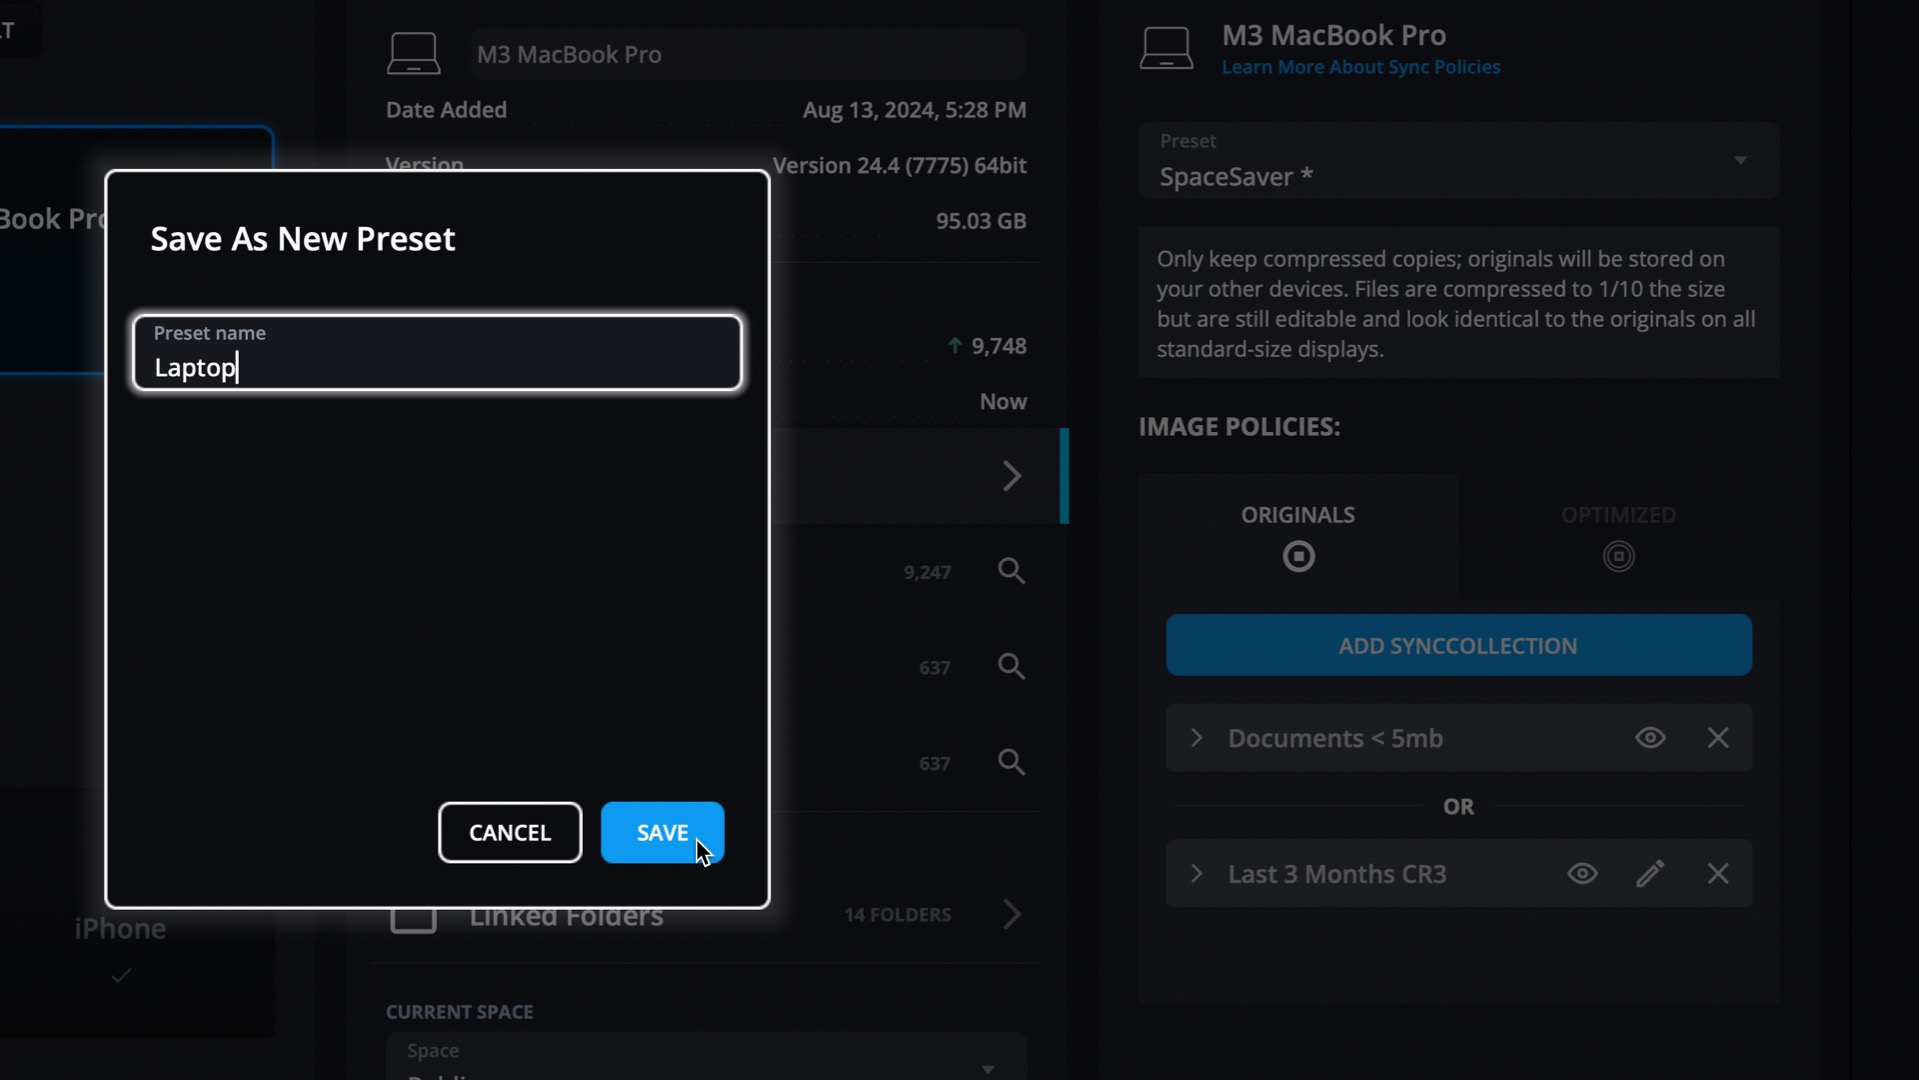
- Click the Preset dropdown menu, then choose Save as New Preset.
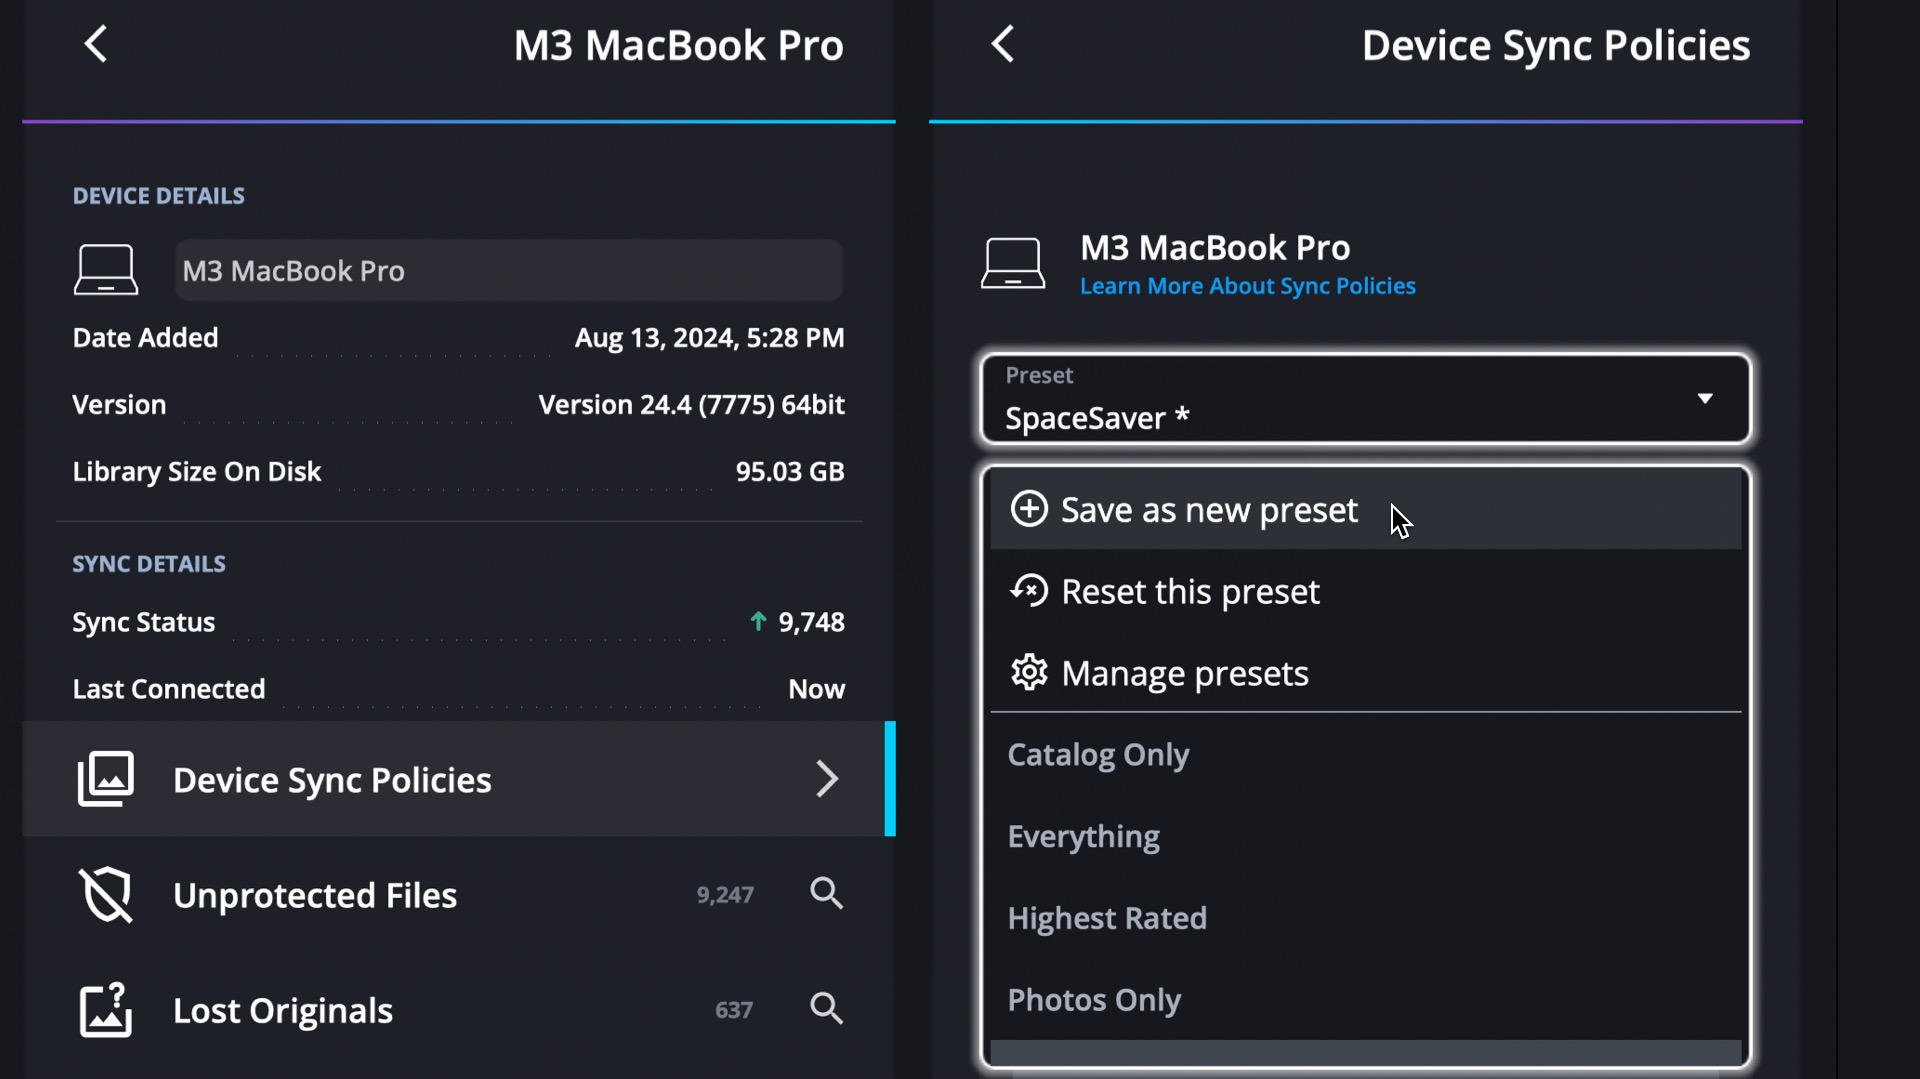
- Enter a name for your customer device present, then click Save.
- Select a different device, click Device Sync Policies, then choose your custom preset from the preset list.
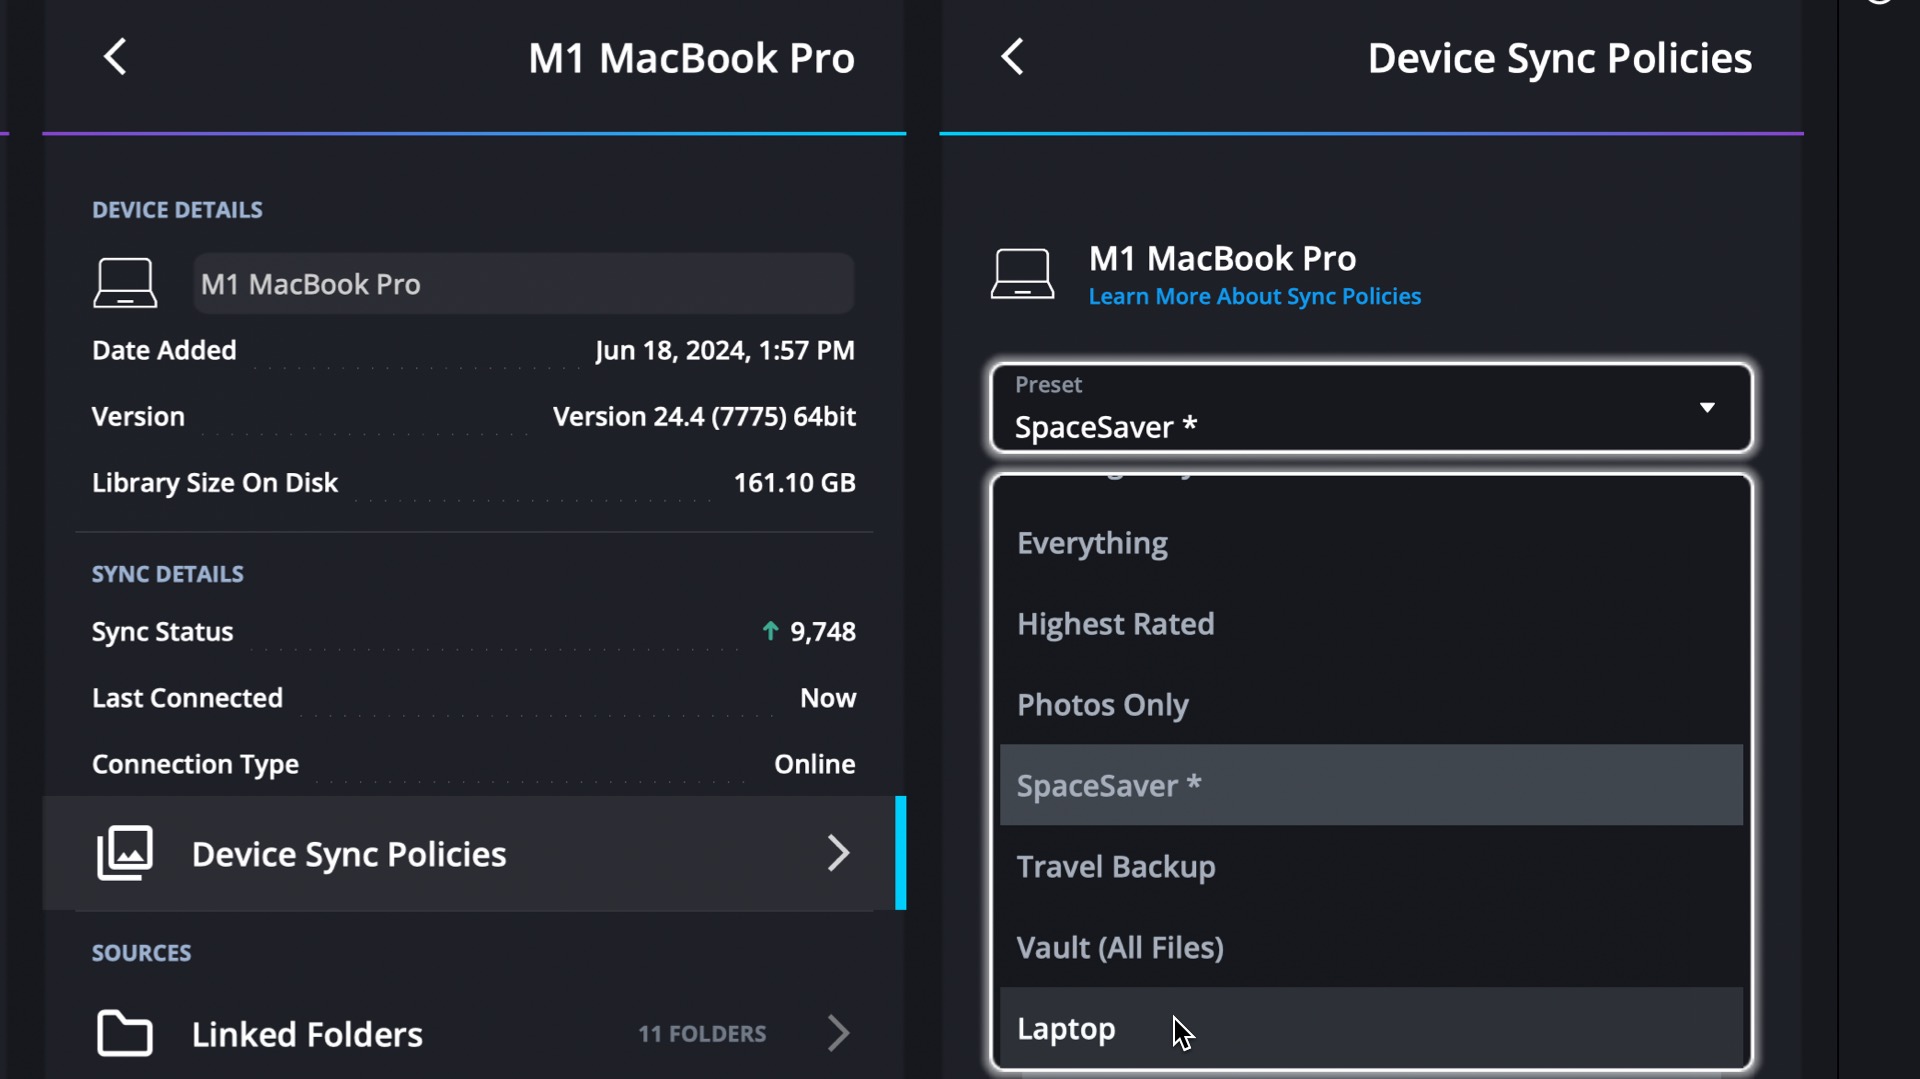
- After selecting a preset, click Apply Changes at the bottom of the panel. Mylio Photos will begin syncing the selected device based on the new preset.
- If your new sync policy preset reduces the amount of storage used (for example, switching from SpaceSaver to Catalog Only), Mylio Photos will prompt you to clear cached files and free up space.
- Click Yes, Clear Cache to immediately remove unused files.
- Click No, Keep Files to retain cached files.
- Closing the dialog has the same effect as selecting No, Keep Files.
Manage Custom Sync Policy Presets
If you’ve created a custom sync policy preset you no longer need, you can easily delete it.
- Click the Dashboard icon
![]() in the left sidebar, then choose Devices.
in the left sidebar, then choose Devices. - Select the device card for the device you wish to manage, then click Device Sync Policies
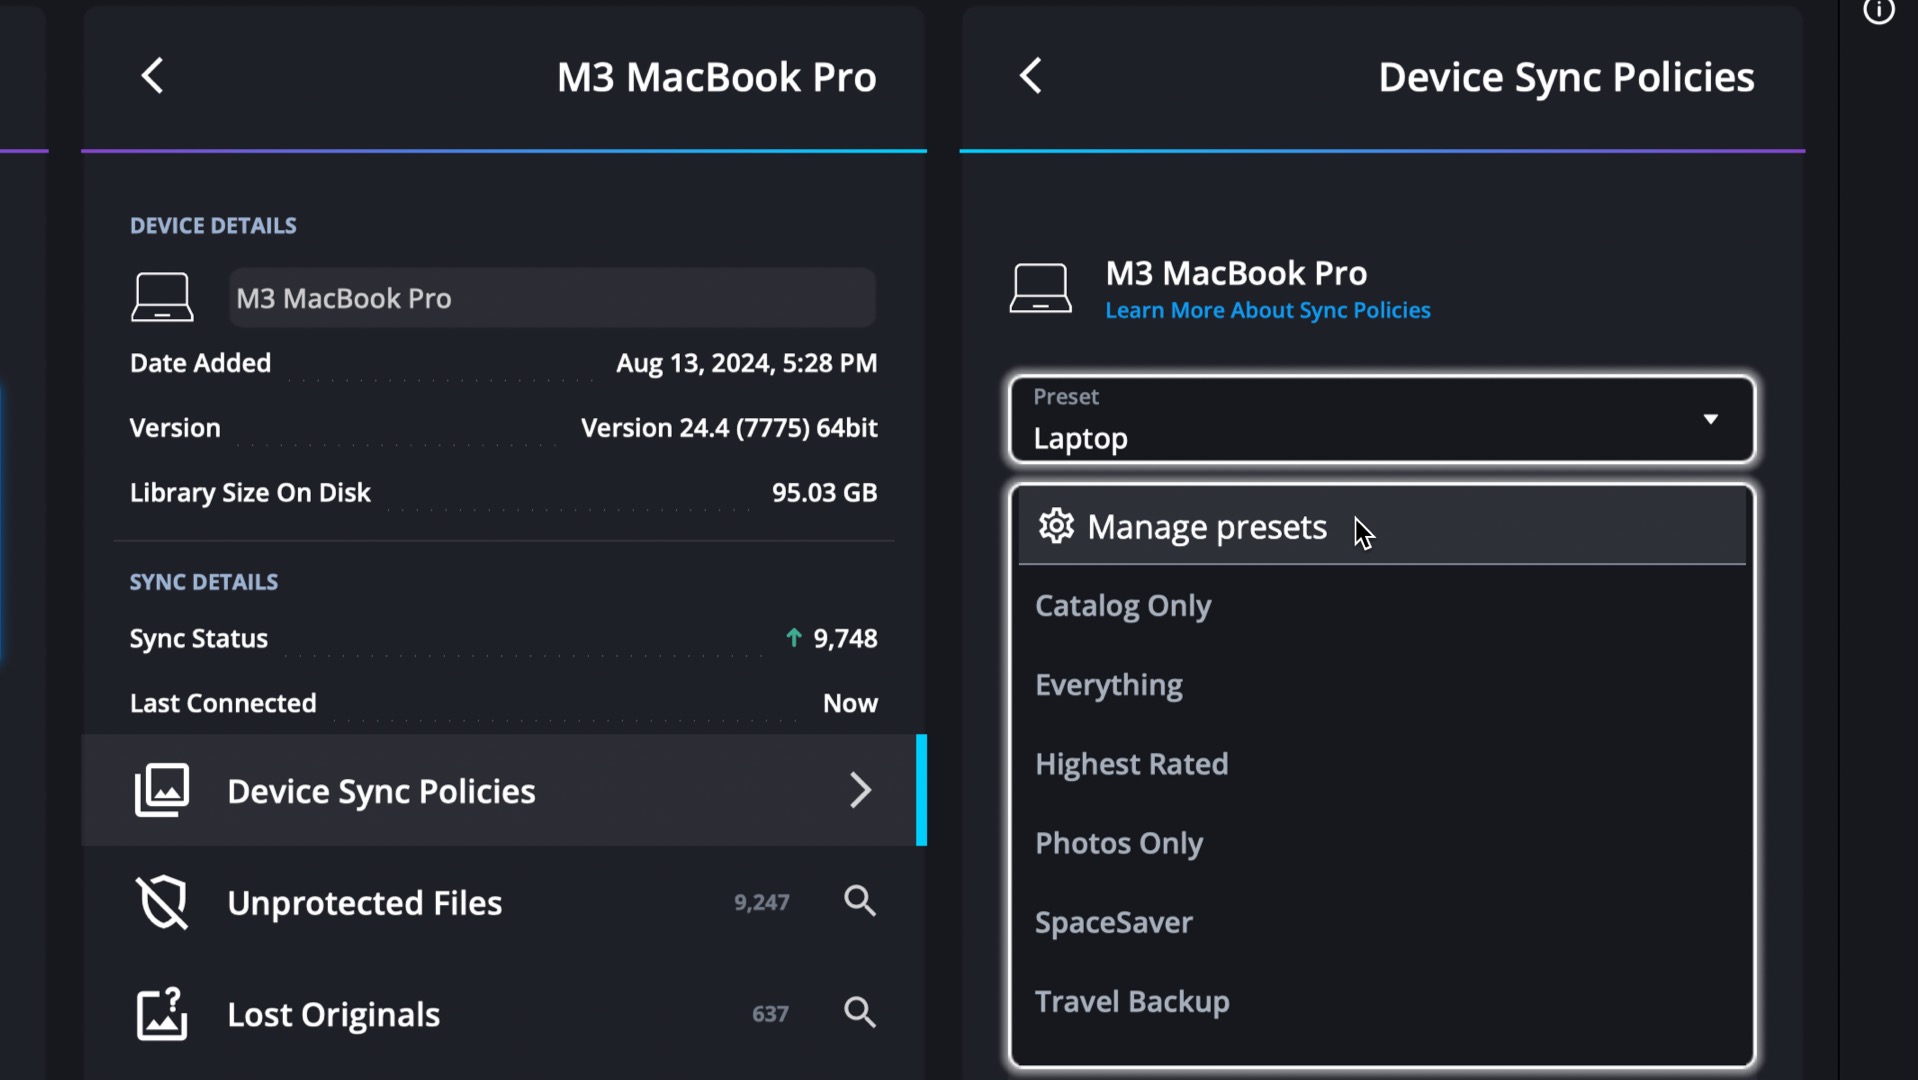
- Click the Preset dropdown menu, then choose Manage Presets.
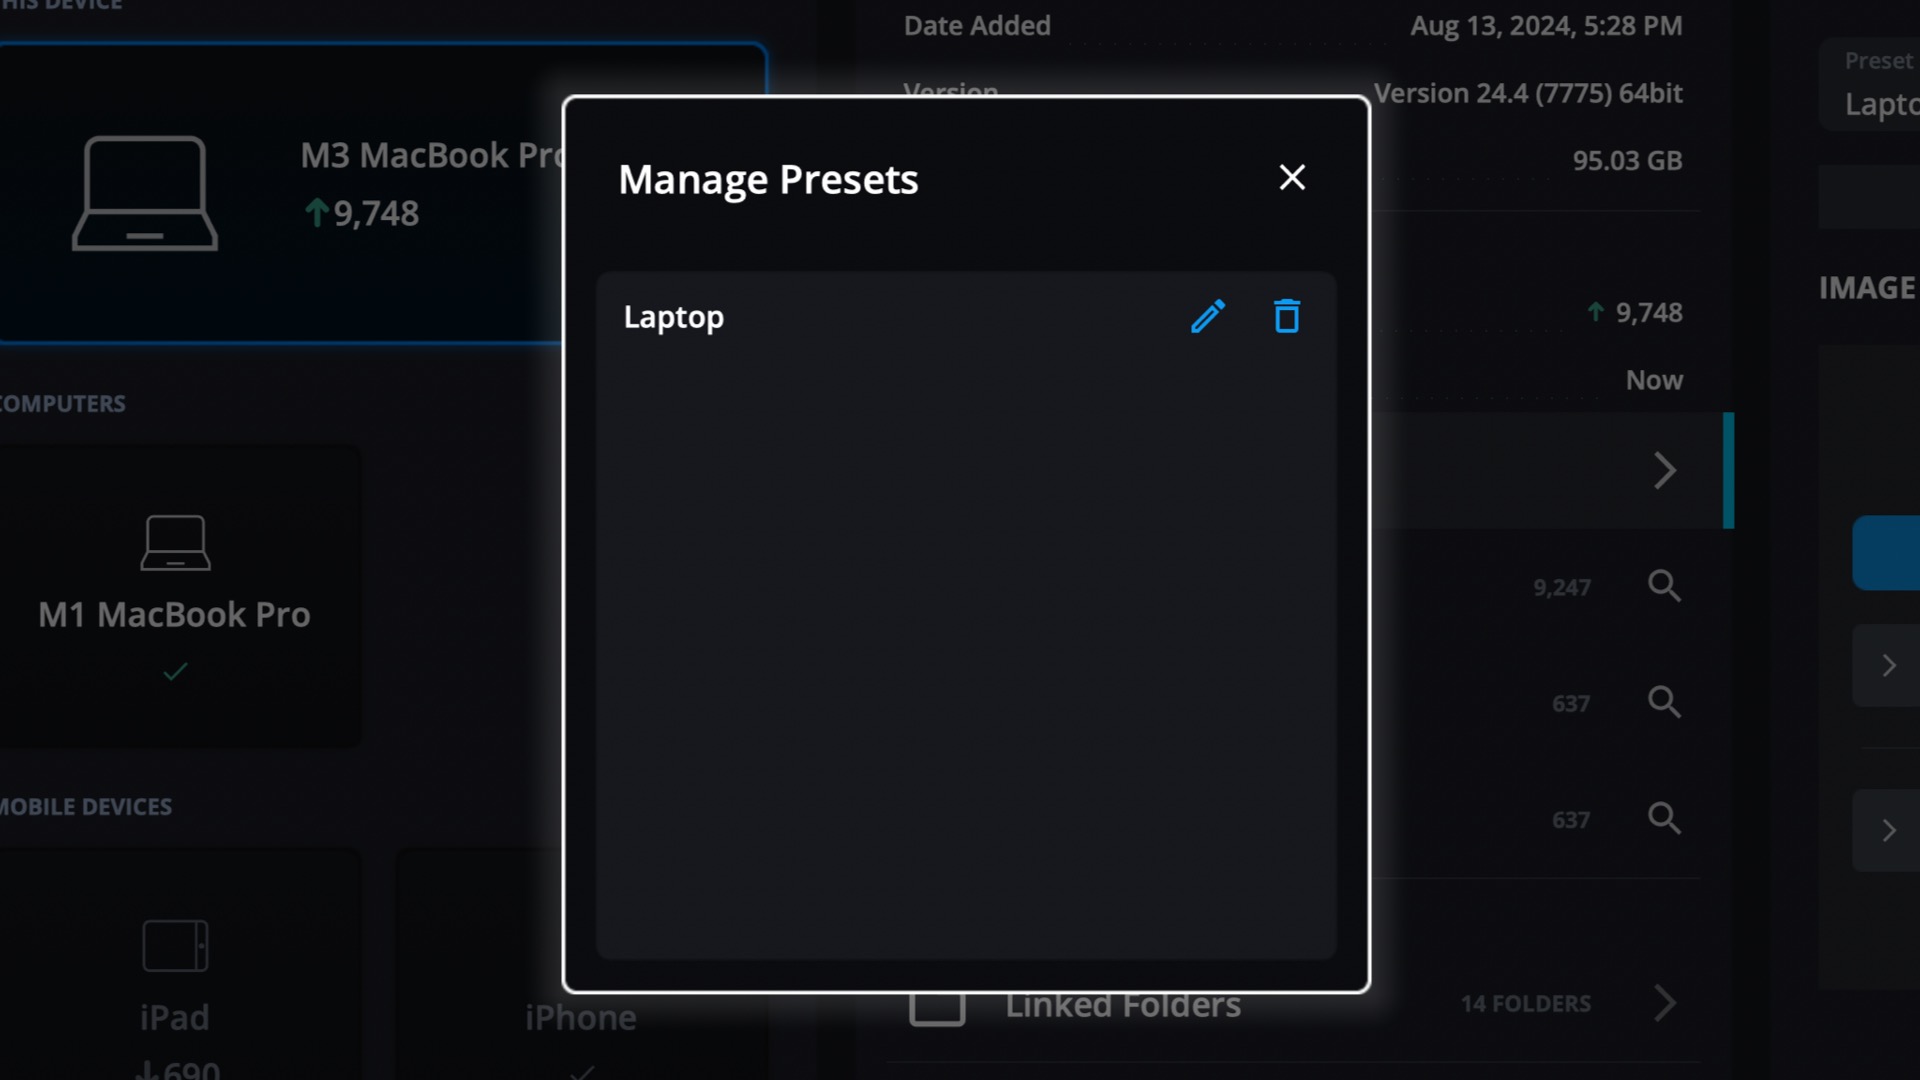
- Click the pencil icon
![]() to rename a preset.
to rename a preset. - Click the trashcan icon
![]() to delete a preset.
to delete a preset.
Post your comment on this topic.